
A Simple Guide to Vibe Coding for Beginners
Now anyone can create apps without being expert programmers.


The era when building apps with code was exclusive to programmers is coming to an end.
Say hello to vibe coding, a new approach where AI takes on the heavy lifting of code generation, allowing anyone to create apps through simple prompts. By leveraging AI code editors anyone can build and deploy apps without being expert programmers. This collaborative approach also allows developers to focus on conceptual and strategic aspects, while AI handles the coding.
In this article, we’ll do vibe coding with different AI code editors to create 4 apps from scratch.
To get weekly articles like this, subscribe 👇 After subscribing, check my welcome email to download my Python, ChatGPT, and more cheat sheets :)
1. Windsurf
Windsurf is an AI-powered code editor developed by Codeium, designed to act as a co-pilot that helps you write and refine code through prompts.
You can download it using this link whether you're on Windows or macOS.

After you install and open the Windsurf Editor, I recommend you to use Cascade mode pressing CMD + L. If you go with Cascade mode, you’ll gain access to the built-in chat where you can interact directly with the AI. Windsurf also allows you to choose from several available AI models to best suit your project.

One useful feature of this IDE is image upload, which comes in handy when you're trying to give visual context to a project.
For this project, I crafted a detailed prompt to help ensure a higher-quality result. I also attached the following reference image:

Here’s the prompt I used. It’s a bit long, but the extra effort helps reduce the chances of bugs.
Create a complete and simple Tetris game that can be played directly in a web browser. The game should be visually appealing, colorful, and extremely easy to use. Classic Tetris pieces should slowly fall from the top of the screen and be controllable using basic keyboard inputs (such as the arrow keys) — allowing the player to move them sideways, rotate them, and make them drop faster.
Whenever the player completes a full horizontal line, that line should disappear and award points. The game should gradually become more challenging as it progresses — for example, by slightly increasing the falling speed of the pieces with each new level.
Next to the main game board, there should be a clear and visually organized display showing the following information:
Current Score: increases whenever lines are cleared.
Current Level: automatically increases as the player advances.
Total Lines Cleared during the current game.
Next Piece Preview: a small window showing the next piece so the player can plan ahead.
The visual style of the game should be modern, clean, and appealing to all ages — both kids and adults. Use soft background colors (such as light blues, purples, or grays) and bright, vivid colors for the pieces. Make sure all text is large, clear, and easy to read.
When the game ends — meaning there’s no more room for new pieces — a simple “Game Over” message should appear clearly on the screen, along with a visible button to restart the game immediately.
The entire experience should run smoothly on any modern web browser and be fully responsive — working well on both large and medium-sized screens (desktops and tablets) — to ensure a smooth, simple, and fun gameplay experience.
Watch the video below to see how I create the Tetris app with Windsurf in a few minutes.
Let’s check out some stuff Windsurf generated for us.

What stood out the most to me is that Windsurf automatically created all the files used in the project’s setup. Running the project is very straightforward and intuitive even if you're not familiar with using a terminal.
Here’s another great feature: if there’s any piece of code you don’t fully understand, you can simply copy and paste it into the chat and ask Windsurf to break it down for you.
As you’ve seen in the video, we successfully got out Tetris game!

Overall, I was happy with the final result especially considering that most of the work was frontloaded into writing a clear, detailed prompt. While there’s always room for improvement, you can easily continue refining and expanding the project by chatting directly with Windsurf.
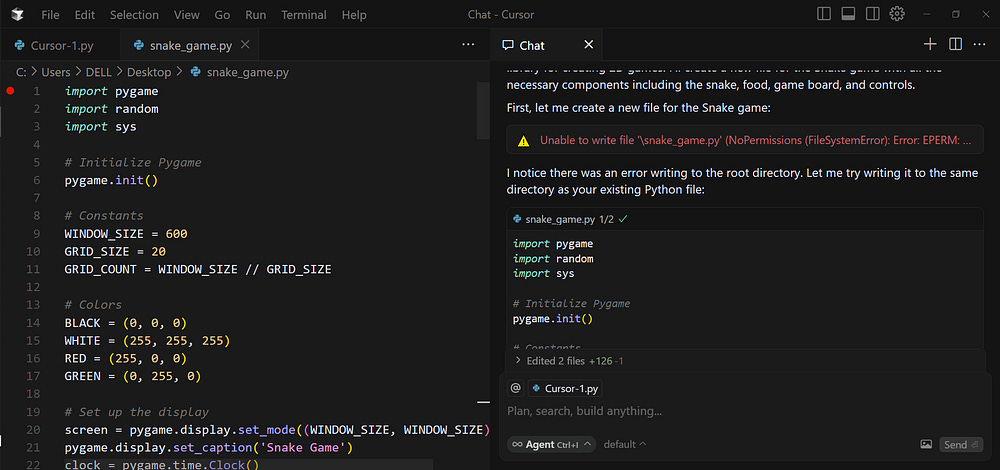
2. Cursor
Cursor is an AI-powered code editor that offers an interesting approach to coding assistance. It’s intuitive and fairly quick when it comes to generating code through its built-in chat interface.
You can easily download it using the link below.

Like other code editors, its core purpose is writing code. However, with AI integration, it gives us the possibility to obtain incredible solutions even without knowing how to code.

Once Cursor is installed, getting used to the interface is pretty straightforward. You can generate code by asking questions directly, or open a side-by-side chat using the shortcut Ctrl + I. Personally, I prefer having the chat open alongside my code, as shown below.

One feature I find especially useful is the "@Add context" option. Even if you have multiple projects open, this lets you focus on one specific project at a time.
You can also choose which model to use for your project, depending on the complexity of the task. That said, most models generally deliver high-quality results.

For this example, I’m going to build a simple video game most of us have played at some point: Snake.
To start, just open a chat and enter a prompt.
We want to create a video game snake
In this case, I used a very straightforward prompt without giving much details. With this approach, the chances to get the result you had in mind are lower. Overall, I recommend you to elaborate more when writing your prompts as I did in the first project.
Here’s the result I got:
On the chat panel, you'll see the full code being generated along with explanations. If you're not familiar with a specific part of the code, you can simply ask follow-up questions right there in the same chat.

I was really impressed with what Cursor came up with for this first prototype. While the graphics were basic, the core functionality worked perfectly. In this case, I went with a classic game, but what’s great is that you can keep customizing the project by giving it more specific instructions. I recommend keeping your prompts as clear and detailed as possible to avoid any issues.
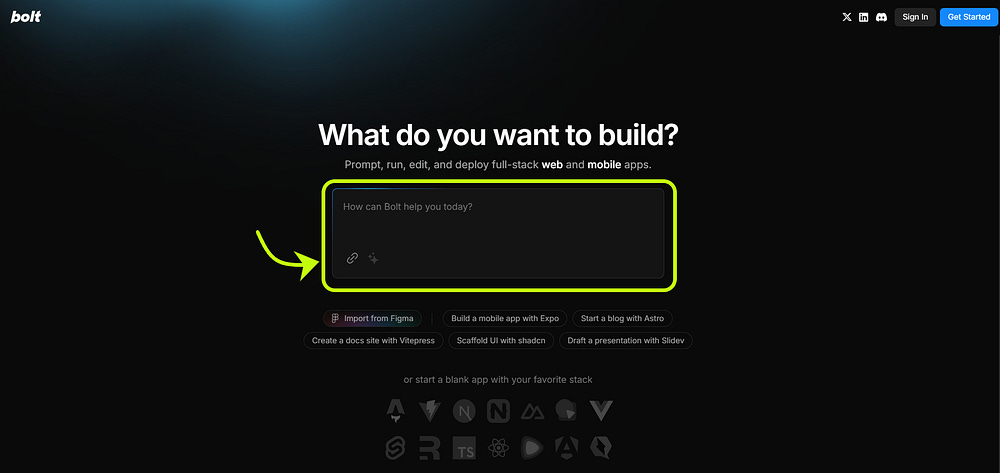
3. Lovable
Lovable is an AI-powered app builder that lets you create full web applications without writing any code. It handles both the visual interface and the backend elements—like the database and other components—for you.
To get started, just head over to their website using the link below. From there, you'll simply enter a prompt into the chat interface:

Once again, the more detailed your project description, the better the results will be. The goal is to clearly communicate exactly what you want so the AI can deliver accordingly.
For this project, I decided to create a website that provides information about movies. Here’s the prompt I used:
Users should be able to log in and save their own movie lists.
Movies should be categorized by genre, release year, or user-defined categories
Each movie should have a poster image along with additional details like title, synopsis, director, cast, and user ratings
I want the design to be modern, sleek, and with pops of color to enhance visual engagement.
And this is what I got:

On the left side, Lovable provided a breakdown and explanation of everything it generated for the website. On the right side, you can see a live preview of the web design. It also shows you the source code used to build the site, which is displayed on the left panel.

Next, let’s connect the website to a database that will store the information of users who register. To do this, go to the top right corner and click on Supabase. You can either create a new account or sign in with GitHub.

Once you’ve created a new project in Supabase and given it the necessary permissions, your website will be linked to a working database.
Now, we’ll ask Lovable through the chat to help us set up user access settings. Just type in a prompt like this:
Set up secure user authentication with sign-up, login, password recovery, and optional third-party integration
Lovable will generate the necessary SQL code. Don’t worry—there’s no need to write or edit it manually. Just click “Apply Changes” to have it implemented automatically.

After that, you can test it out by adding an email address and checking to see if it appears in your database.


Overall, I’m impressed with Lovable’s functionality. Not only does it build out the visual side of your site, but it also lets you connect a backend database—all without writing a single line of code. Everything is done through detailed prompts, making it a powerful tool for non-developers and developers alike.
4. Bolt
Bolt is another tool that lets you create websites or mobile apps simply by providing prompts. One standout feature is the ability to upload files to help supplement or support the project you're building.
For this project, I decided to create a simple webpage with a countdown timer to a specific date of my choosing.
Here’s the prompt I used:
- Create a simple web page that shows a countdown to a specific date I choose (for example, my birthday). The design should be clean, minimal, and elegant, with a white background and dark text.
- At the top of the page, include a large, clear title that shows what the countdown is for.
- Below the title, I want to clearly see how much time is left until that special day — showing the number of days, hours, minutes, and seconds remaining. Each time unit should be displayed in a simple, well-organized box with a clean layout.
- When the countdown reaches zero, the page should automatically display a nice message like “The day has arrived!”
- The entire layout should be fully responsive, so it looks great on phones, tablets, and computers. It should also be easy to update the event title and date later on, so I can reuse the page for different occasions.
Let’s take a look at the results:
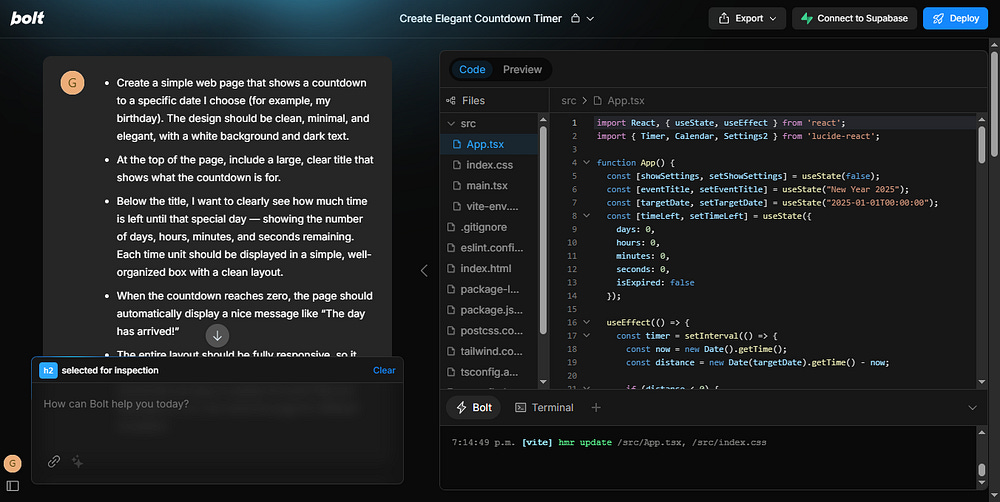
Unlike other AI assistants, Bolt generates and shares all of the individual files used to build the website. That’s a big advantage—it makes it much easier to review, update, or hand off the project later on if needed.
It also reinforced how important it is to provide a clear and detailed prompt. The more specific you are, the better the outcome.

Of course, not everything always comes out perfectly on the first try. If you need to make changes as you go or fix a bug, all you need to do is enter another prompt. For example, in my original prompt, I mentioned that the countdown date should be customizable. However, the generated site didn’t include a clear way to adjust the date. So I followed up with an additional prompt in the chat:
Where can I enter the date? When I look at the preview, there’s already a date set, which I didn’t choose.
After that, I was able to clearly see the changes and the code adjustments I needed.

Final Thoughts
Overall, I think this “Vibe Coding” trend is a good opportunity for those new to programming. Having AI on our side opens up a lot of possibilities for rapid development. I believe the design and user experience of AI-generated projects is one area that will continue to improve over time.
It’s important to take the time to craft a detailed prompt and include examples if possible. Doing so will save you time down the line by reducing the chances of bugs or needing to troubleshoot errors during the development process.
I was looking for an analysis of Replit.
Vibe coding democratizes access to development for people who do not have coding background. While this might sound appealing, it's also a major security risk. These folks do not have any knowledge of SDL practices and may inadvertently publish insecure code.