
Your Mac Terminal Doesn't Have to Look Ugly. Upgrade It In a Few Minutes
Here's my guide to transform your Mac terminal, so that you become more productive as a programmer.


Before we start today’s article, I have a recommendation for anyone into Java and system design: Javin’s Substack, Javarevisited.
Javin has a Substack called Javarevisited where he helps thousands of tech enthusiasts, developers, and software professionals to learn Java, Programming, and System Design and prepare for tech interviews. He has been writing blogs since 2010 and published Grokking the Java Interview book and courses on Udemy.
If you're into Java or System Design, check out his Substack!
The Mac terminal is quite a useful tool for programmers, yet it doesn’t have a friendly interface.
If you’re a programmer, chances are you spend a lot of time using the terminal. That’s why you should invest some minutes to upgrade it in order to become more productive when working with it.
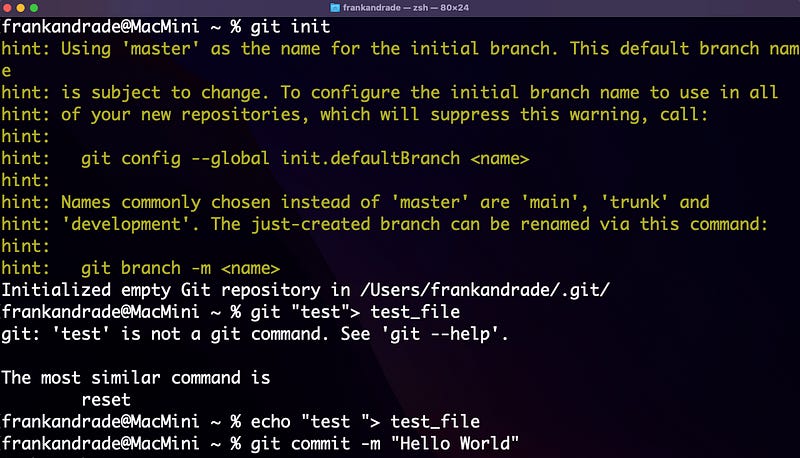
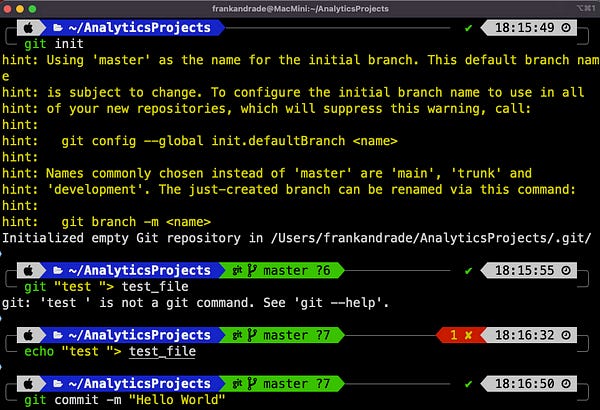
Here’s how to upgrade your Mac terminal so it looks less like the first image and more like the second image below.
Install Homebrew
In this guide, we’ll use the brew command a lot, so the first thing to do is install Homebrew. Open up a terminal and paste the command below.
/bin/bash -c "$(curl -fsSL https://raw.githubusercontent.com/Homebrew/install/HEAD/install.sh)"Install iTerm2
Then we’re going to install iTerm 2. That’s a replacement for Terminal and has features you wouldn’t find on the default terminal. iTerm2 works on Macs with macOS 10.14 or newer. To install it run the command below in the terminal.
brew install --cask iterm2Once you get the message “iterm2 was successfully installed!” a new iTerm icon will be added (press F4 to see it in launchpad)
Open iTerm 2. From now on, we’ll work with it. Now, let’s install some extra packages.
Install Git
Git will help us easily clone themes for our terminal a bit later.
brew install gitInstall Oh-My-ZSh
Oh My Zsh is a framework that comes bundled with thousands of helpful functions, helpers, plugins, and themes that will help us transform our terminal.
sh -c "$(curl -fsSL https://raw.githubusercontent.com/ohmyzsh/ohmyzsh/master/tools/install.sh)"Install Themes
There are many themes you can install to give a different look to your terminal. One cool theme I found on the internet is PowerLevel10K
First, install PowerLevel10K theme.
git clone https://github.com/romkatv/powerlevel10k.git $ZSH_CUSTOM/themes/powerlevel10kThen set the theme in configuration. To do so, go to the home folder and open ~/.zshrc with the command below (you can use nano or vim for that).
nano ~/.zshrc
vim ~/.zshrc
Once ~/.zshrc is opened, locate the word “ZSH_THEME” and change its value to the name of the theme we installed (powerlevel10k/powerlevel10k)
ZSH_THEME=”powerlevel10k/powerlevel10k”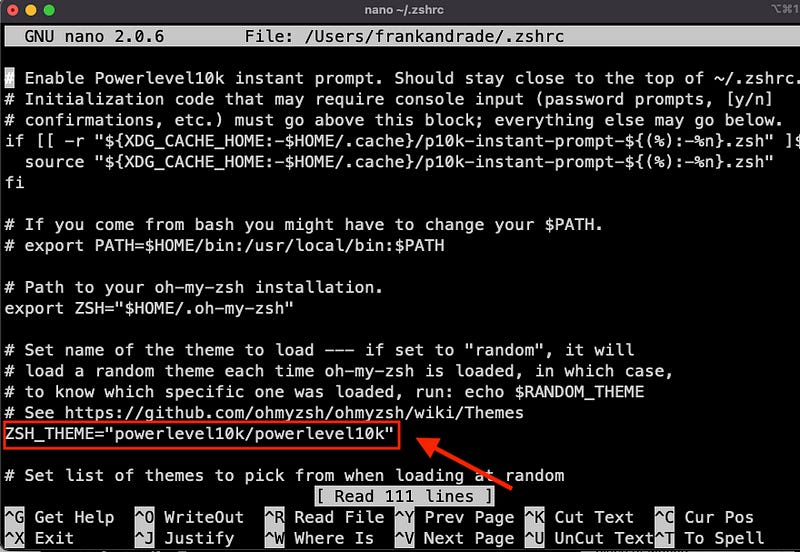
Then exit ~/.zshrc (esc > :wq or ^x > enter) and apply the changes running the command below.
source ~/.zshrcThen you’ll see the window below. If you want to install Meslo Nert Font (which I recommend you), press Y.
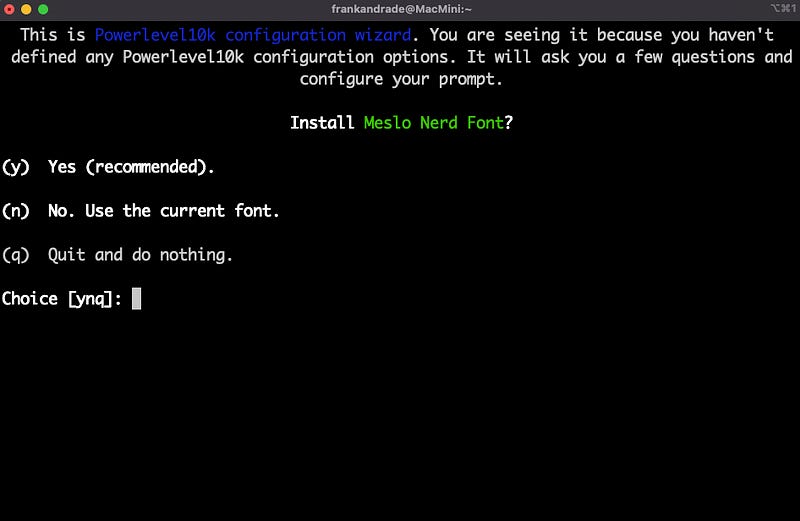
The font will be downloaded and then we have to quit iTerm (use Cmd+Q).
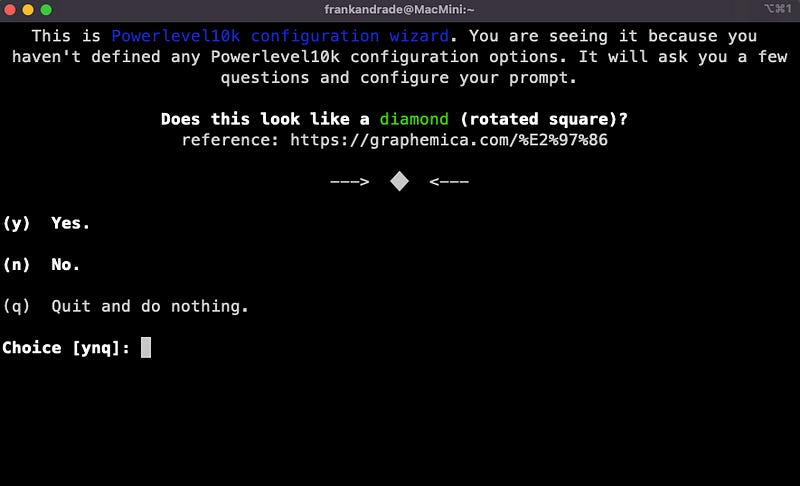
Open iTerm again. You should see the image below (if not run “p10k configure”). These are a series of questions to verify everything is fine. If everything is as indicated in the questions, press Y.
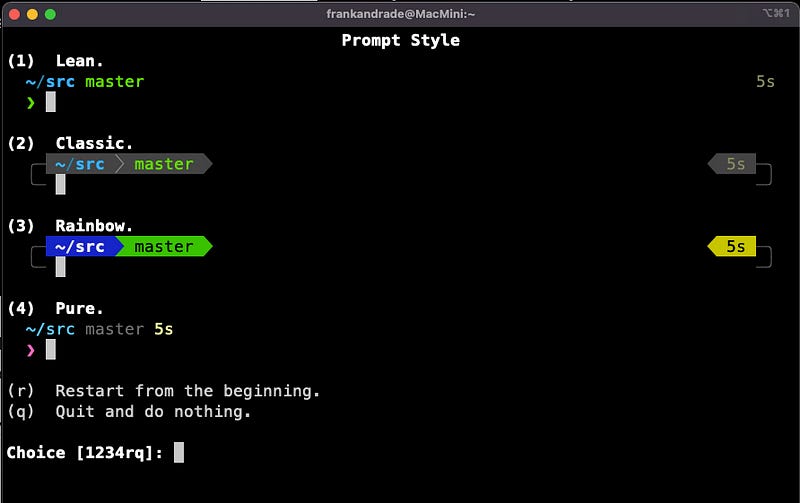
Then you’ll see some preferences to configure the prompt style, heads, tails, spacing, etc. You can choose the options you like the most.
After the setup is done, iTerm2 should look like the image below.

Extra Customizations
ITerm 2 can be further customized. We can increase the font size, install useful plugins, and more.
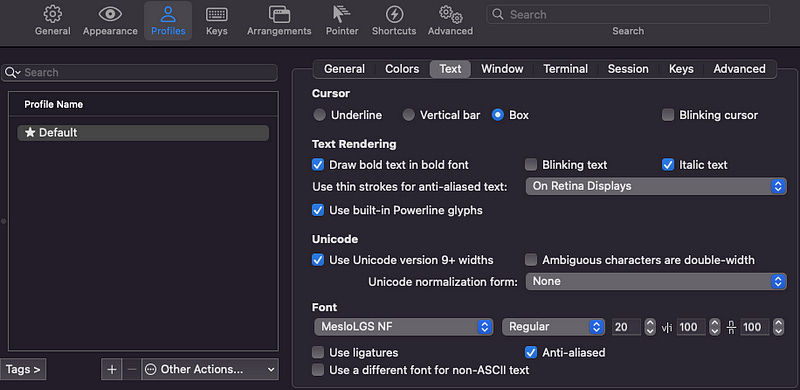
1. Change iTerm2 font size
Open iTerm2 preferences (cmd + ,)
Go to Profiles and click on Text
In the Font section, you can increase the font size and select other fonts
2. Install Plugins
Here are some useful plugins I recommend you to install.
a. Autosuggestions
First, install autosuggestions to get suggestions based on the previous commands you run on the terminal.
git clone https://github.com/zsh-users/zsh-autosuggestions ${ZSH_CUSTOM:-~/.oh-my-zsh/custom}/plugins/zsh-autosuggestionsAfter installing a plugin, you go to the home folder, open ~/.zshrc, and modify the line below.
nano ~/.zshrc
vim ~/.zshrc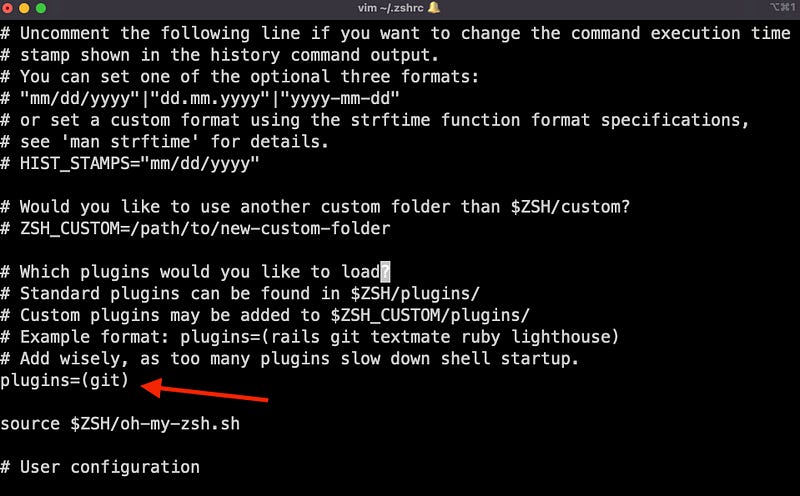
Add this plugin inside the parenthesis.
plugins=(git zsh-autosuggestions)Exit ~/.zshrc and apply the changes by running the command below.
source ~/.zshrcNow you should have auto suggestions enabled. Every time you type a command, you’ll see the suggestions in gray.

b. Syntax-highlighting
If you want to add syntax and highlighting to the commands we run (like in a code editor), you should install this plugin with the command below.
git clone https://github.com/zsh-users/zsh-syntax-highlighting.git ${ZSH_CUSTOM:-~/.oh-my-zsh/custom}/plugins/zsh-syntax-highlightingAs we did before, after the installation, we need to add this new plugin to the plugin variable inside ~/.zshrc.
plugins=(git zsh-autosuggestions zsh-syntax-highlighting)Exit ~/.zshrc and apply the changes by running the command below.
source ~/.zshrcNow you should have auto syntax-highlighting enabled.
That’s it! You’ve just upgraded your Mac terminal.
3. Bonus: Themes for Vim
In case you’re using Vim as your text editor, you can also change the themes used for Vim.
To do so, open ~/.vimrc
vim ~/.vimrcNow, to see a list of ready-to-use themes, type the following
:colorscheme [space] [Ctrl+d]Now you should see all the themes available.

If you want to set the default vim theme, type i (to enable insert mode) and then type the following to set the default color scheme to the color you want and also enable the syntax highlight
colorscheme [colorscheme_name]
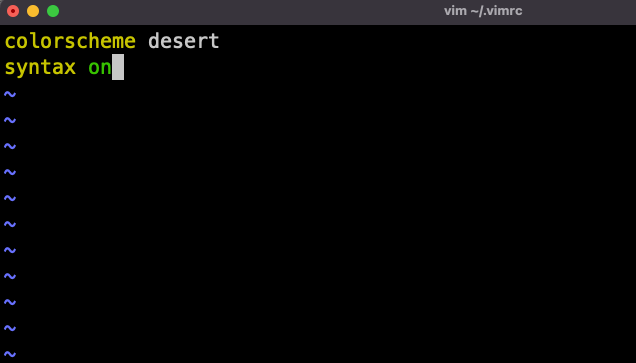
syntax onHere’s how your ~/.vimrc should look like (in this case, I chose the desert theme).
Now press escape and then :wq to save and quit. Now vim will have the theme you chose!