
Why You Need Claude Code and How to Use It (Even With 0 Coding Experience)
Claude Code guide for absolute beginners


Claude Code is one of the best AI tools I have used in recent years.
Forget about getting generic answers with ChatGPT.
Claude Code’s real value emerges when you organize your work into projects. It understands your intent, manages the information you provide, and delivers results that are genuinely useful.
The key? Providing as much context as possible.
The more clarity Claude has about what you want to achieve, the better the outcomes will be. Believe me, spending a bit of time setting this up is entirely worthwhile.
Here’s what makes Claude Code different from ChatGPT or Gemini: Claude Code offers significantly more control over the results you want to obtain, leading to
Fewer errors
Fewer repetitive responses (I love this one in particular)
Greater precision
Better focus
And you do not need to be a programmer to use Claude Code
I’ll say it again: Claude Code isn’t exclusive to programmers!
A lot of people are intimidated by the name Claude Code (and that’s totally understandable), but in reality, Claude Code handles the technical complexity for you.
In this article, you will learn:
How to understand Claude Code and its core components
How to install Claude Code using VS Code (the easiest way to use it)
How to use Claude Code using a real-world example
By learning Claude Code, you’ll be far ahead of the average AI user who relies only on traditional web apps.
Hi! I’m Frank. If you’re new here, welcome! I’ve created a series of guides on Claude, Claude Cowork and Claude Code.
Subscribe to get my FREE Claude course.
20+ lessons delivered straight to your inbox 👇
How to install Claude Code in 4 steps
Visit the Claude website → Look for your operating system → copy and paste the installation command into your terminal → execute it.
If you’re new to the terminal, here’s how to open it:
Windows: press the Windows key, type “CMD” and press enter
Mac: press Command (⌘) + Spacebar, type “Terminal“ and press enter
After running the command, you should see this message: “✅ Installation complete!“
To verify that Claude was installed successfully, type “claude” and press enter. You should see the image below in your terminal

Install VS Code. Note that Claude Code can be used directly from the terminal, but I find VS Code the easiest way to use it
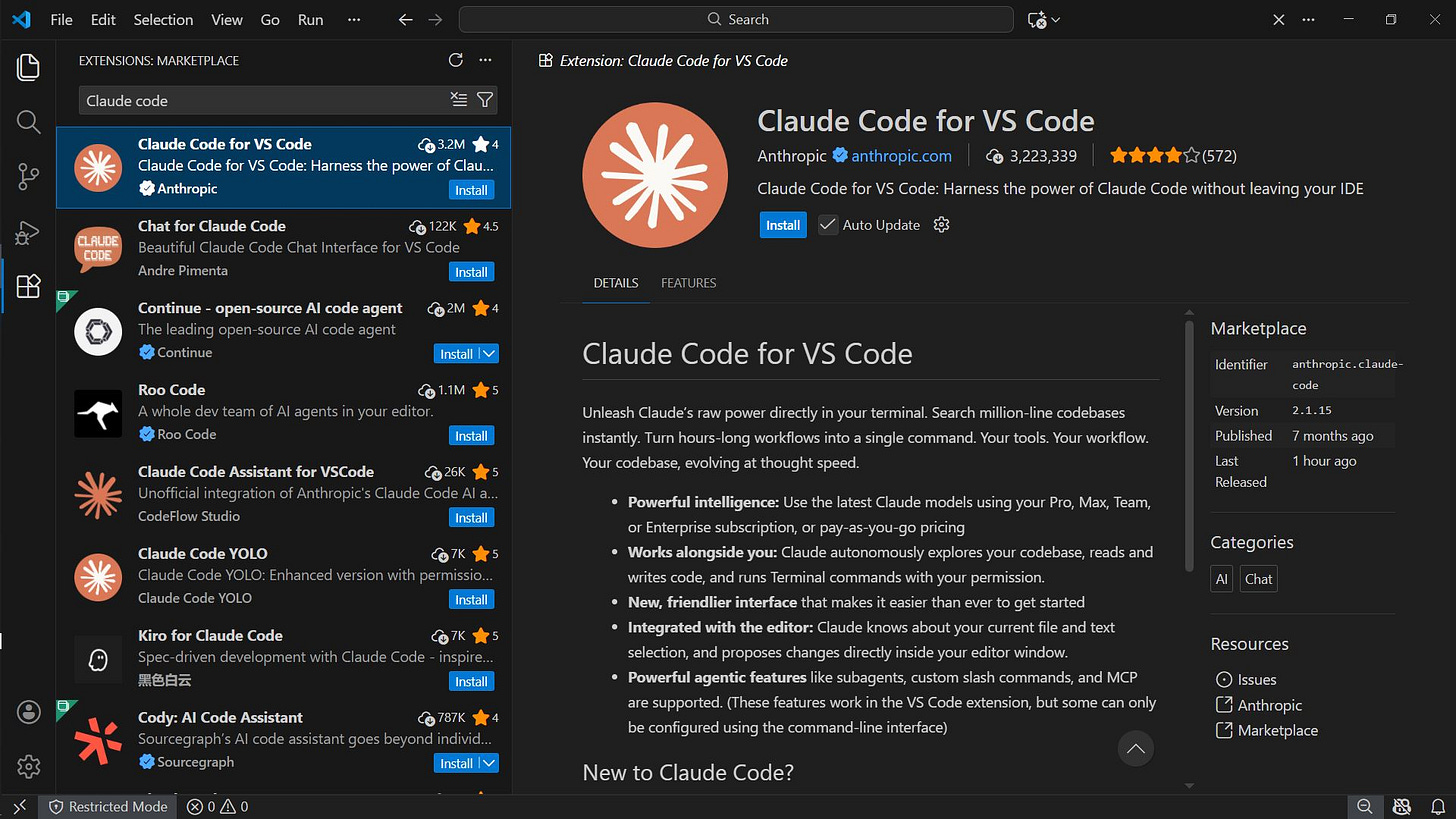
Next, install the Claude extension within Visual Studio Code: Open VS Code → View → Extensions → search for Claude → click Install
After installing the extension, click on the Claude icon to log in to Claude

Finally, open a folder you will use as your working directory inside Visual Studio Code: File → “Open Folder” → Select a folder
What Claude Code is and what it is not
After spending several hours working with Claude Code, I found myself wondering why I had not adopted it earlier. Claude Code allows you to structure everyday tasks into well-defined projects, which eliminates the need to repeat the same instructions over and over again.
Many people assume that Claude Code is designed exclusively for programmers.
This assumption, however, is incorrect. As you will see throughout this article, Claude Code is capable of handling even the technical aspects on its own.
Before diving deeper, let’s look at the high-level structure that explains how Claude Code turns raw input into meaningful output.
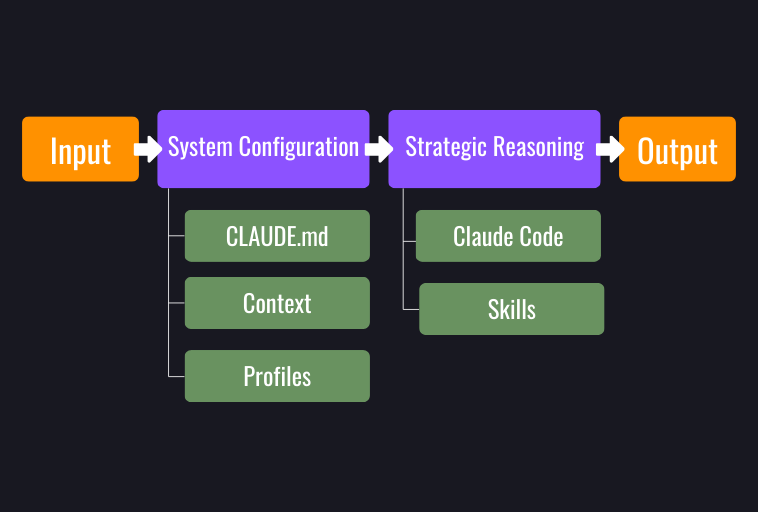
a) Input
This is the initial information that Claude needs in order to operate: documents, data, instructions, etc.
b) System Configuration (how Claude thinks)
This layer defines how the system should reason and operate, rather than specifying a particular task to execute. It contains:
CLAUDE.md: The central file that defines the rules, principles, and criteria Claude follows consistently.
Context: Structured information that ensures coherence and continuity across tasks.
Profiles: Structured configurations that adapt the system’s behavior based on the type of work, the audience, or the intended focus.
In practical terms, this functions as Claude’s operating manual.
c) Strategic Reasoning (the reasoning layer)
At this stage, the system applies the previously defined configuration. This layer includes:
Claude Code: The environment in which structured reasoning takes place.
Skills: Specific procedures that guide how certain types of tasks are solved within a project.
Here, the system combines the provided input with its global configuration, as defined in CLAUDE.md, along with project-specific instructions. This allows it to analyze, structure, and resolve the requested work effectively.
d) Output
The final results may include: well-organized documentsm clear and concise responses, analytical insights, code, actionable work plans, etc
Setting up Claude Code: the system brain
We’ll need “System Configuration” and “Strategic Reasoning” from the previous structure. Inside the folder selected in step 4 of the Claude Code installation, add the structure below.
my-project/
├── CLAUDE.md
├── context/
│ └── content-context.md
├── profiles/
│ └── audience-profile.md
├──skills/
│ └── SKILL.md
Download the files here (click on the green “Code“ button → download ZIP). We’ll use these files in the next sections.
Viewed inside VS Code, the structure will look like this:
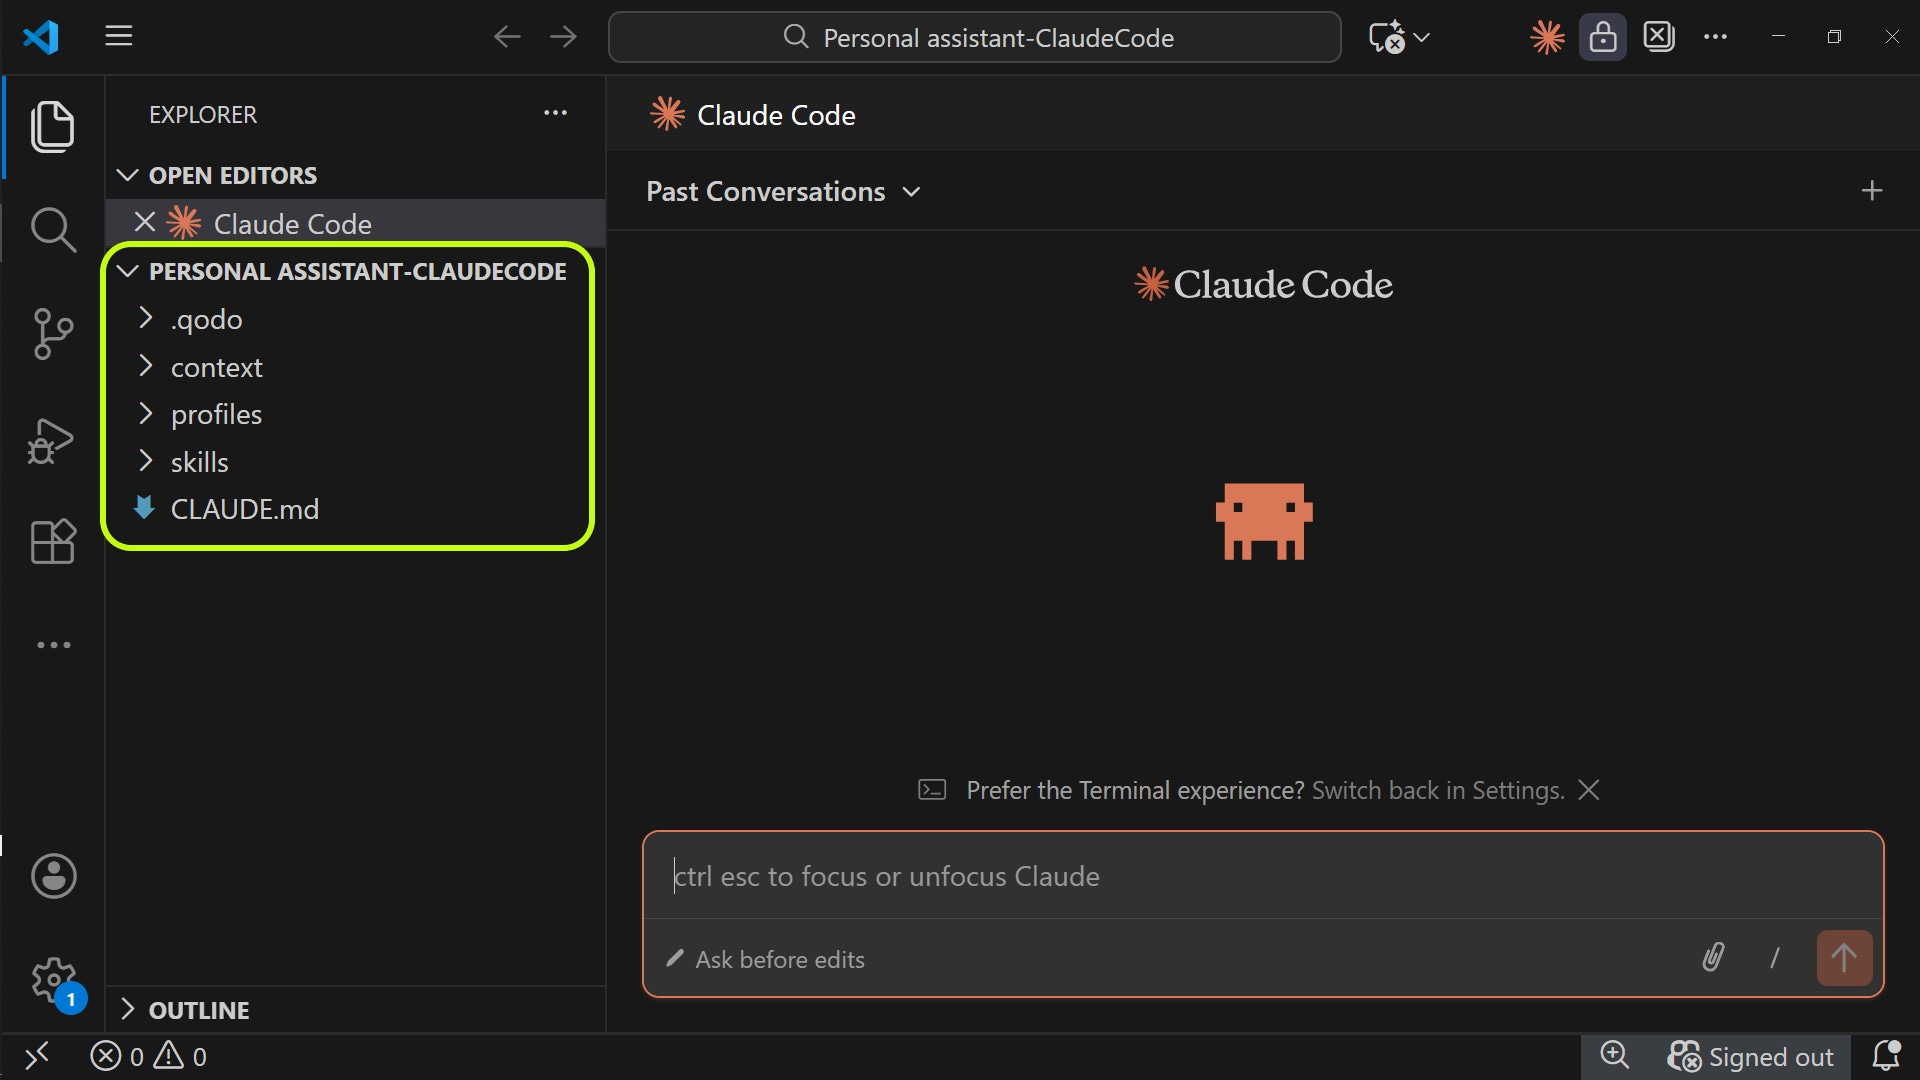
At this stage, the core structure is nearly complete.
Your first chat in Claude Code
Let’s ask Claude Code a few questions about the files we’ve shared with it.
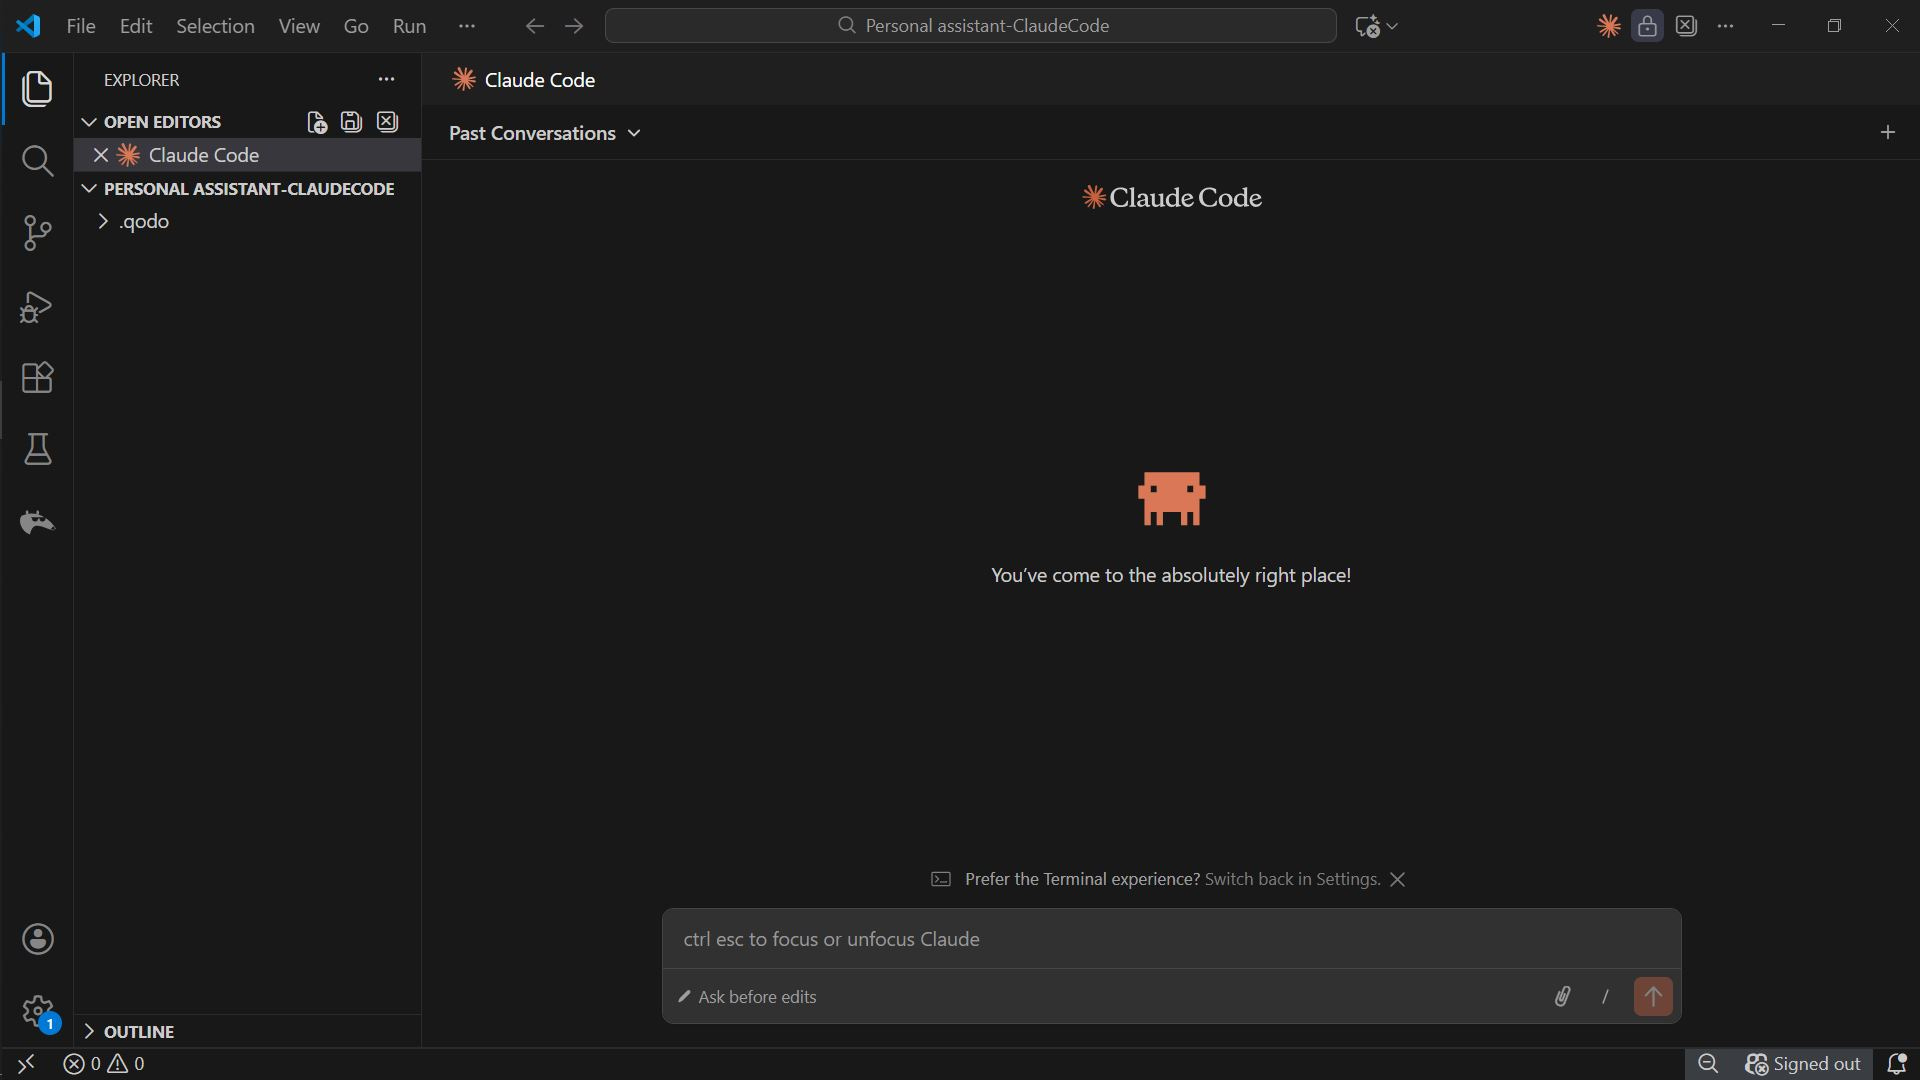
To open a chat window with Claude Code and have everything ready to start a conversation, click on the Claude logo → select the Explorer tab (top left) → enter your prompt in the chat box.

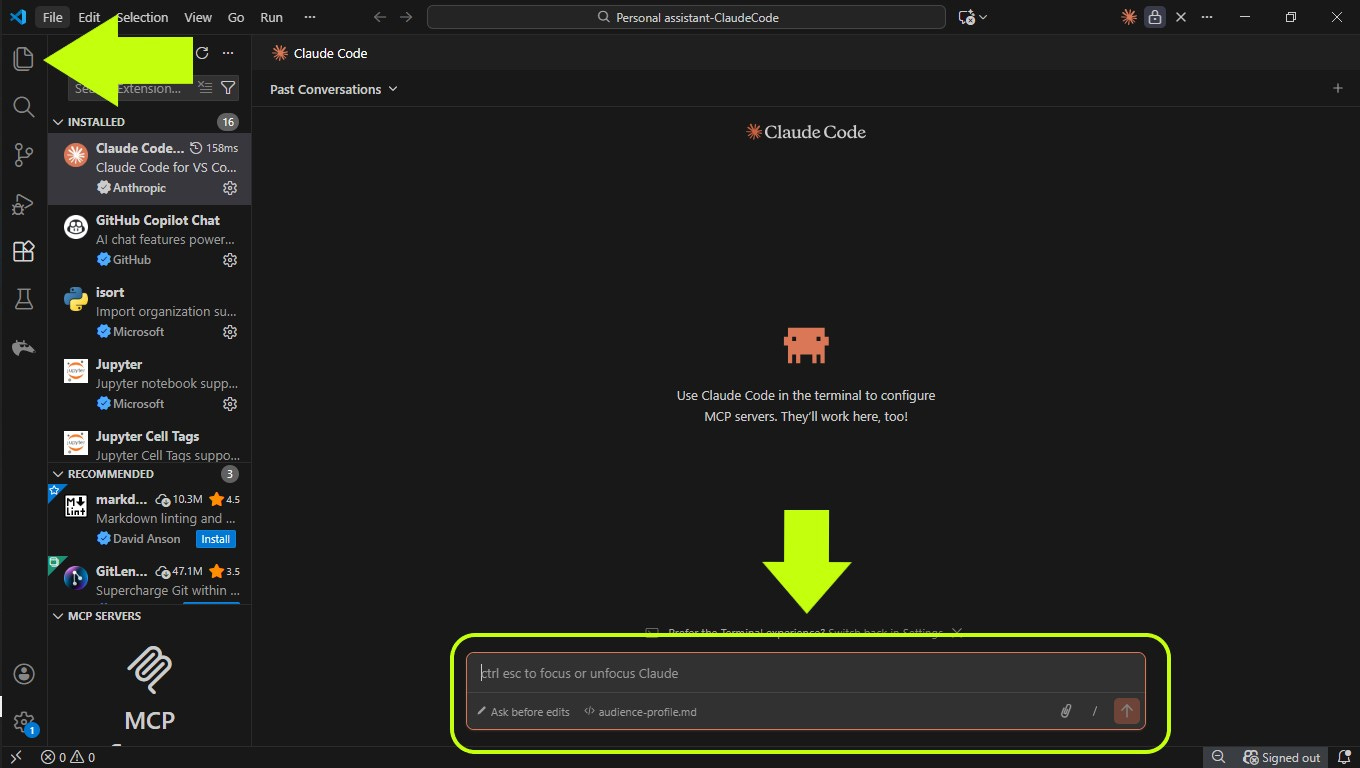
At this point, everything is ready to start a conversation with Claude Code.
Keep in mind that the environment in which the responses are generated is centered around the files we previously loaded for this project.
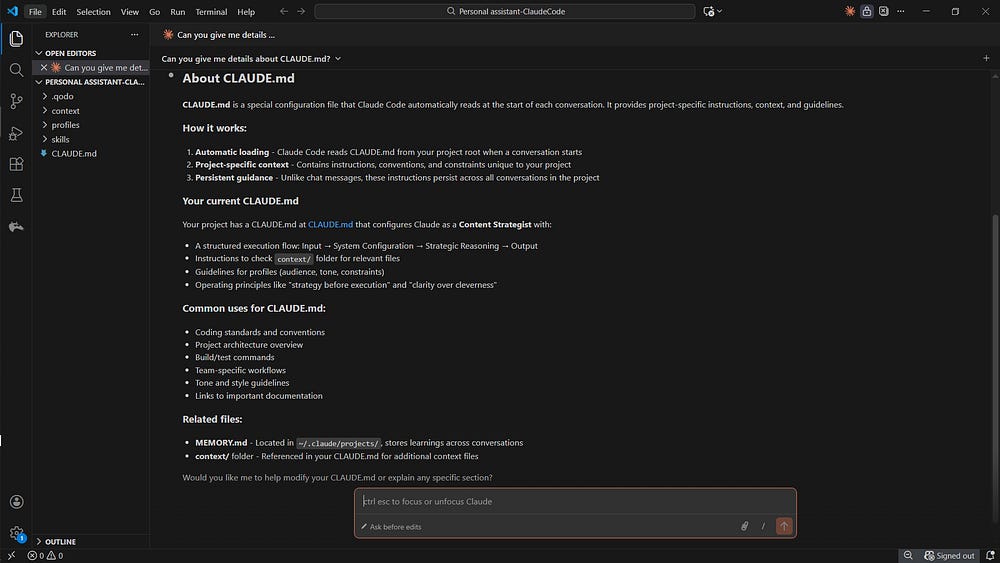
I ask Claude Code to explain how it understands the project configuration based on CLAUDE.md and the defined skills, helping verify that the setup is interpreted correctly.
Tell me everything I should know about
CLAUDE.md
Here’s its response:
I ask another question to confirm the type of output the system is designed to produce with this configuration.
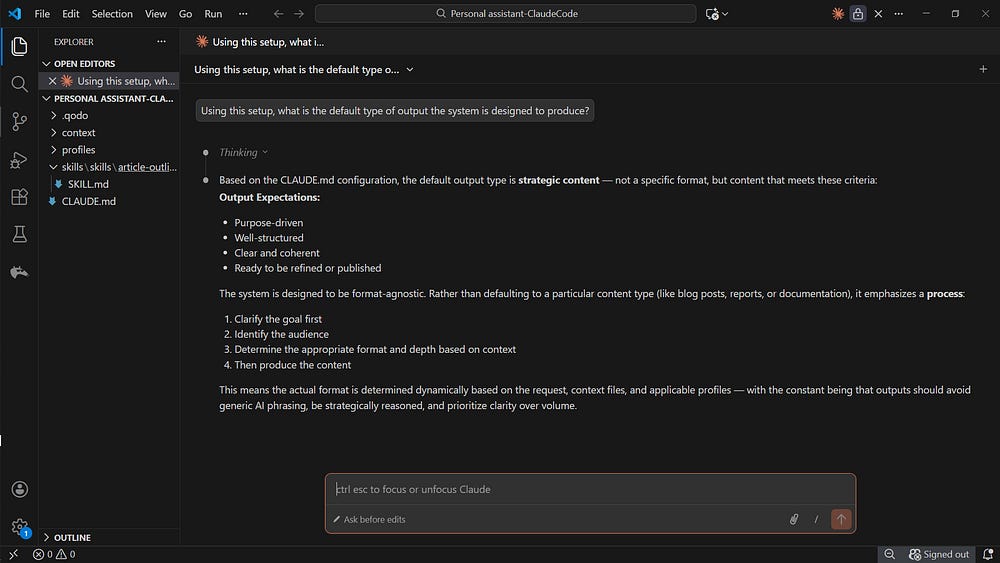
This confirms that the entire workflow will work correctly (taking into account the tools we’ve provided to Claude Code)
Using skills in Claude Code
Now let’s put everything into action. We’ll assign Claude Code the role of Content Strategist.
We’ll use the Article Outline Skill from the SKILL.md file and the following prompt:
Using the Article Outline Skill, propose a structured brief that clarifies a potential initiative before execution. The goal is to define purpose, scope, key considerations, and open questions—not to produce final recommendations. The audience consists of decision-makers with limited time.
This produces a very specific type of output.
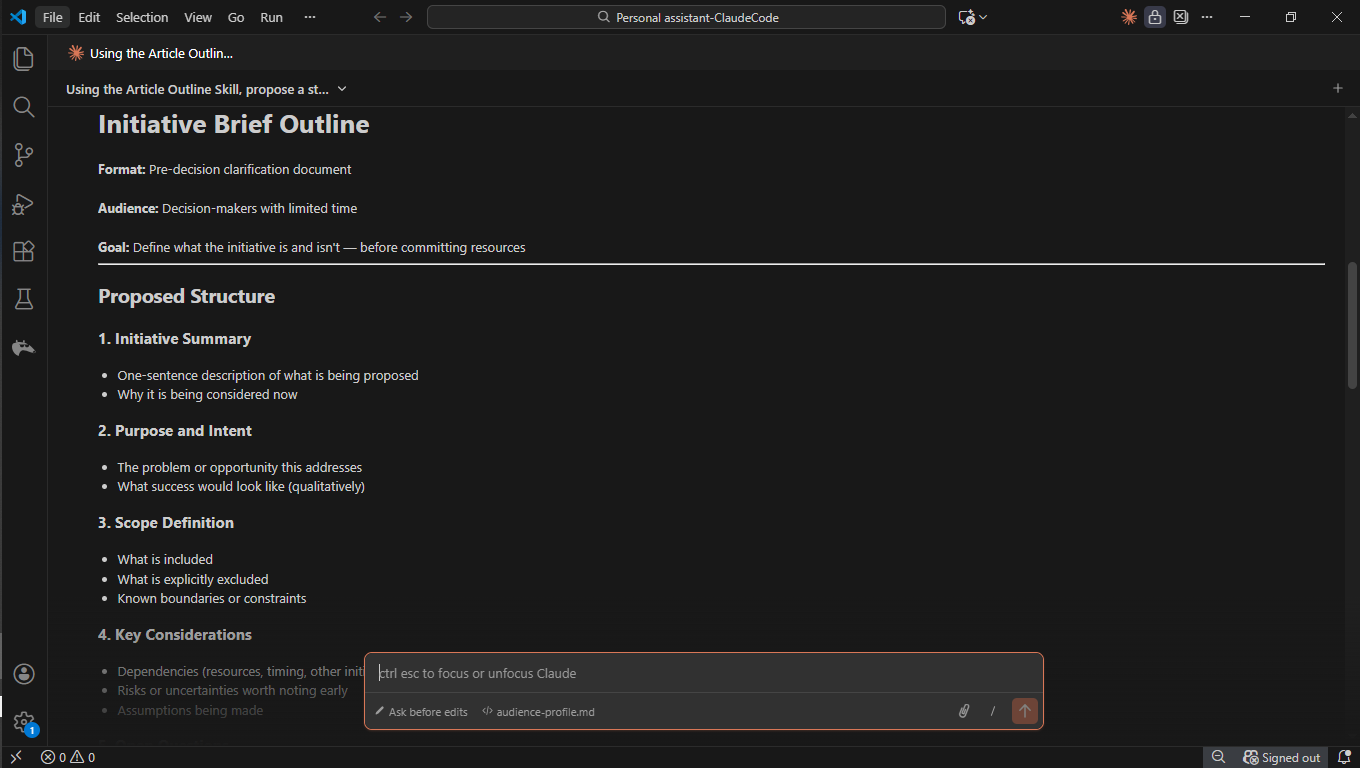
From here, we can take different directions depending on how we want to guide Claude Code. For this particular case, we’ll use the following prompt:
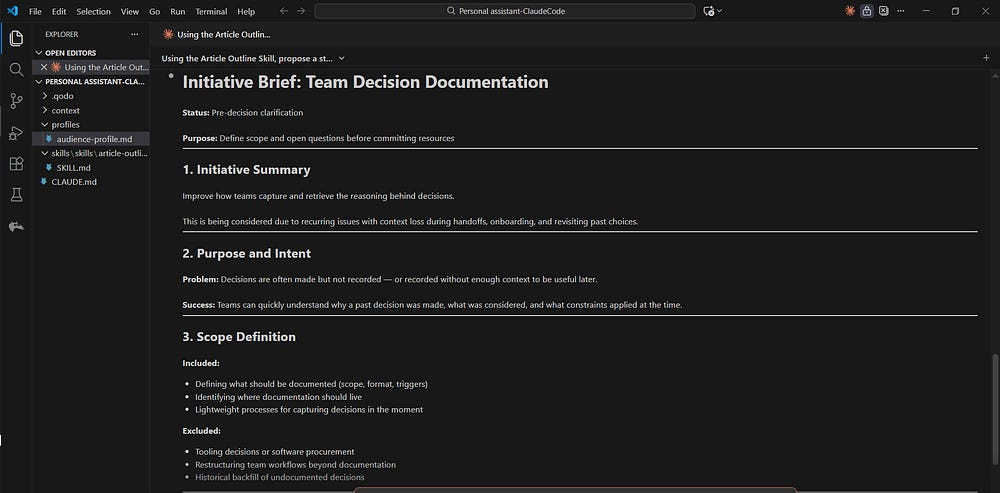
Apply this structure to a hypothetical initiative focused on improving how teams document decisions.
As we can see, the workflow generates a concise initiative summary designed to clarify thinking before execution.
This same approach can be applied to create additional projects for any use case you have in mind.
If you are looking for additional ideas for skills, you can:
Explore the official Claude Code repository
Use available templates as a starting point
If you’re new, read this beginner-friendly introduction to Claude Skills. You’ll find what it is, how to create a skill, and how to use it in the Claude app.

Final Thoughts: What makes Claude Code special
The key difference between Claude Code and traditional chatbots is this:
In ChatGPT or Gemini, the structure, role, and rules usually live inside the prompt and must be repeated each time. With Claude Code, however, this logic is already defined in files like CLAUDE.md and the skills, and it is automatically applied to this specific project. This enables consistent and reusable results without having to restate the context in every interaction.
Subscribe to get my FREE Claude course.
20+ lessons delivered straight to your inbox 👇
I thought there was a security risk letting Claude code loose on your machine. How do you address that?
Just as a heads-up, upon checking current Claude Code conventions:
The structure you shared is mostly right, but the skills placement and file discovery have changed. Here's what to update:
Skills should be in .claude/skills/<skill-name>/SKILL.md, not a top-level skills/ directory. Each skill is a directory, not a single file.
Context files (context/, profiles/) won't be auto-discovered. You have two options:
- Import them explicitly in CLAUDE.md with @context/content-context.md syntax
- Move them to .claude/rules/ where they're auto-discovered
Recommended updated structure:
my-project/
├── CLAUDE.md # Imports context files with @path
├── context/
│ └── content-context.md
├── profiles/
│ └── audience-profile.md
├── .claude/
│ ├── skills/
│ │ └── my-skill/ # Directory per skill
│ │ ├── SKILL.md
│ │ └── template.md # Optional supporting files
│ └── rules/ # Auto-discovered by Claude
│ └── style-guide.md
Then in CLAUDE.md:
- See @context/content-context.md for background.
- See @profiles/audience-profile.md for audience details.
Key changes from your original:
1. skills/SKILL.md → .claude/skills/<skill-name>/SKILL.md
2. Add @ imports in CLAUDE.md so context/ and profiles/ actually get loaded
3. Consider .claude/rules/ for anything you want auto-discovered without explicit imports