


This guide was written in collaboration with Gencay.
Gencay writes LearnAIWithMe, a newsletter focused on practical AI tutorials for people who’d rather replace than be replaced by AI.
In a previous guide, I showed you how to connect NotebookLM with Claude.
It worked, but there was a catch: the whole setup lived in the terminal. CLI, install commands, config. Powerful, but for most people, too technical.
This time, there’s no terminal (or Claude Code).
I found a NotebookLM skill that runs inside Claude Cowork. You only need to download it and add it to Cowork.
In this guide, you’ll learn:
How to set it up in two steps
Use case 1: Interview prep that knows a company’s last twelve months
Use case 2: A weekly language feedback loop that drills your real mistakes
Use case 3: Pre-trip destination briefings grounded in fresh sources
Use case 2 is connected to my Claude for Foreign Language Learning video course, while use case 3 is related to the AI Travel Guide I published last week.

The Claude Skill
This skill was created by Paul J Lipsky.
Download the skill clicking here. Then open Cowork and follow the steps below.
Customize → Skills → “+” → Create skill → Upload a skill → Upload the skill file
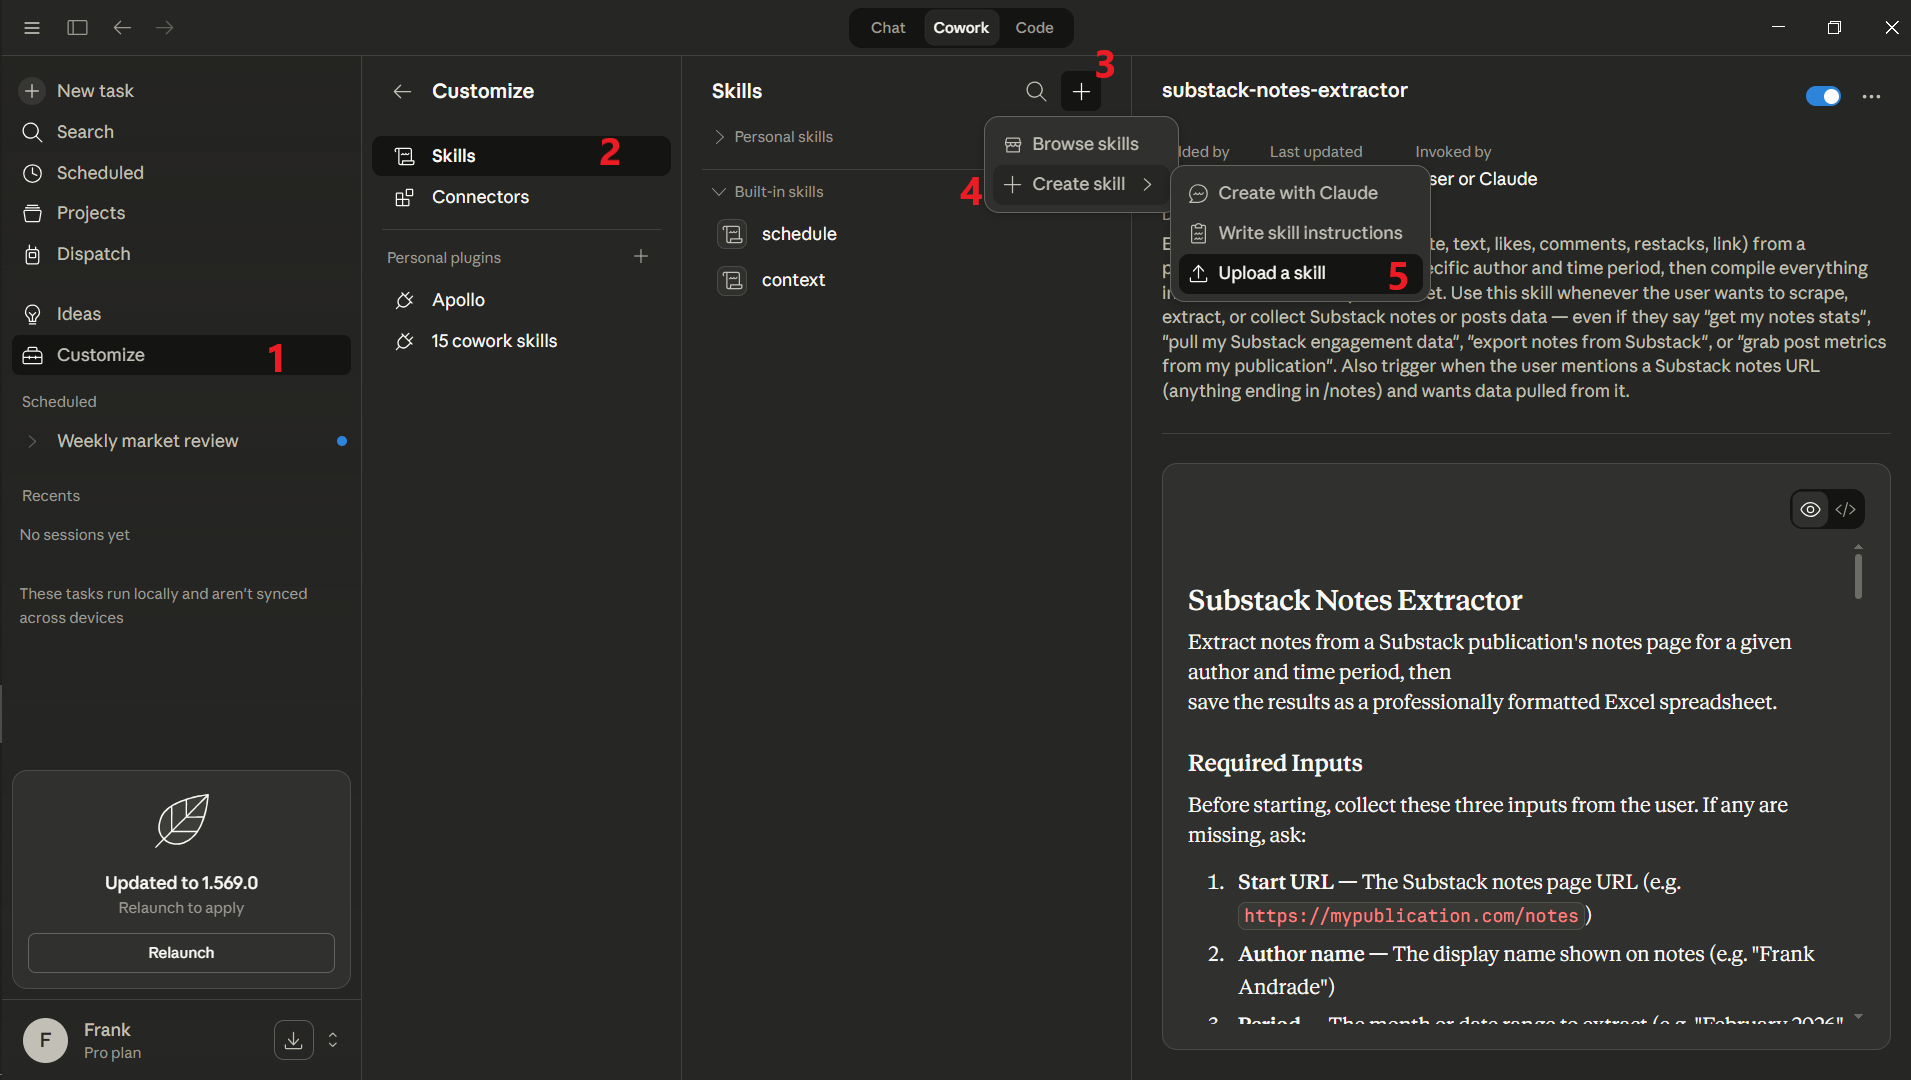
Now I can run NotebookLM through Cowork.
But I got errors the first time, because I skipped half the video.
So before you start, here is what I wish someone had told me.
How to set it up
Two steps. Skip either, and the skill will fail on first run.
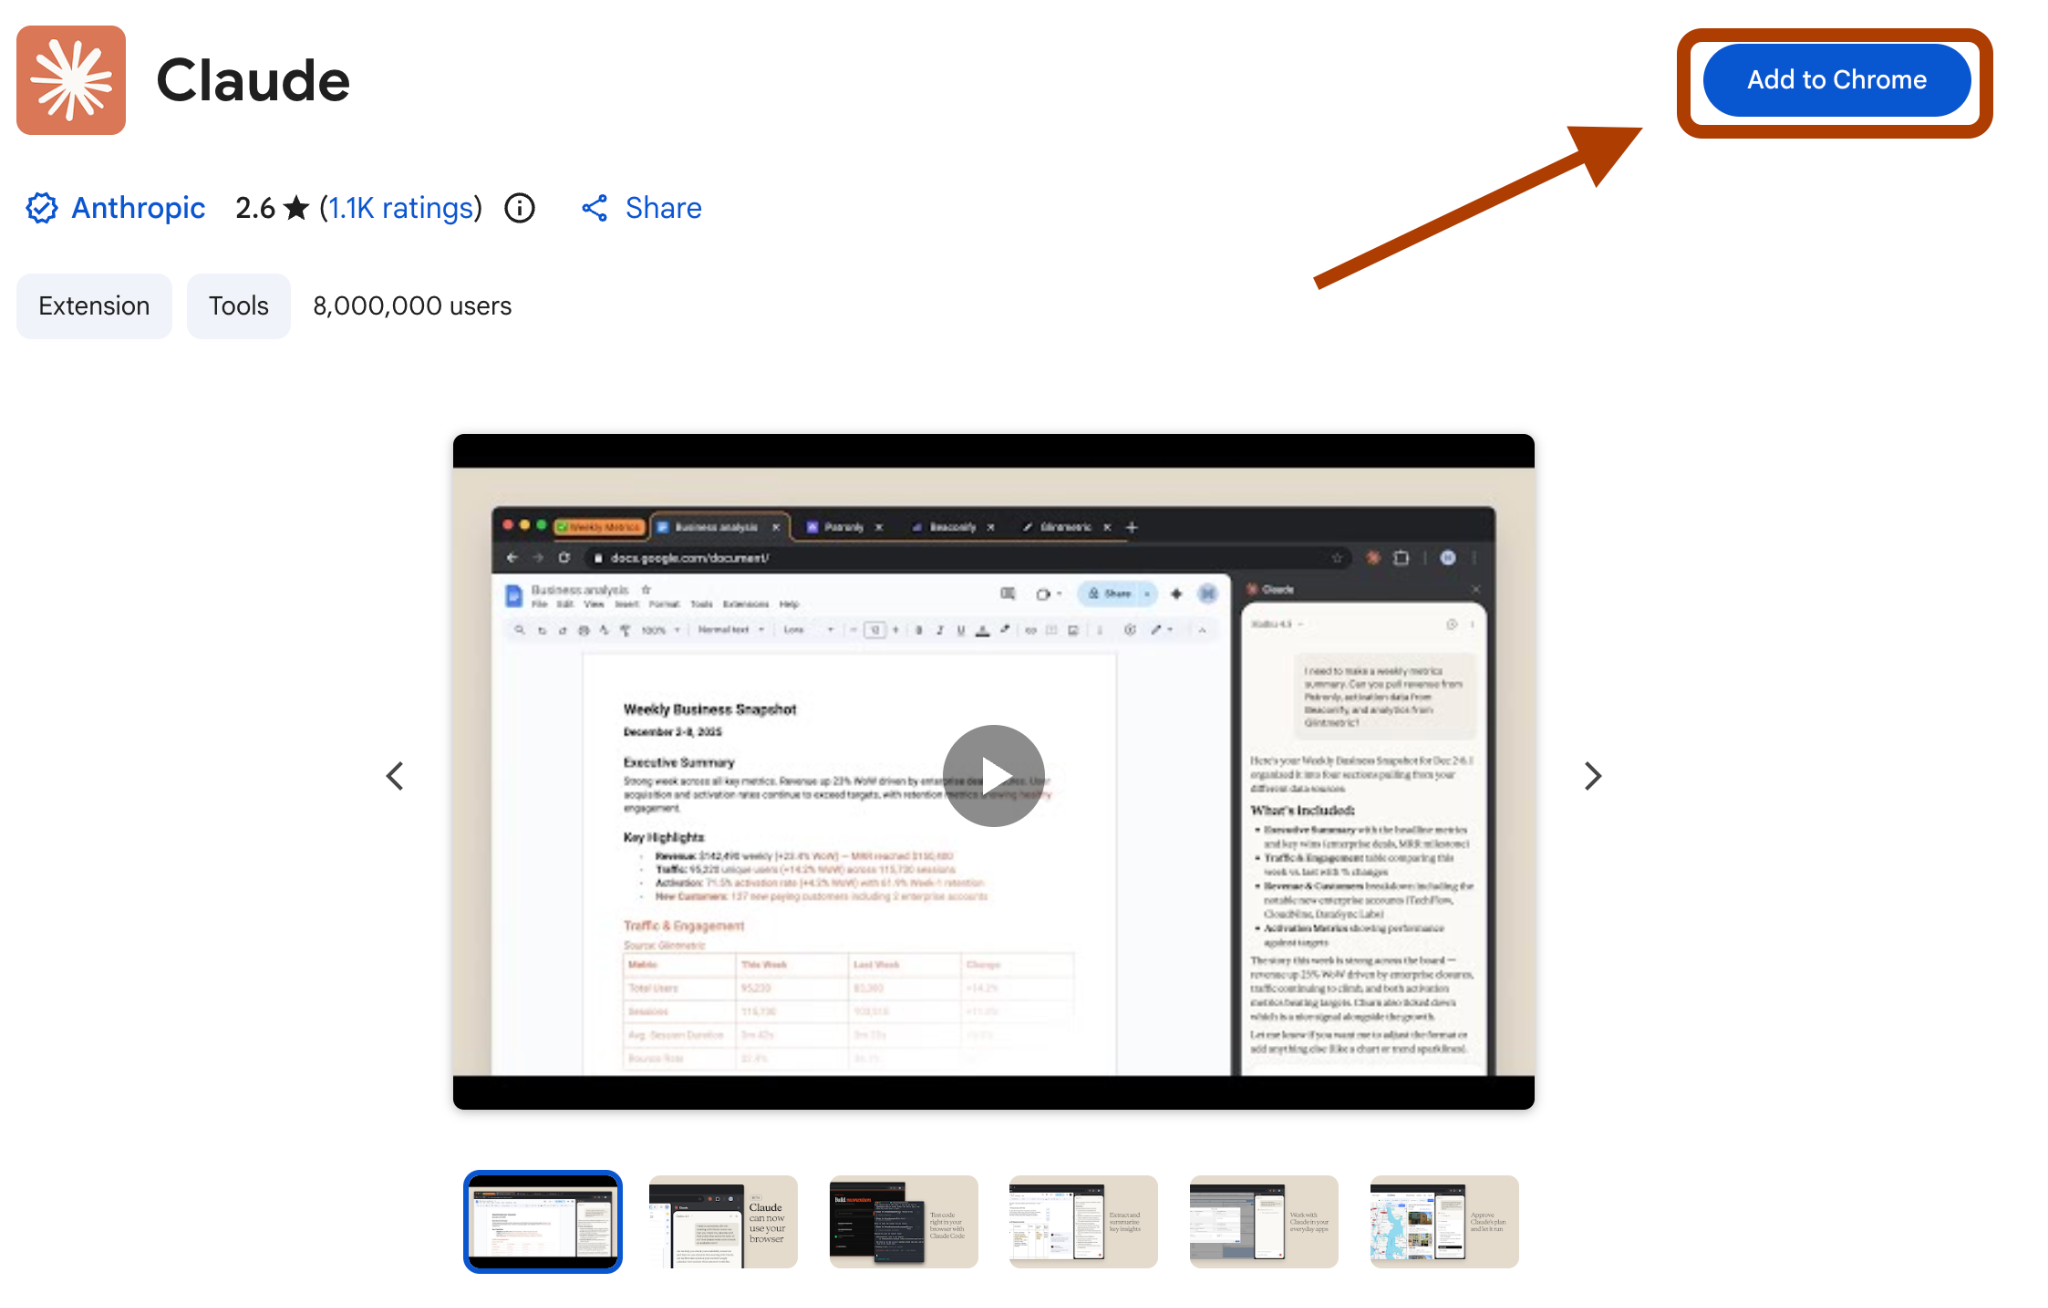
Step 1: Install Claude Chrome Extension
Go here and click Add to Chrome.
Step 2: Add the NotebookLM domain to Claude in Chrome
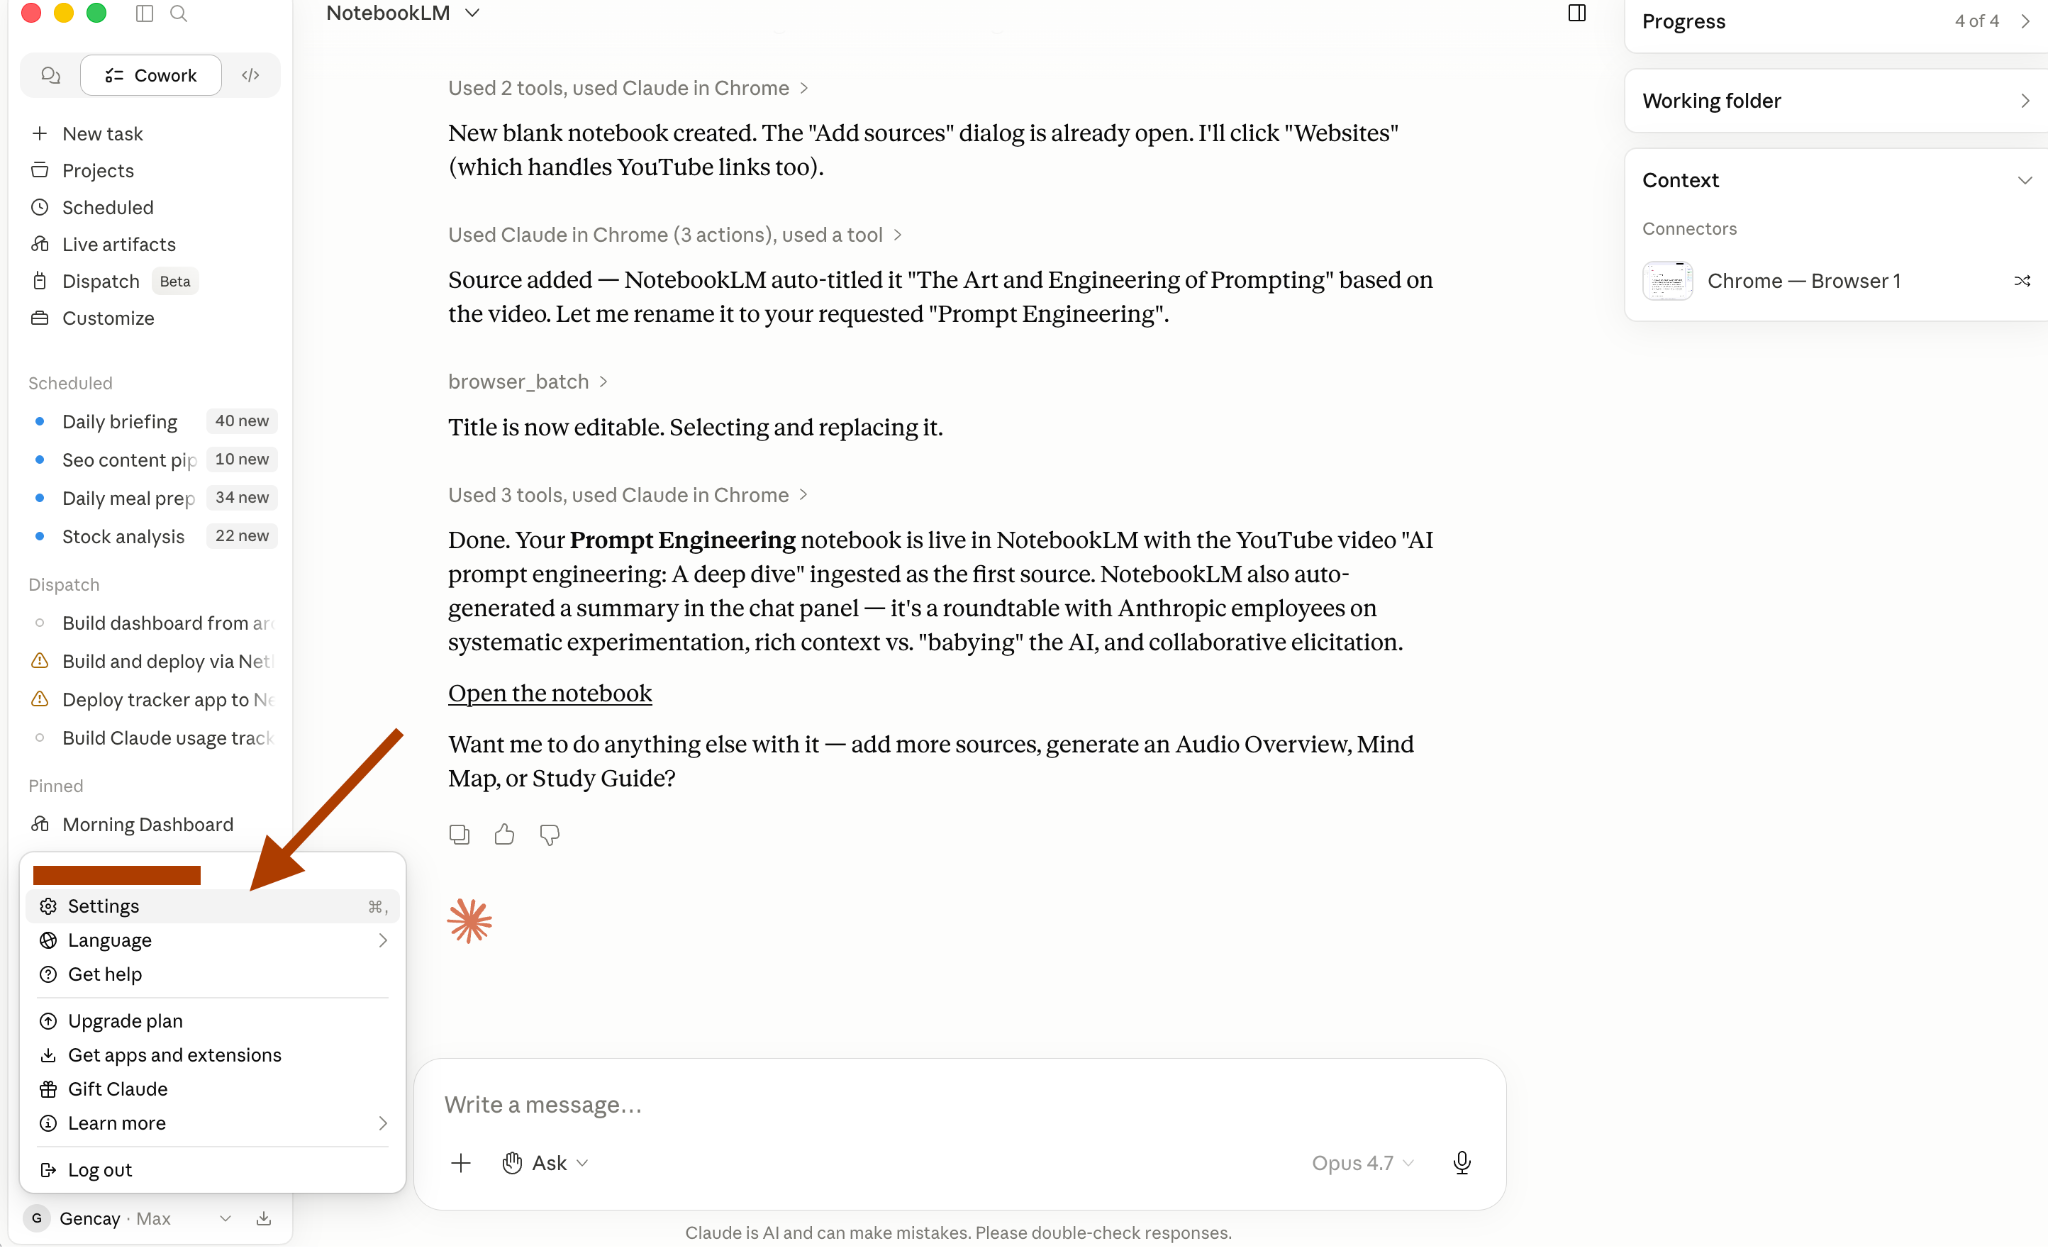
Open the Claude desktop app. Click your name in the bottom left. Hit Settings.
In settings, scroll to Claude in Chrome (Beta). Click Add websites. Type notebooklm.google and confirm.
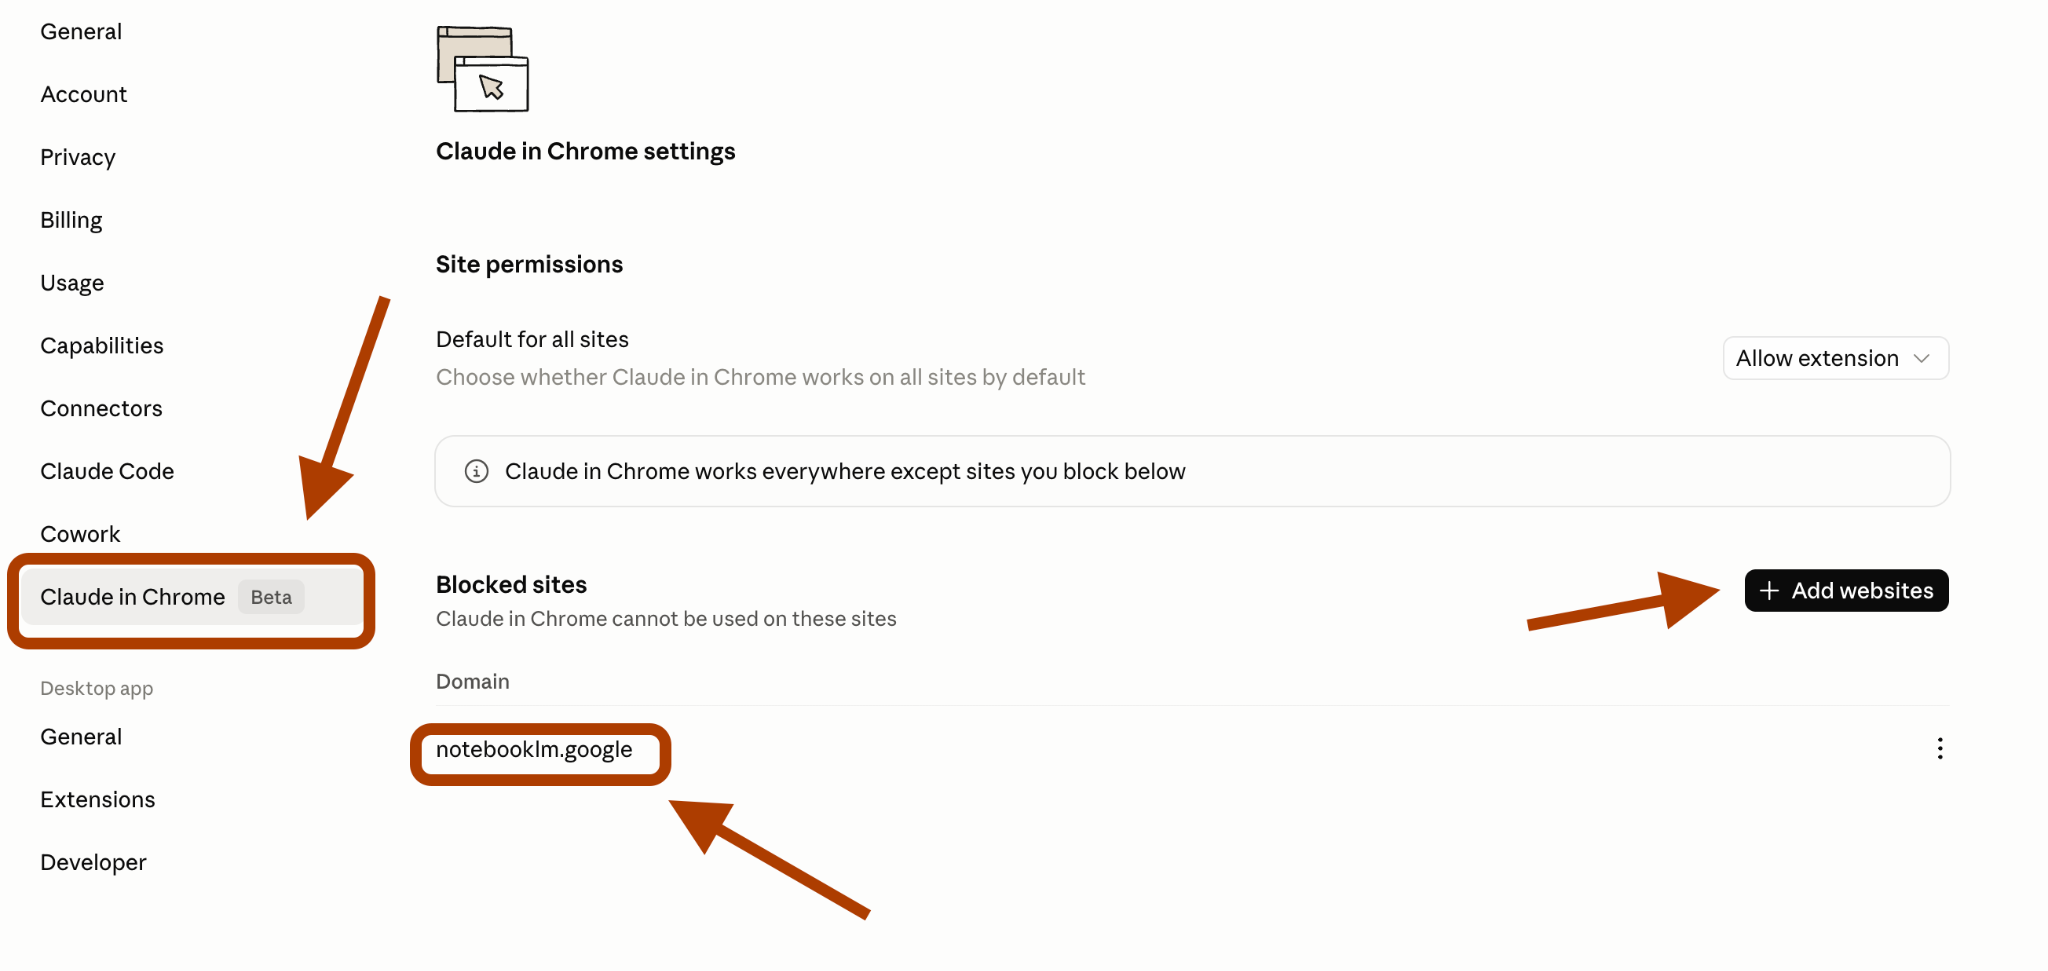
Without this, the skill cannot drive NotebookLM. The extension is loaded but blocked. That was my first error.
How to use it?
In any Cowork chat, type:
/notebooklm
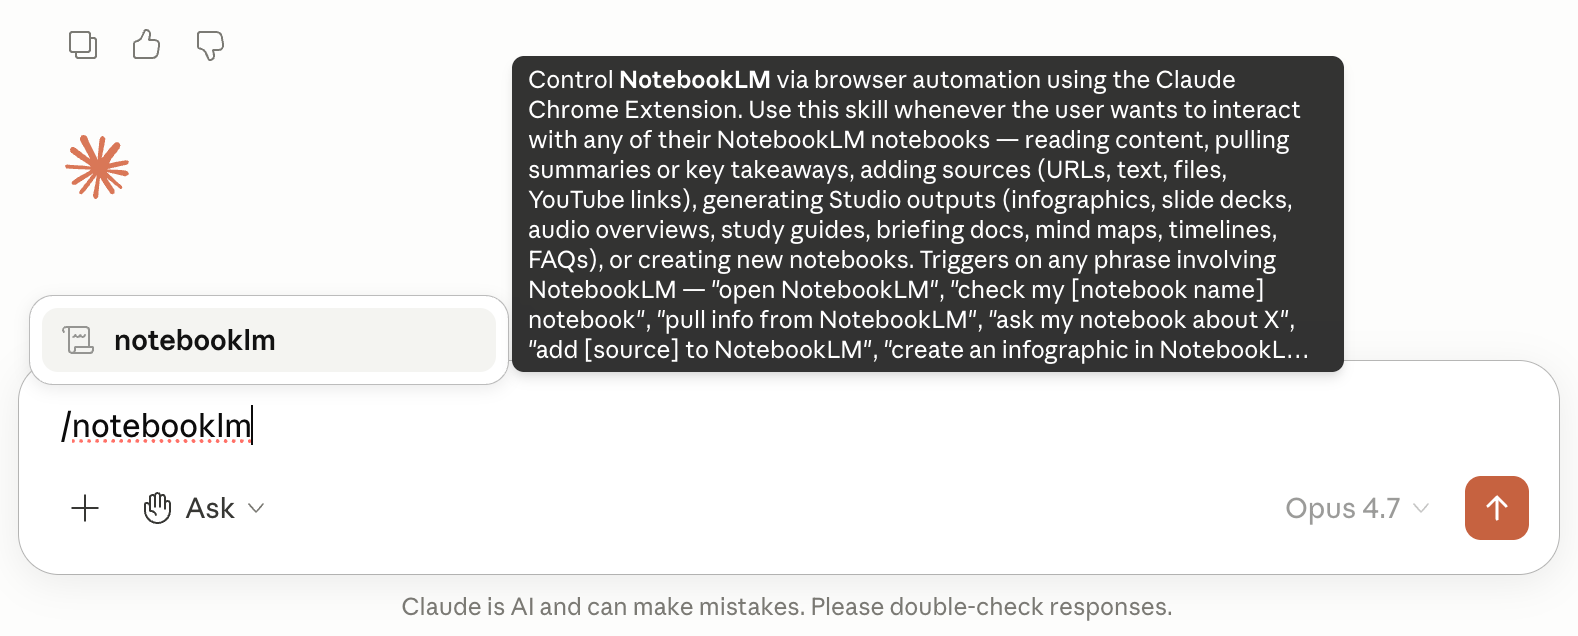
The skill loads and asks what you want to do.

Four options come up.
Read / extract from a notebook
Add sources to a notebook
Generate a Studio output
Create a new notebook
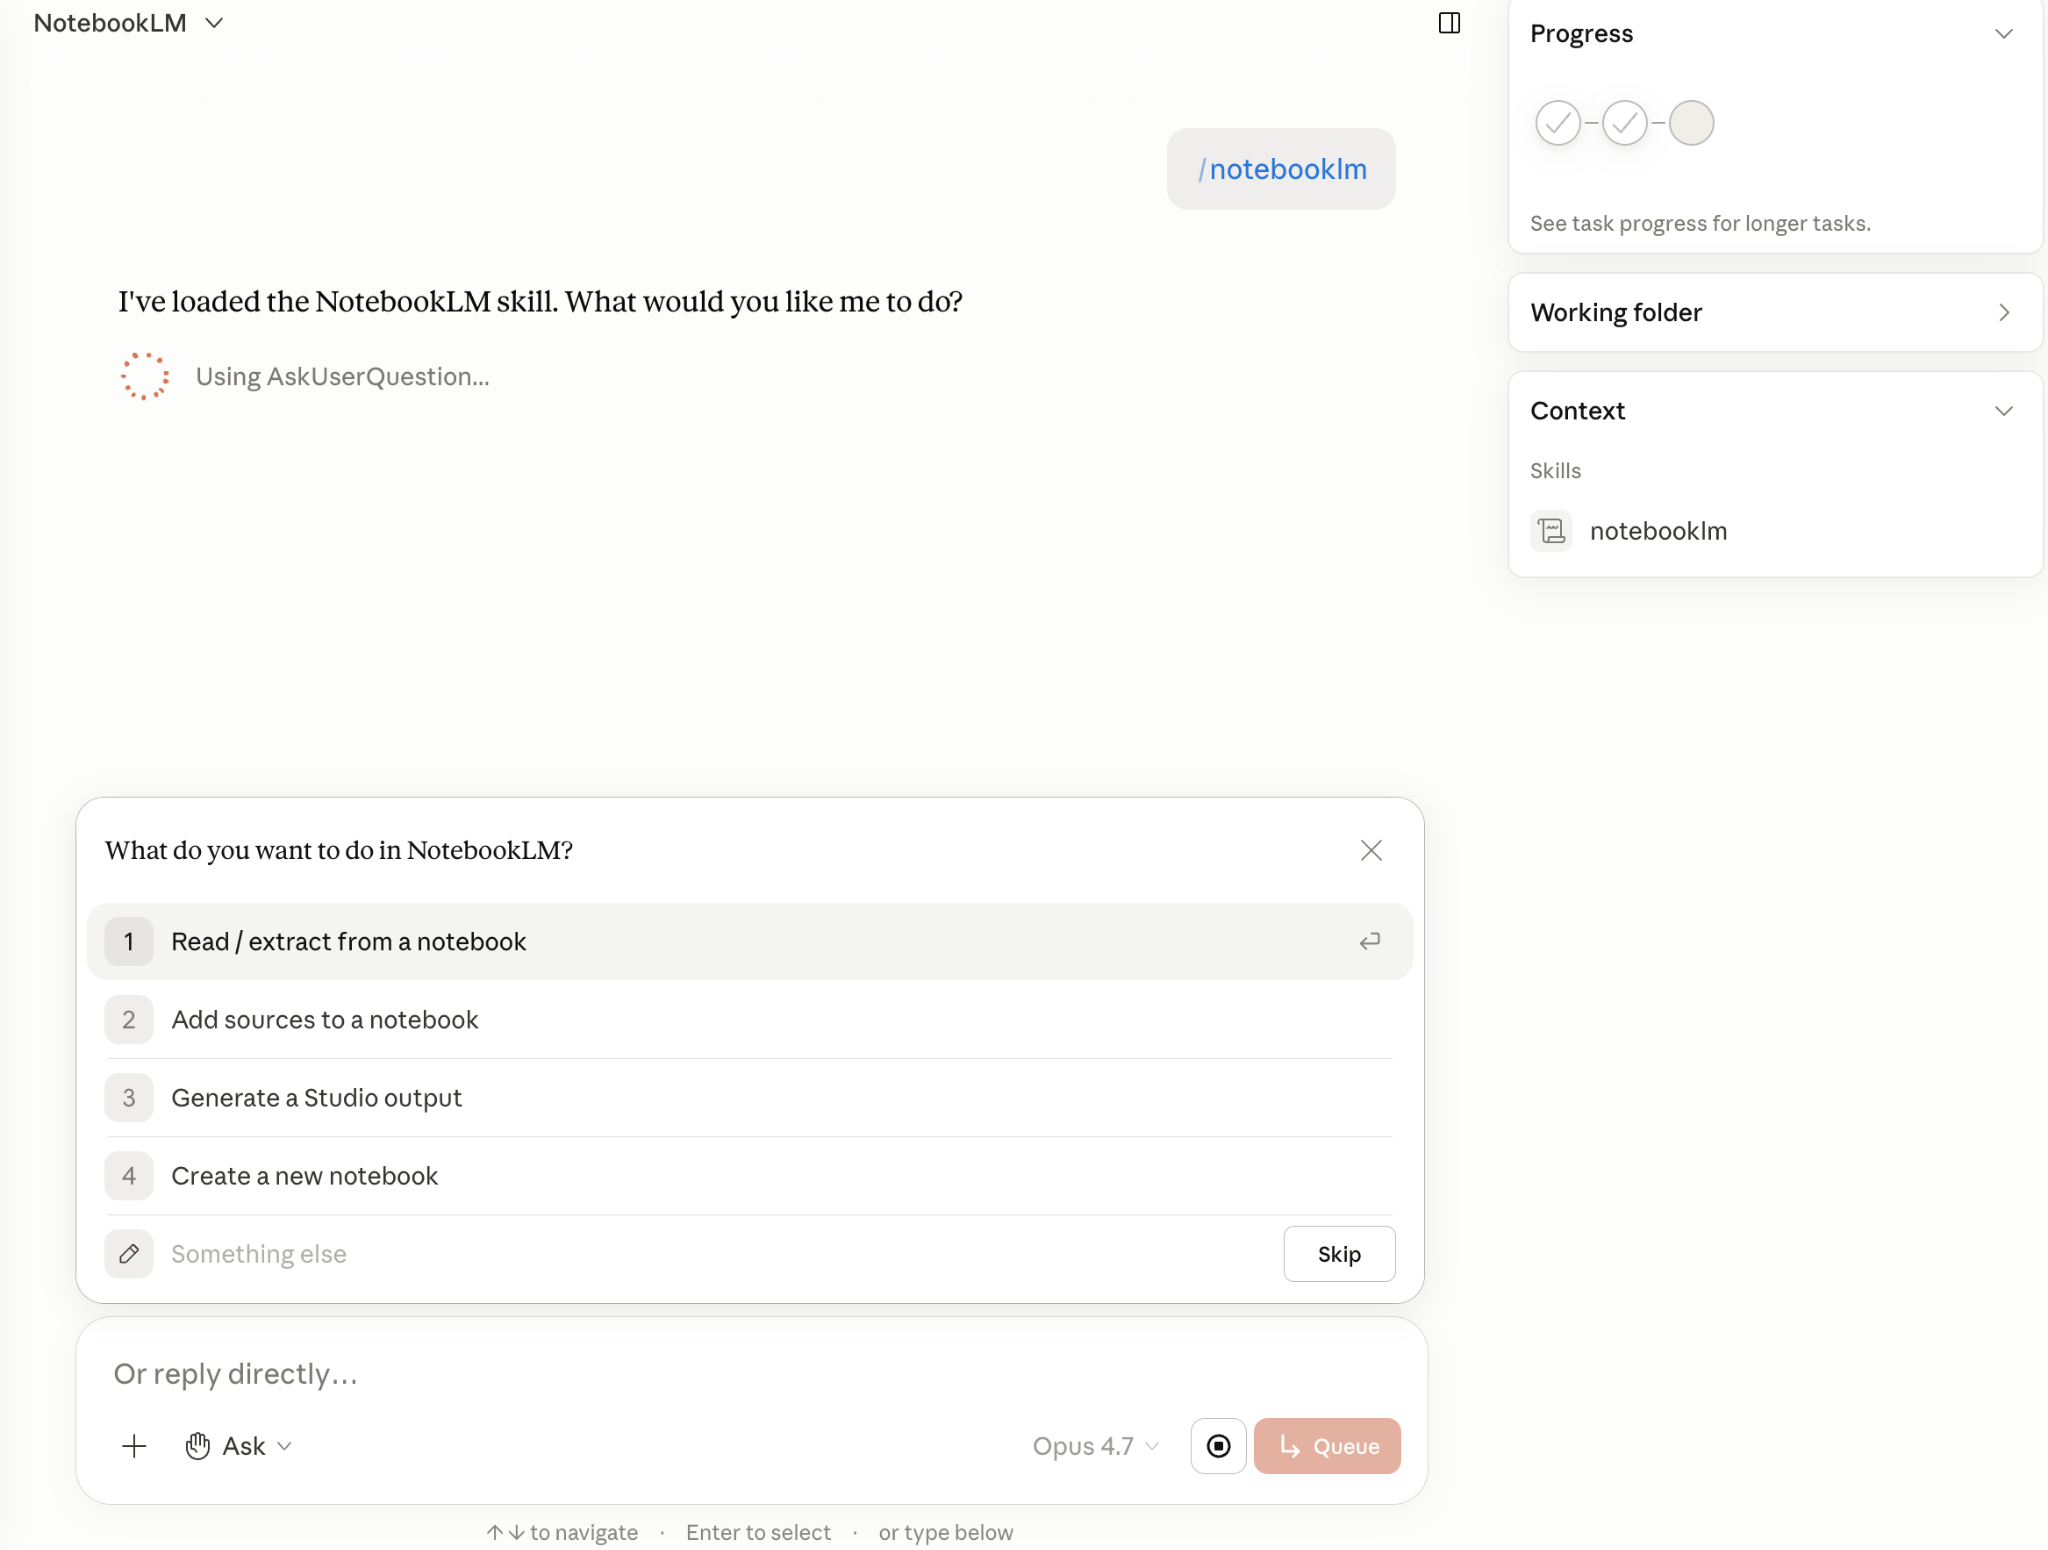
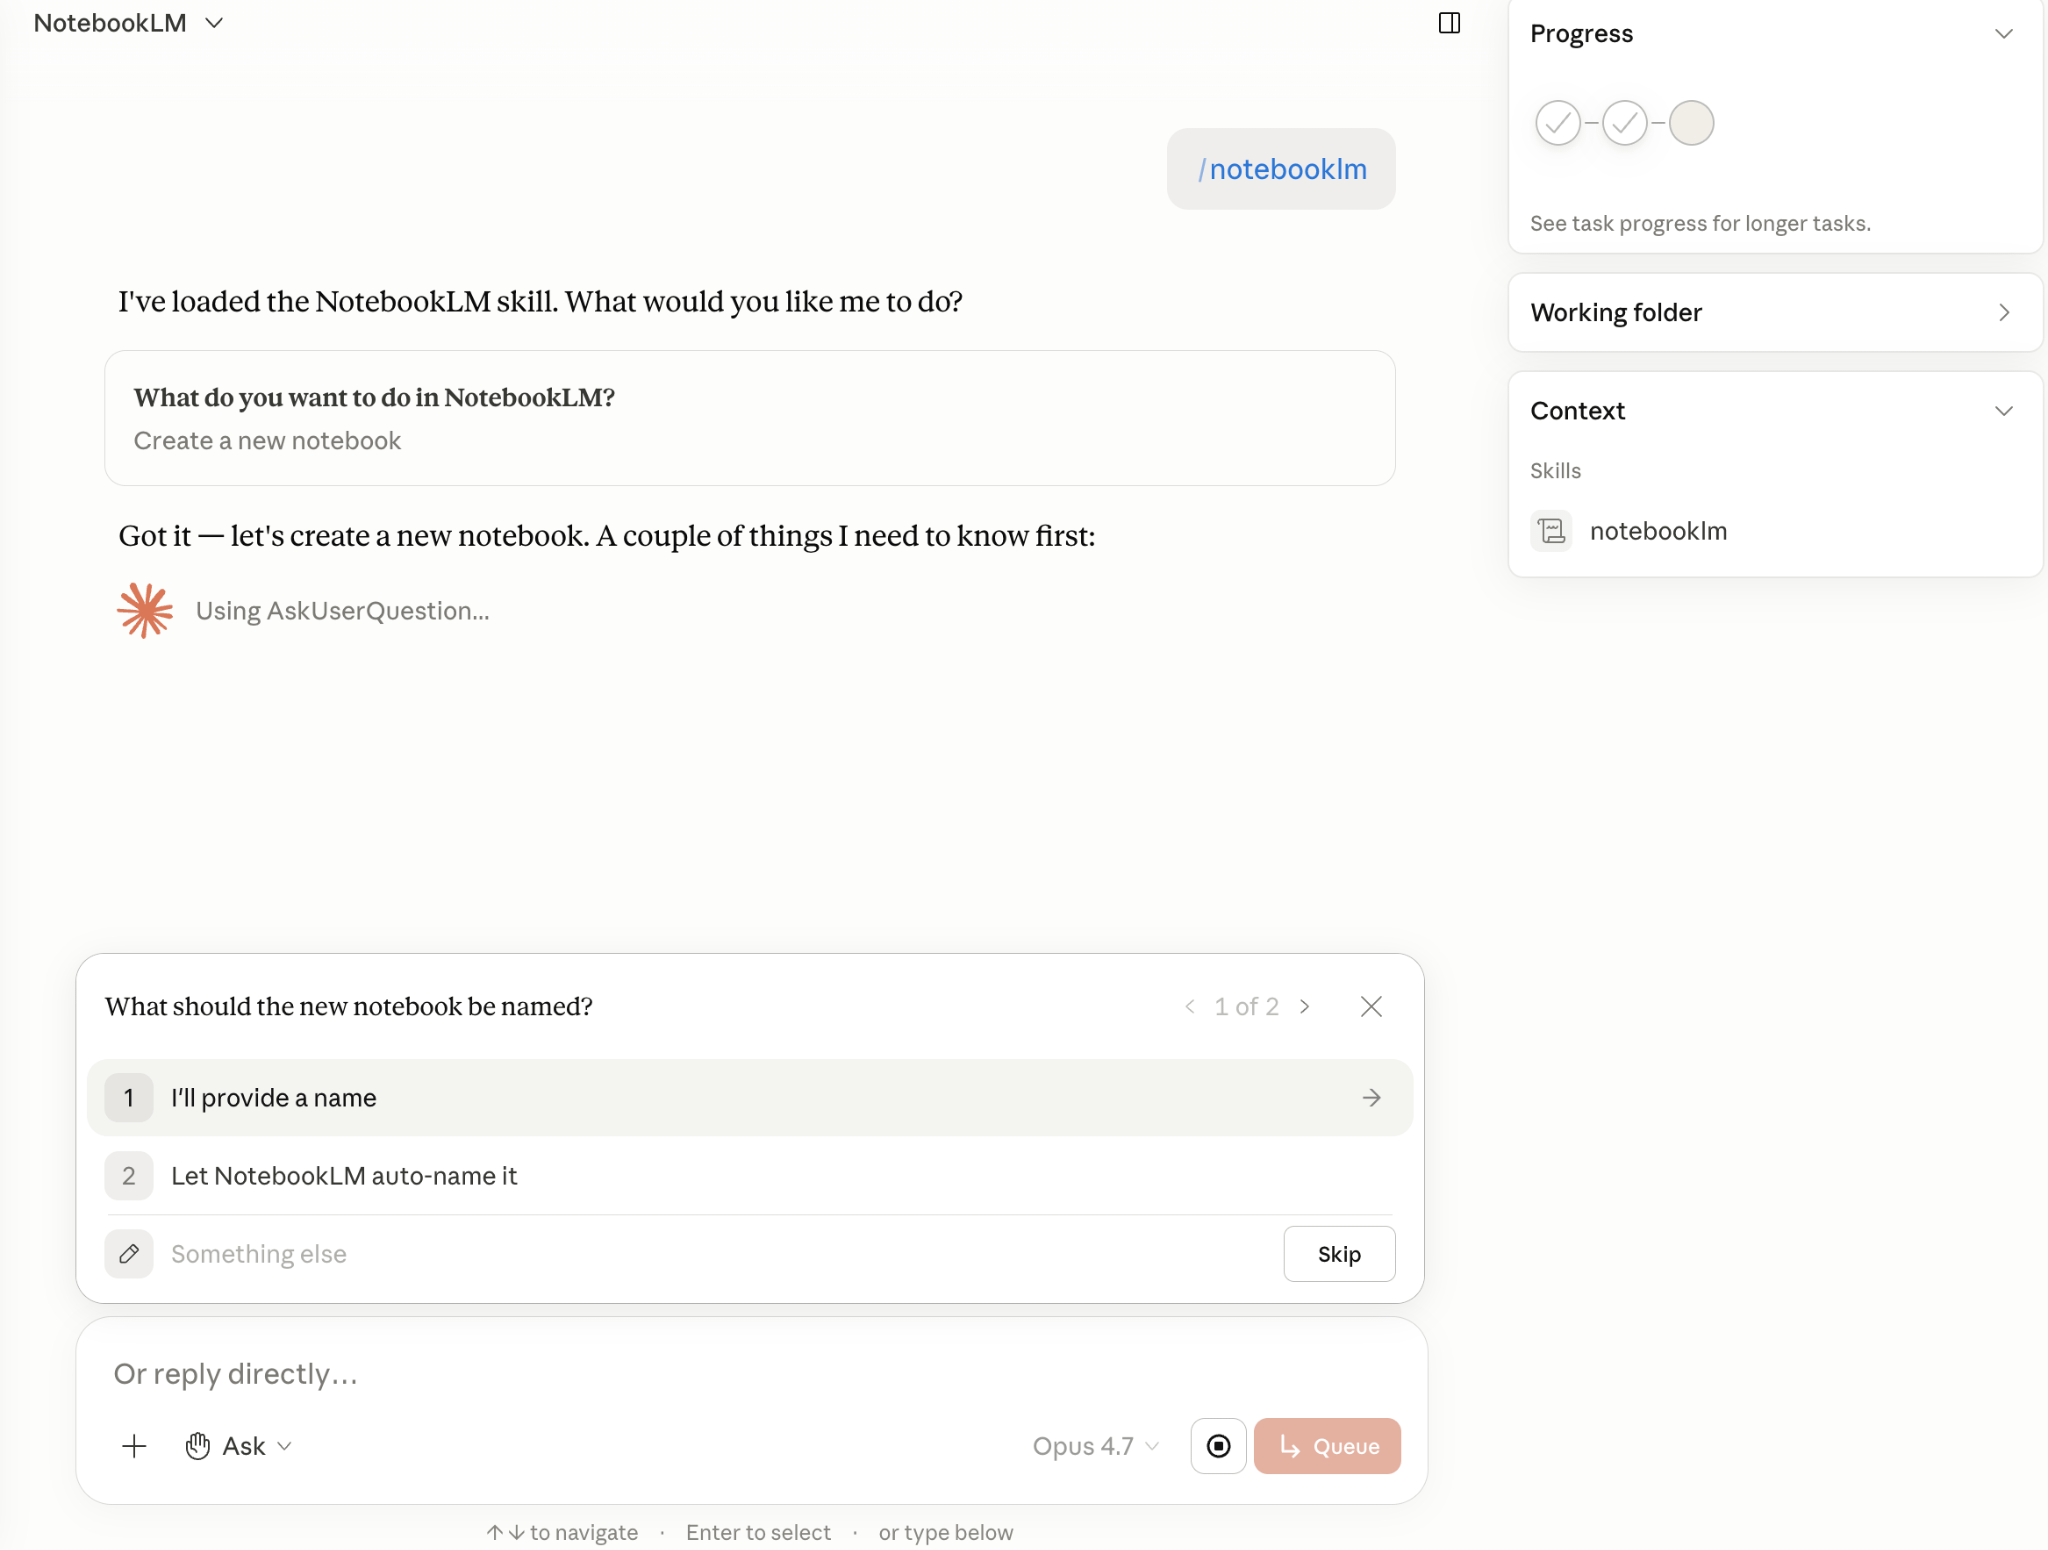
Let’s pick Create a new notebook.
Question 1: Name
The skill asks if you want to name it yourself or let NotebookLM auto-name it. I named mine Prompt Engineering Course.
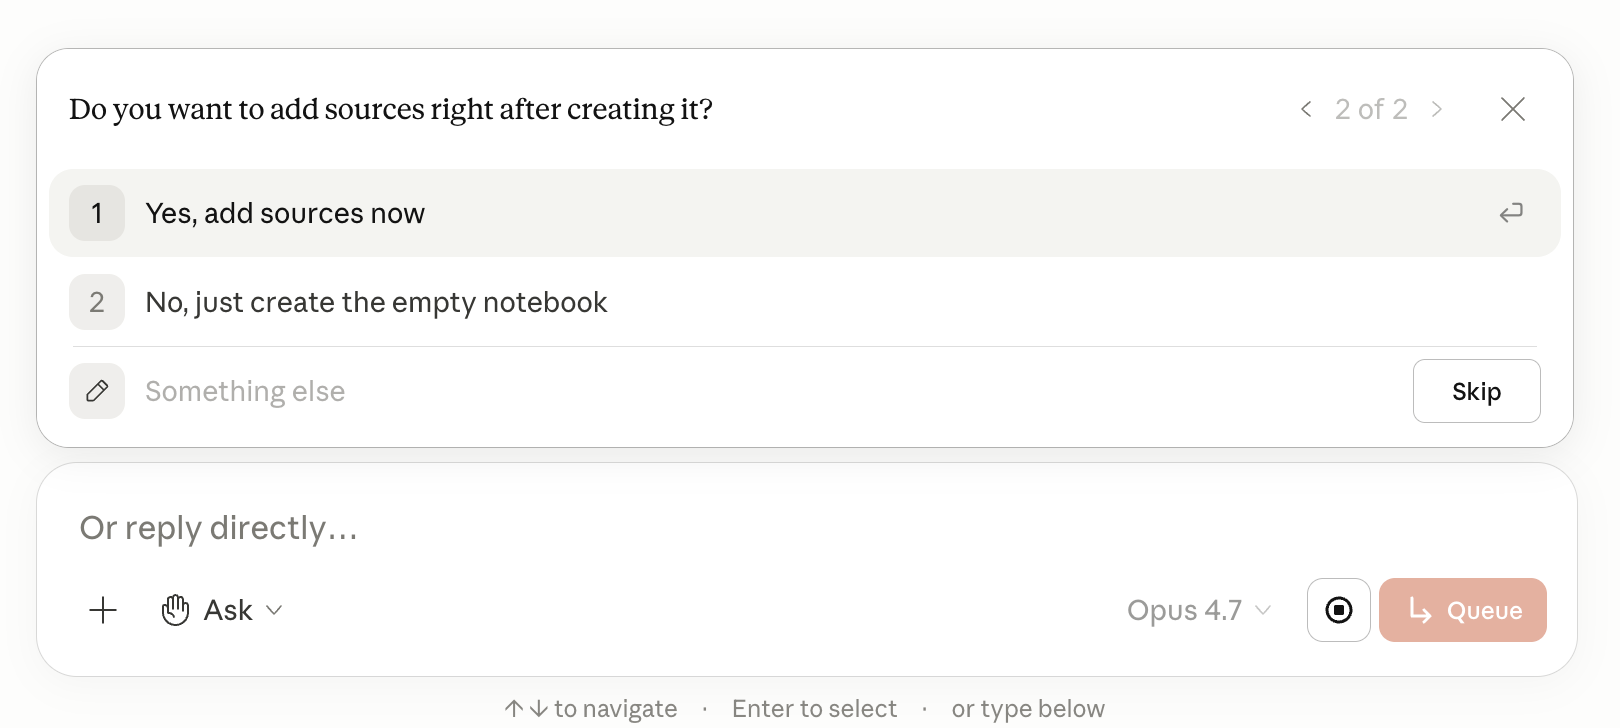
Question 2: Sources
The second question will ask you about the sources.
I clicked Yes, add sources now.
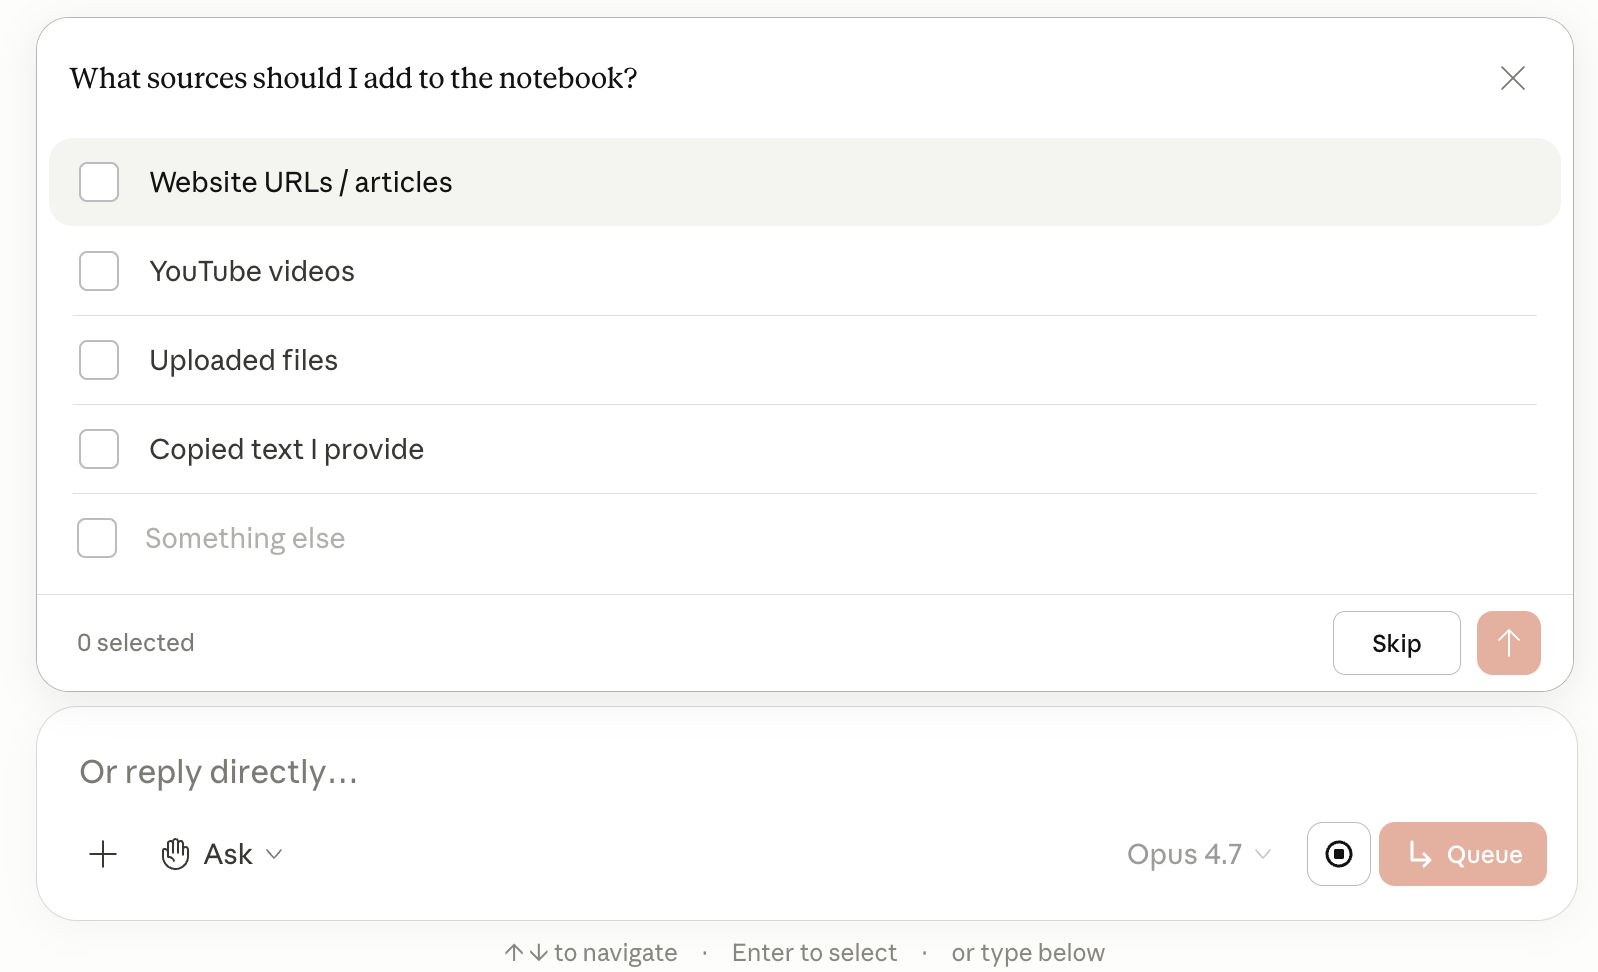
Five options: URLs, YouTube, uploaded files, copied text, or something else.
I dropped into the Anthropic prompt engineering course on YouTube:
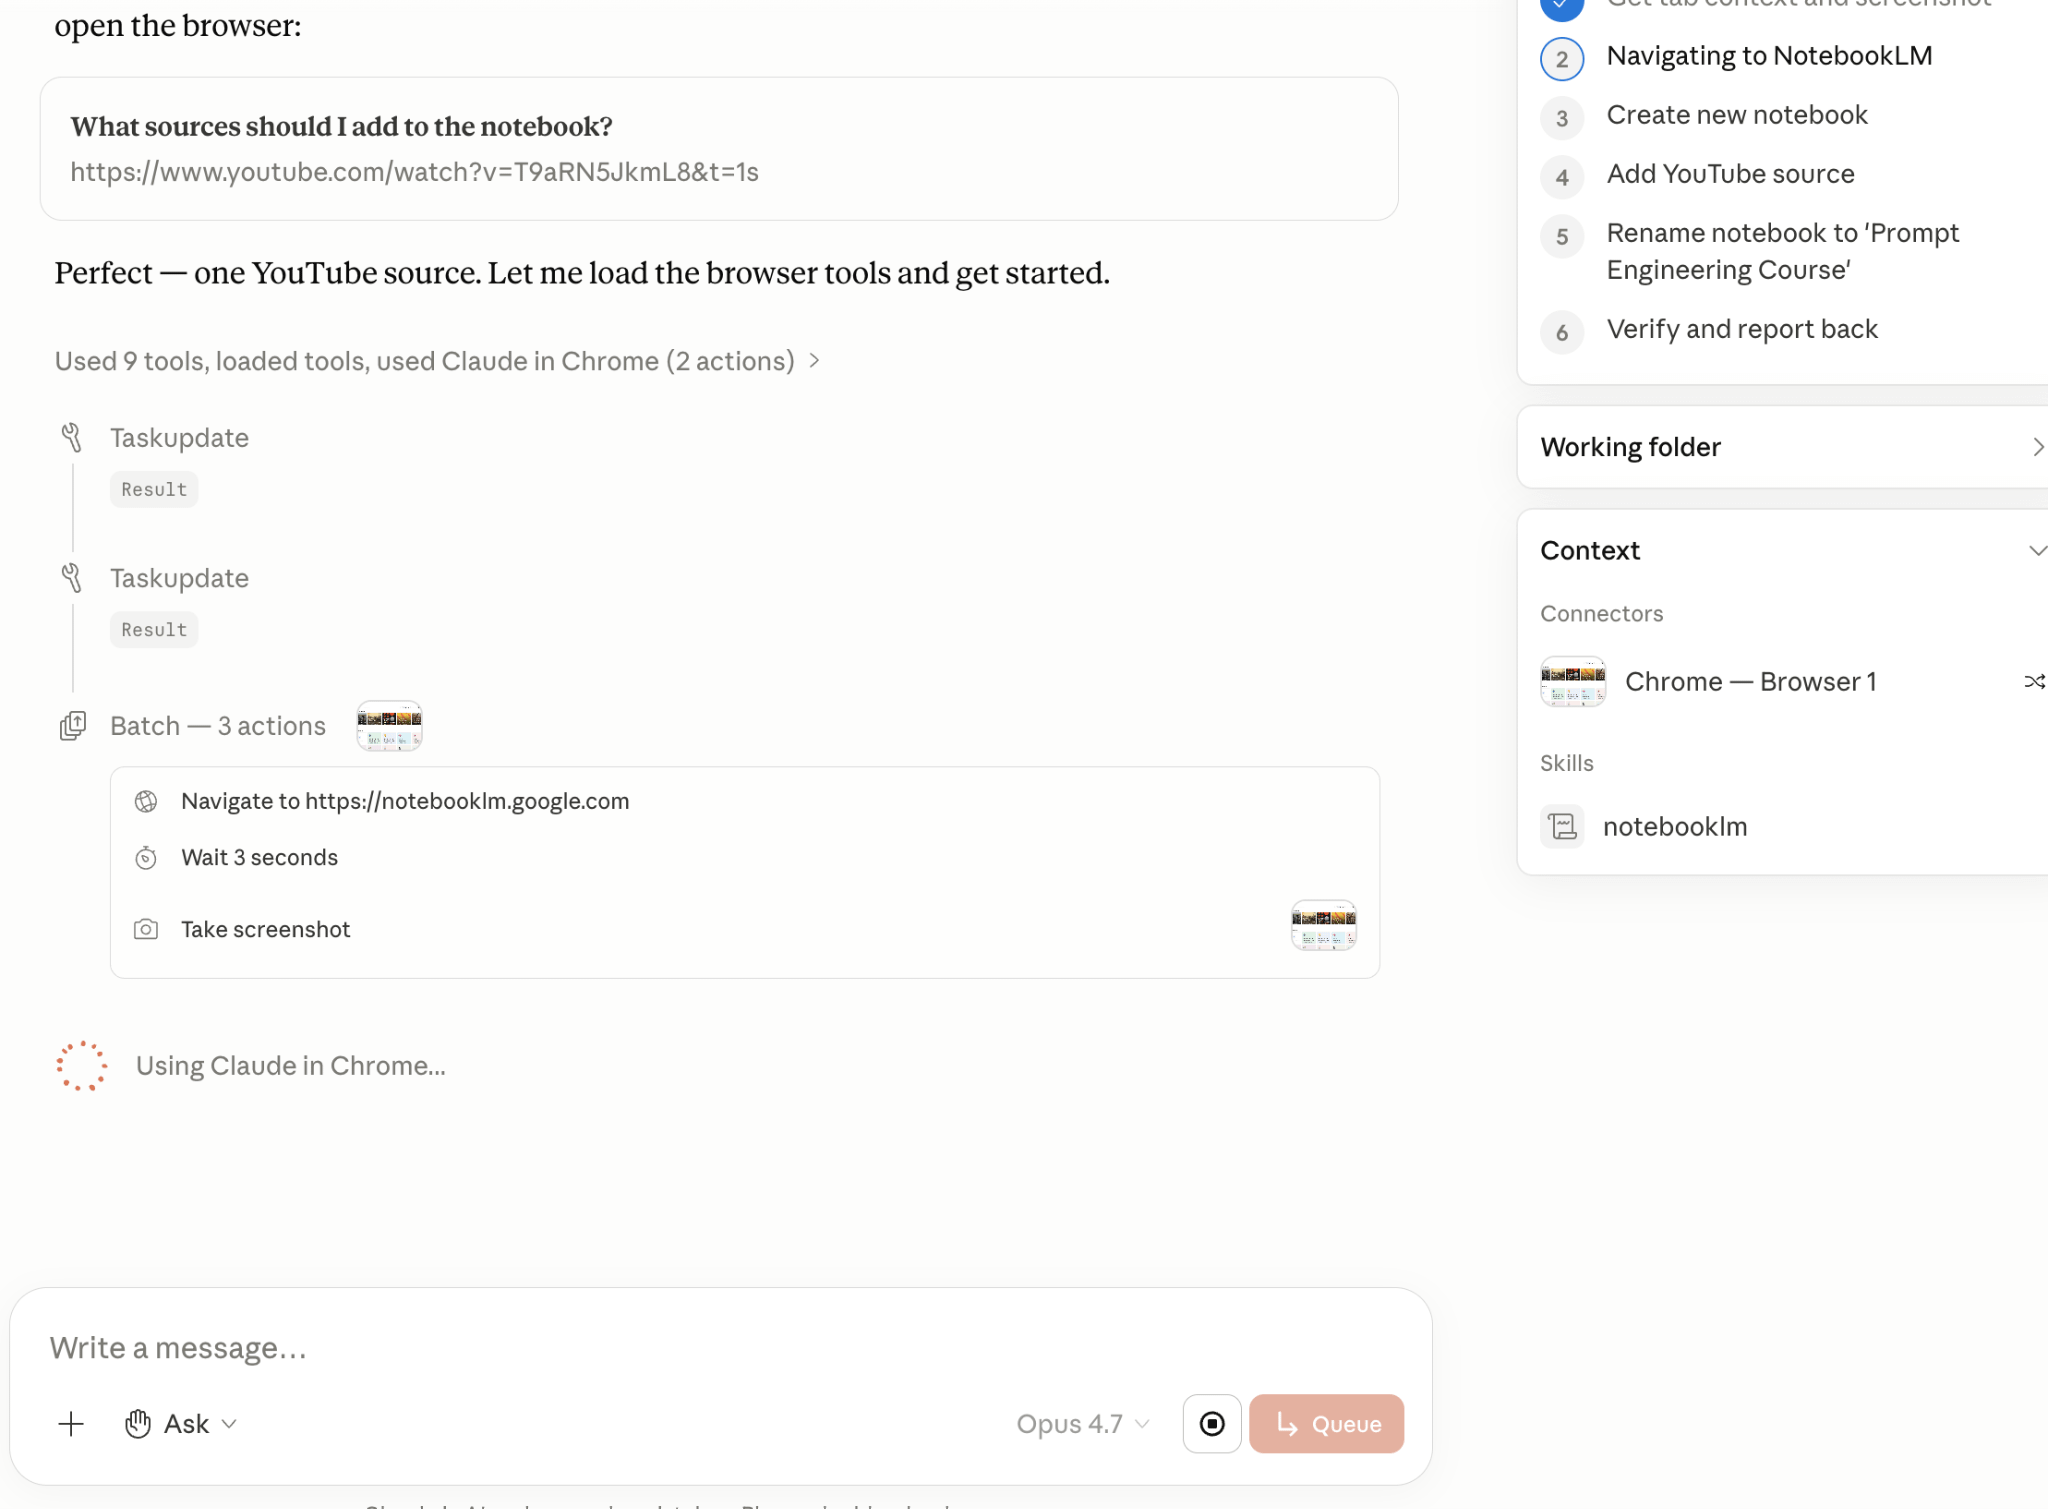
Next, it loaded the source and took control of my Mac.
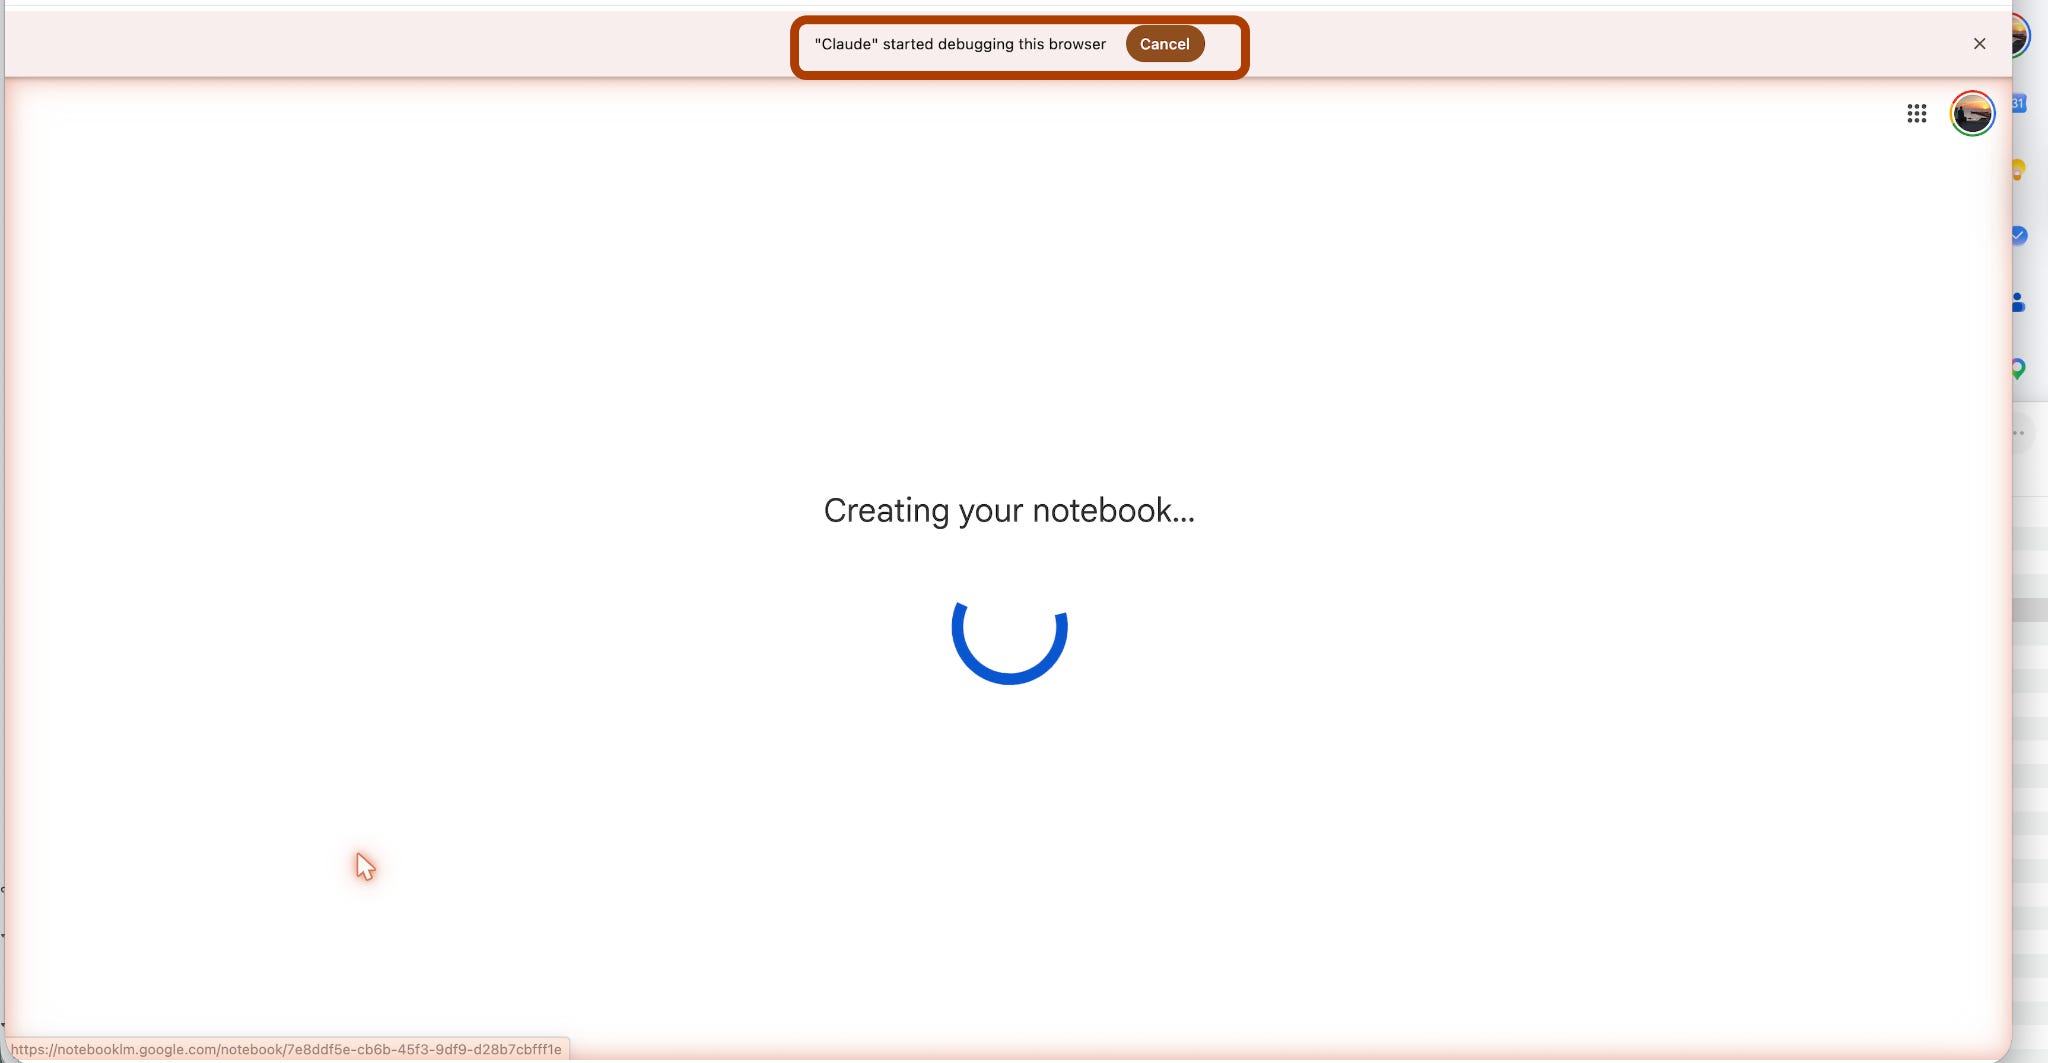
A red border appears at the top of the screen.
That is Claude debugging the browser. You watch it click, type, wait, screenshot. Same way you would do it, just faster.
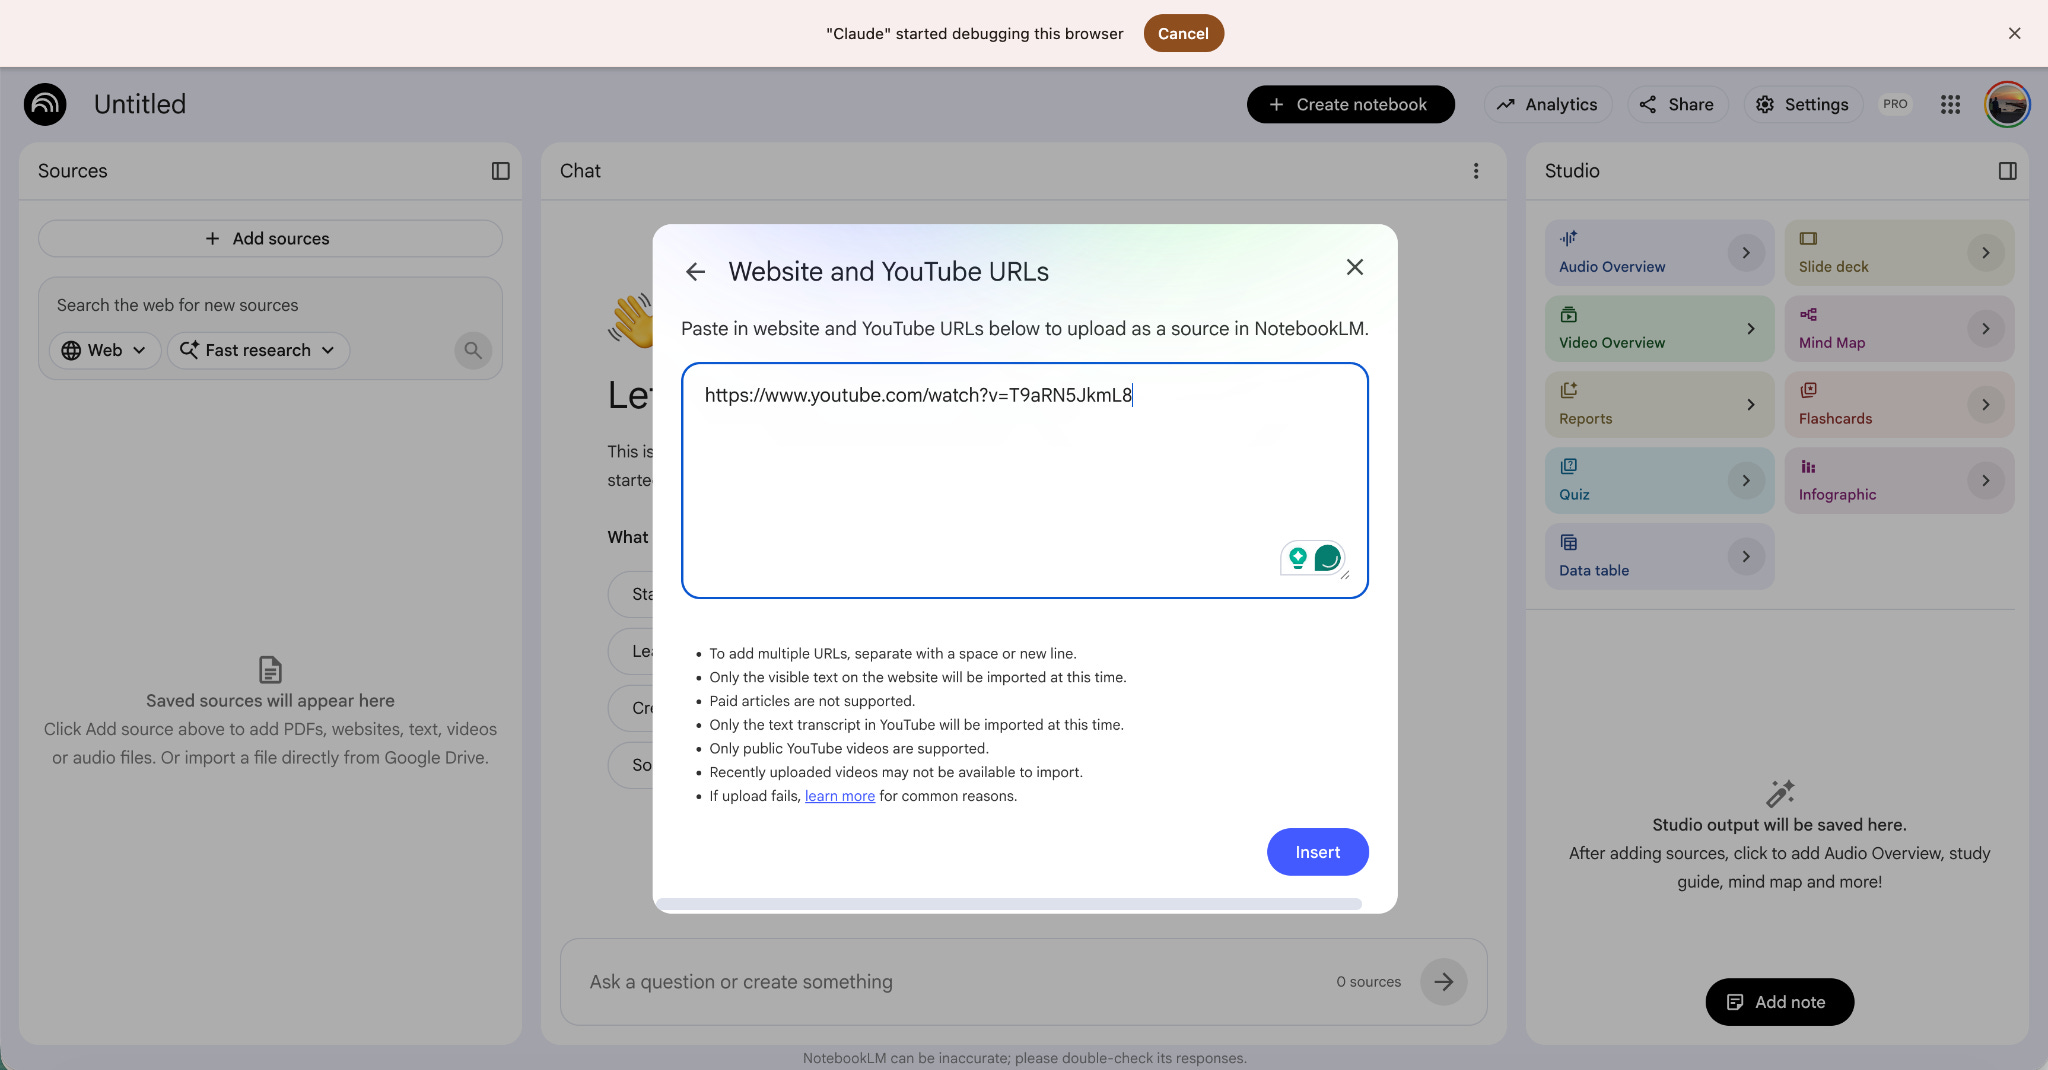
It pasted the YouTube link into the source box.
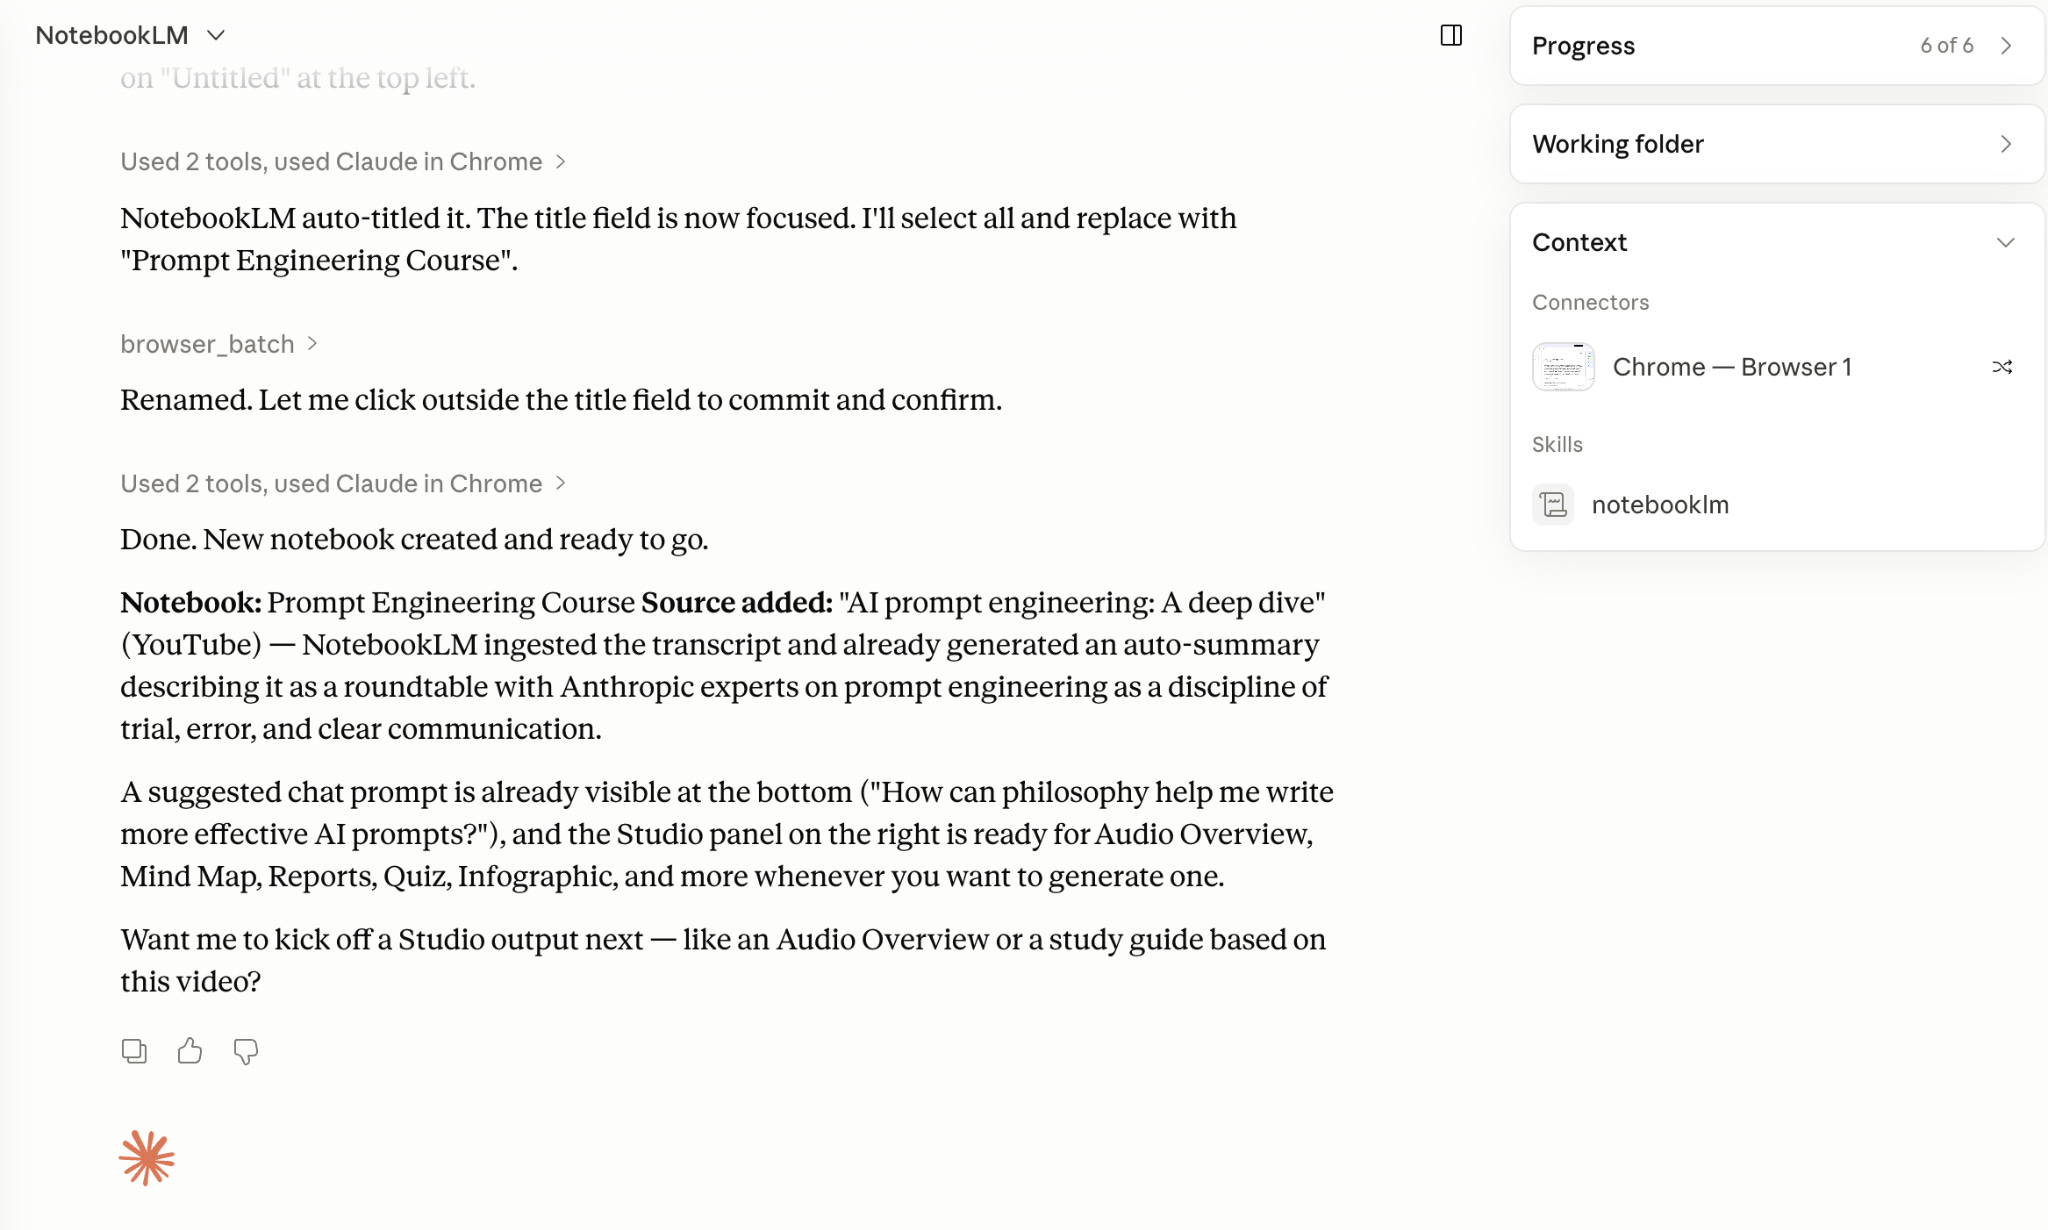
NotebookLM ingested the transcript and auto-generated a summary describing the video as a roundtable with Anthropic experts on prompt engineering.
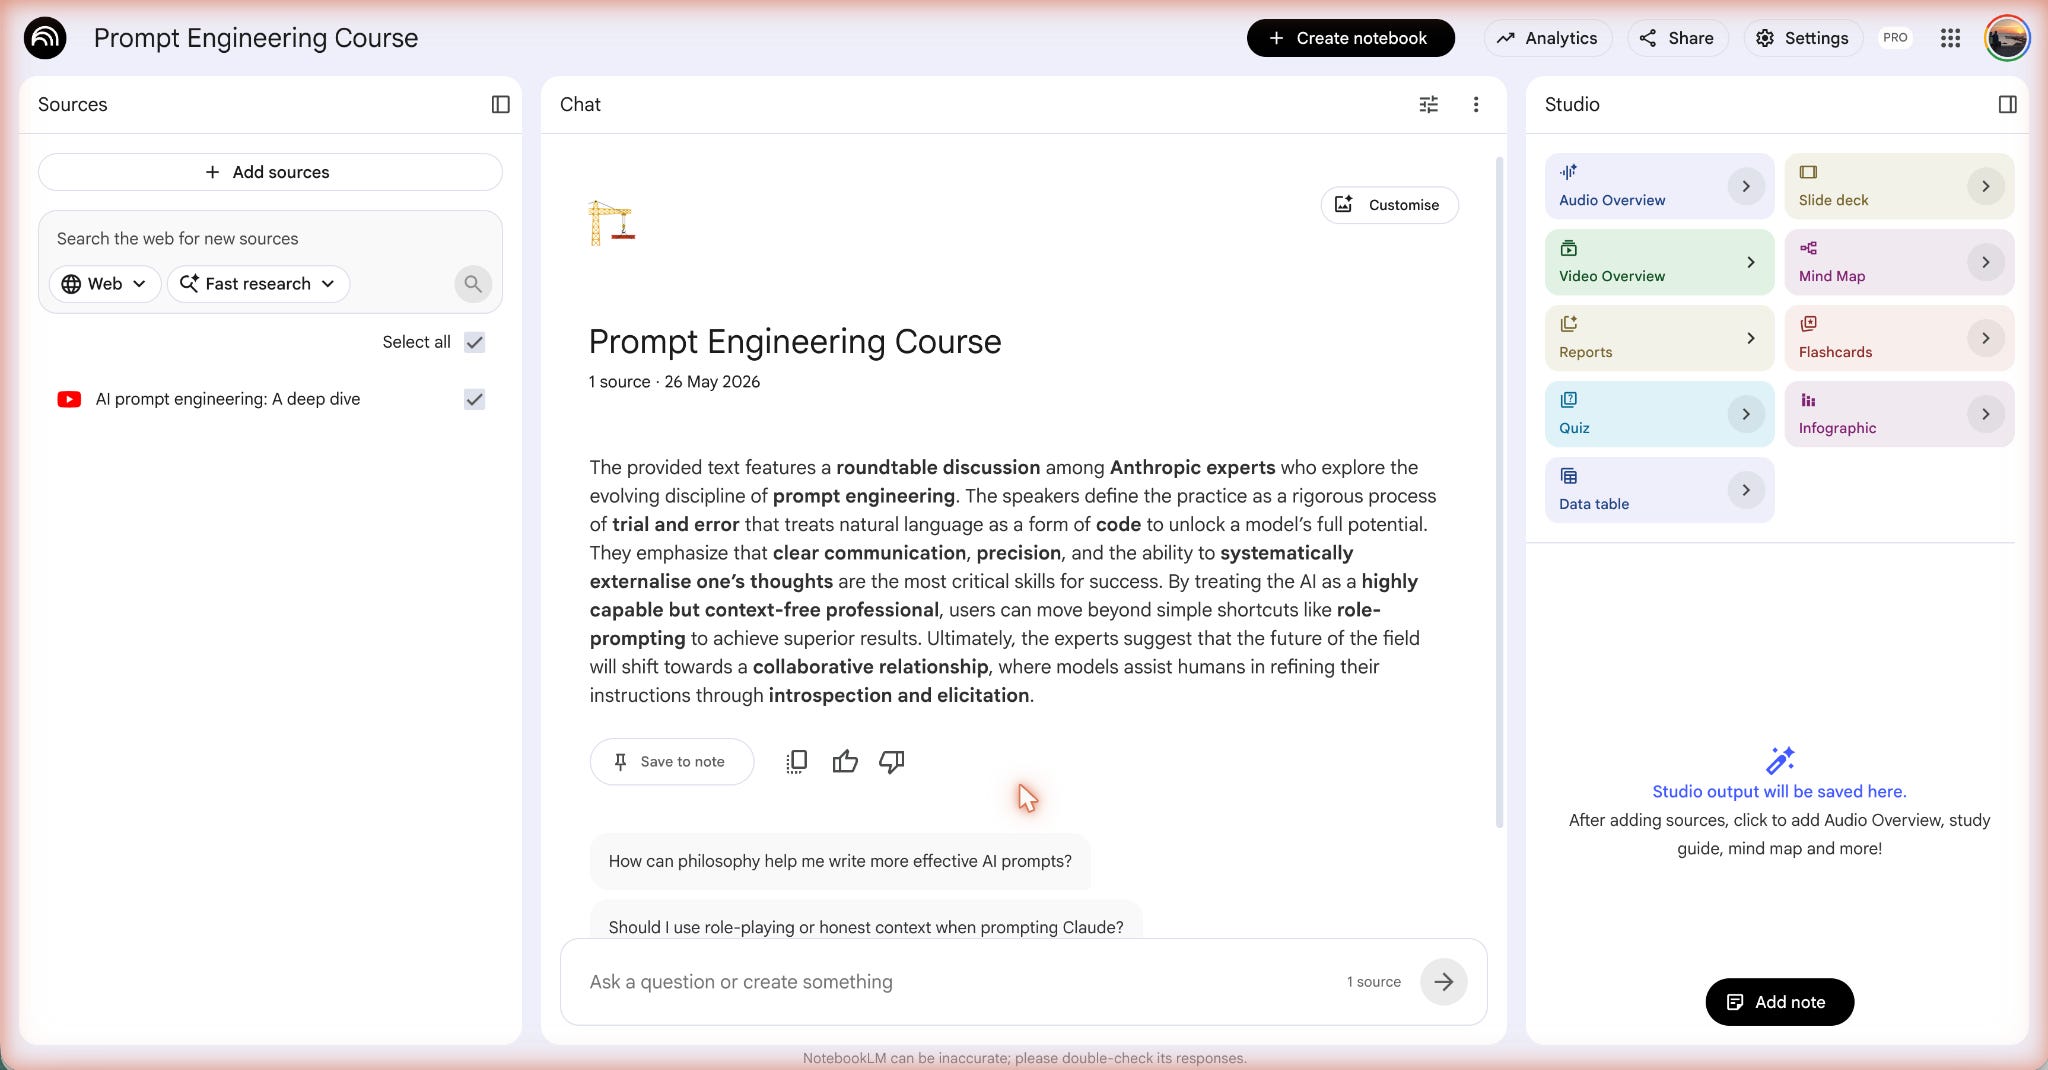
Done. Notebook live.
Audio Overview, Mind Map, Reports, Quiz, Infographic, all one click away in the Studio panel.
So here are 3 use cases I love.
Use Case 1: Weekly Job Interview Prep
The week before an interview, most people do the same thing. Open the company website, read the About page, and maybe check LinkedIn. Walk in underprepared and get caught off guard by something you should have known.
The fix is better synthesis of more sources than you can read.
Step 1. Train NotebookLM with Deep Research
In Cowork, type:
/notebooklm
Create a new notebook called “Stripe Interview”. Then run Deep Research with this prompt:
I have an interview at Stripe. Find sources that cover:
Company history, mission, and recent strategic moves
Latest product launches and roadmap signals from the last 12 months
Public statements from the CEO and senior leadership (podcasts, conferences, X)
Financial position, fundraising, or earnings if public
Competitor landscape and how Stripe positions against them
Glassdoor reviews, common interview formats, and what current employees say about culture
Prioritize sources from the last 12 months. Mix press releases, podcast transcripts, news articles, official advisories, and employee reviews.
Cowork takes over the browser. Red border on top. Opens NotebookLM, creates the notebook, clicks Discover sources, pastes the prompt, and hits run.
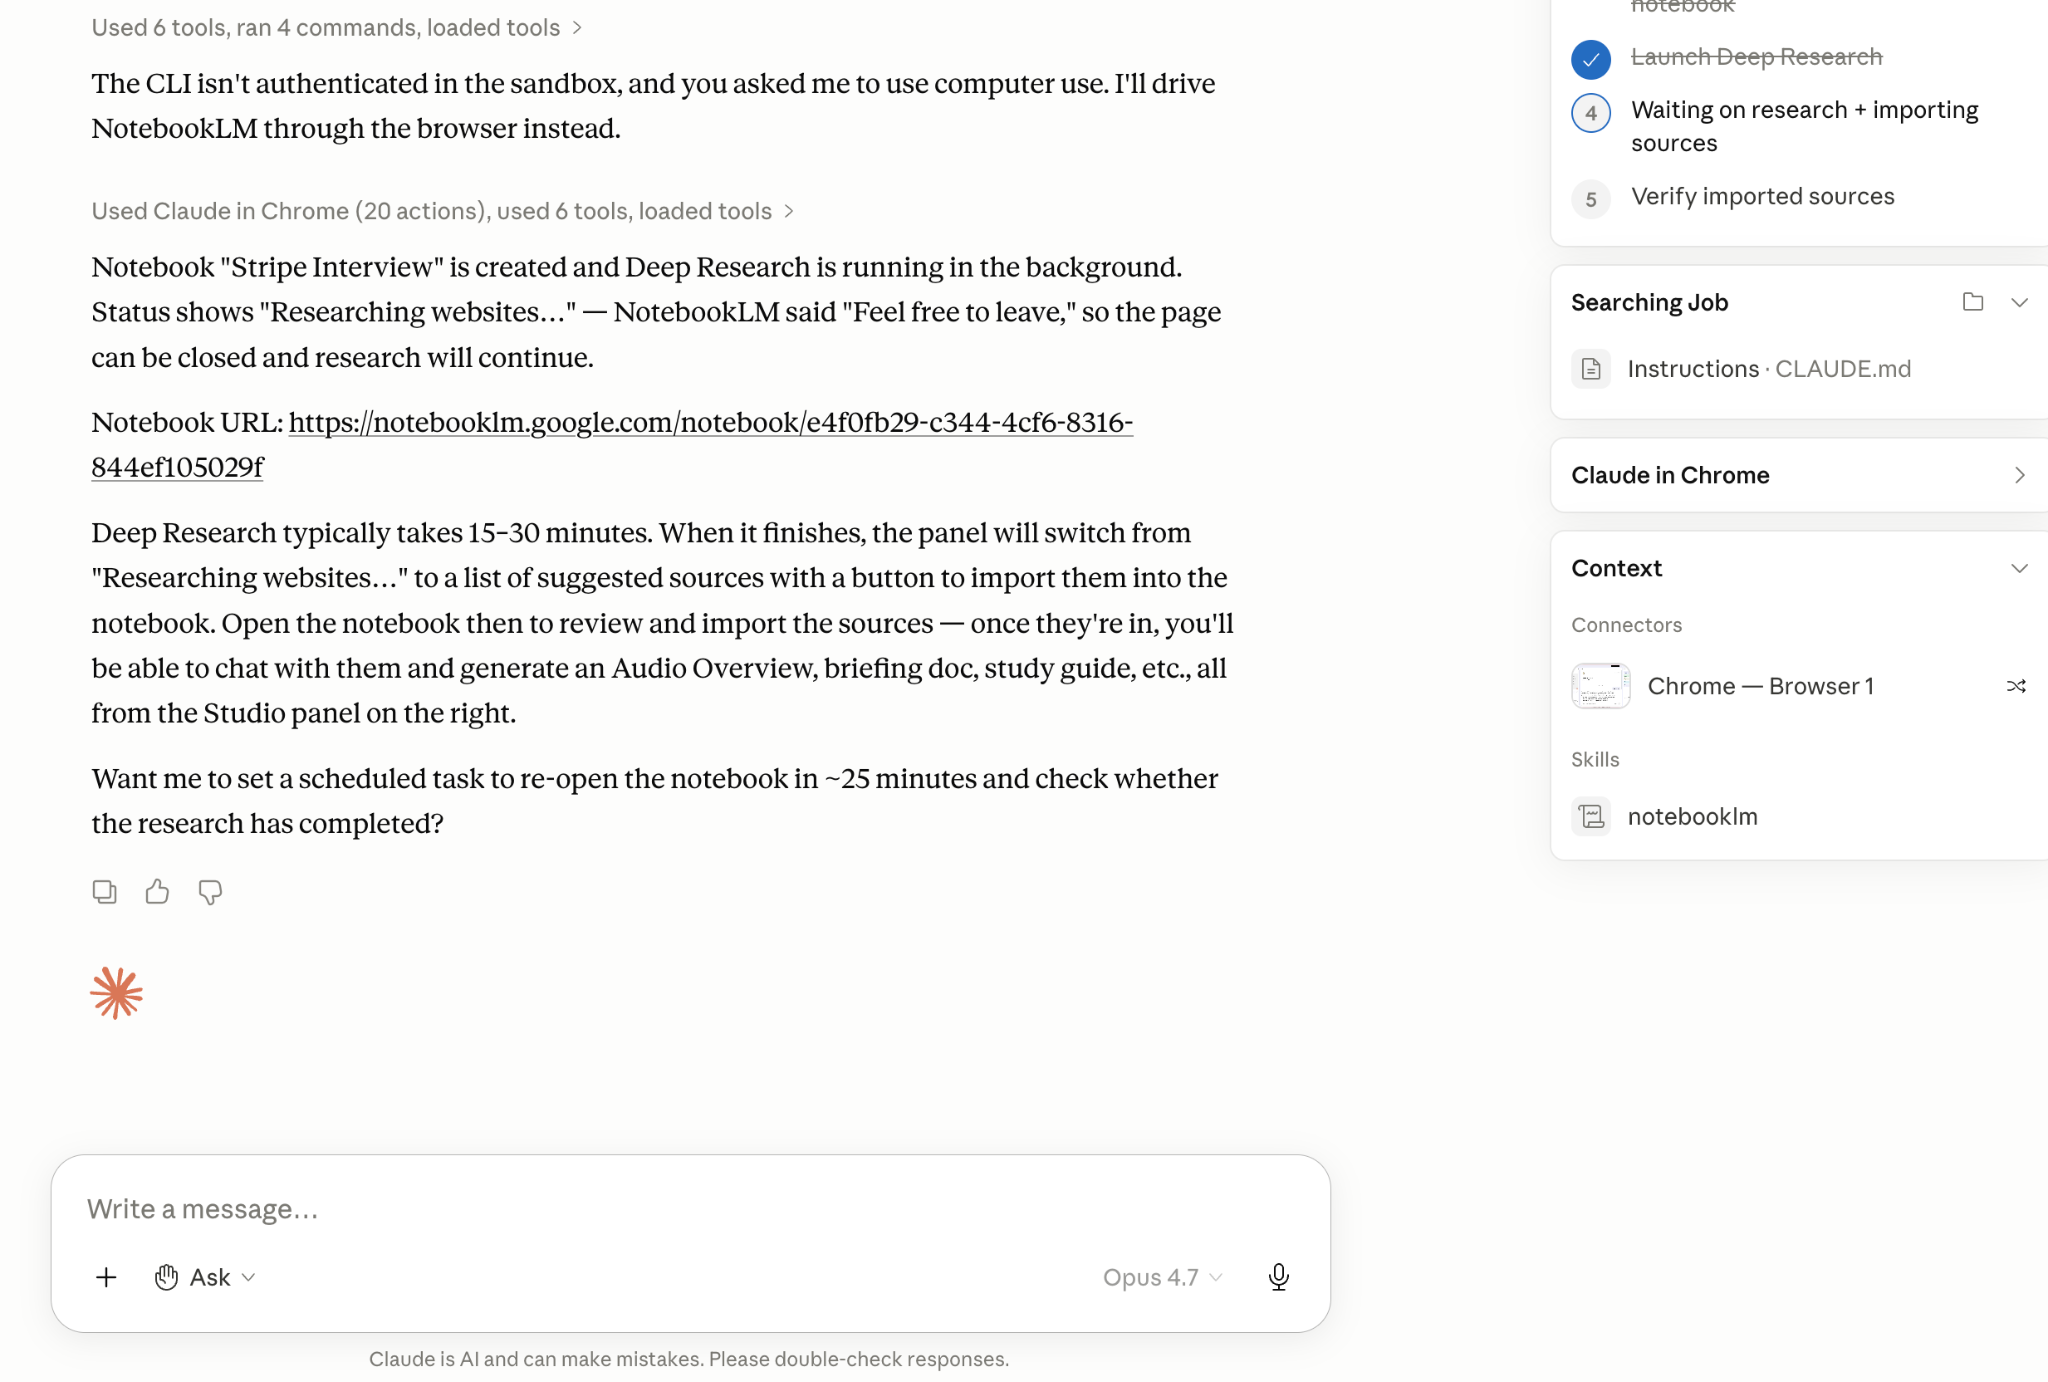
After some minutes, the research was done.
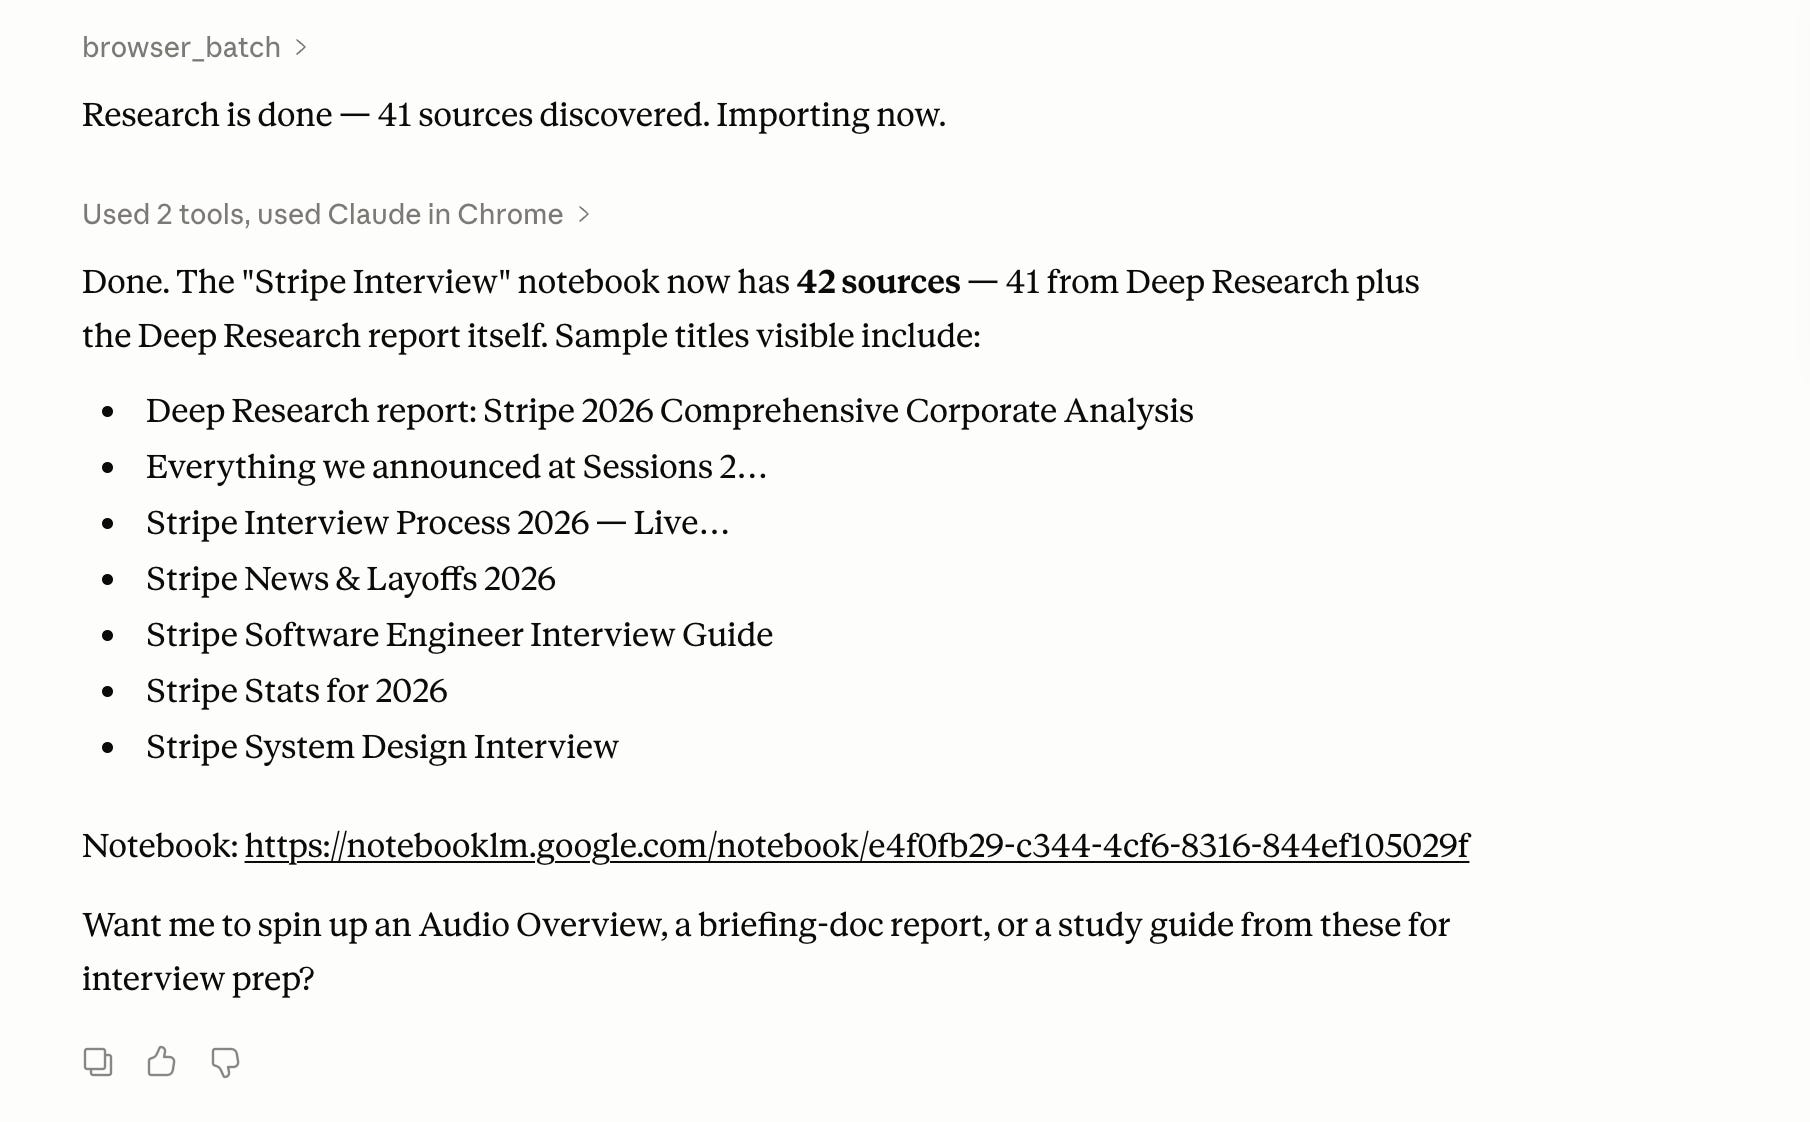
And the notebook is ready.
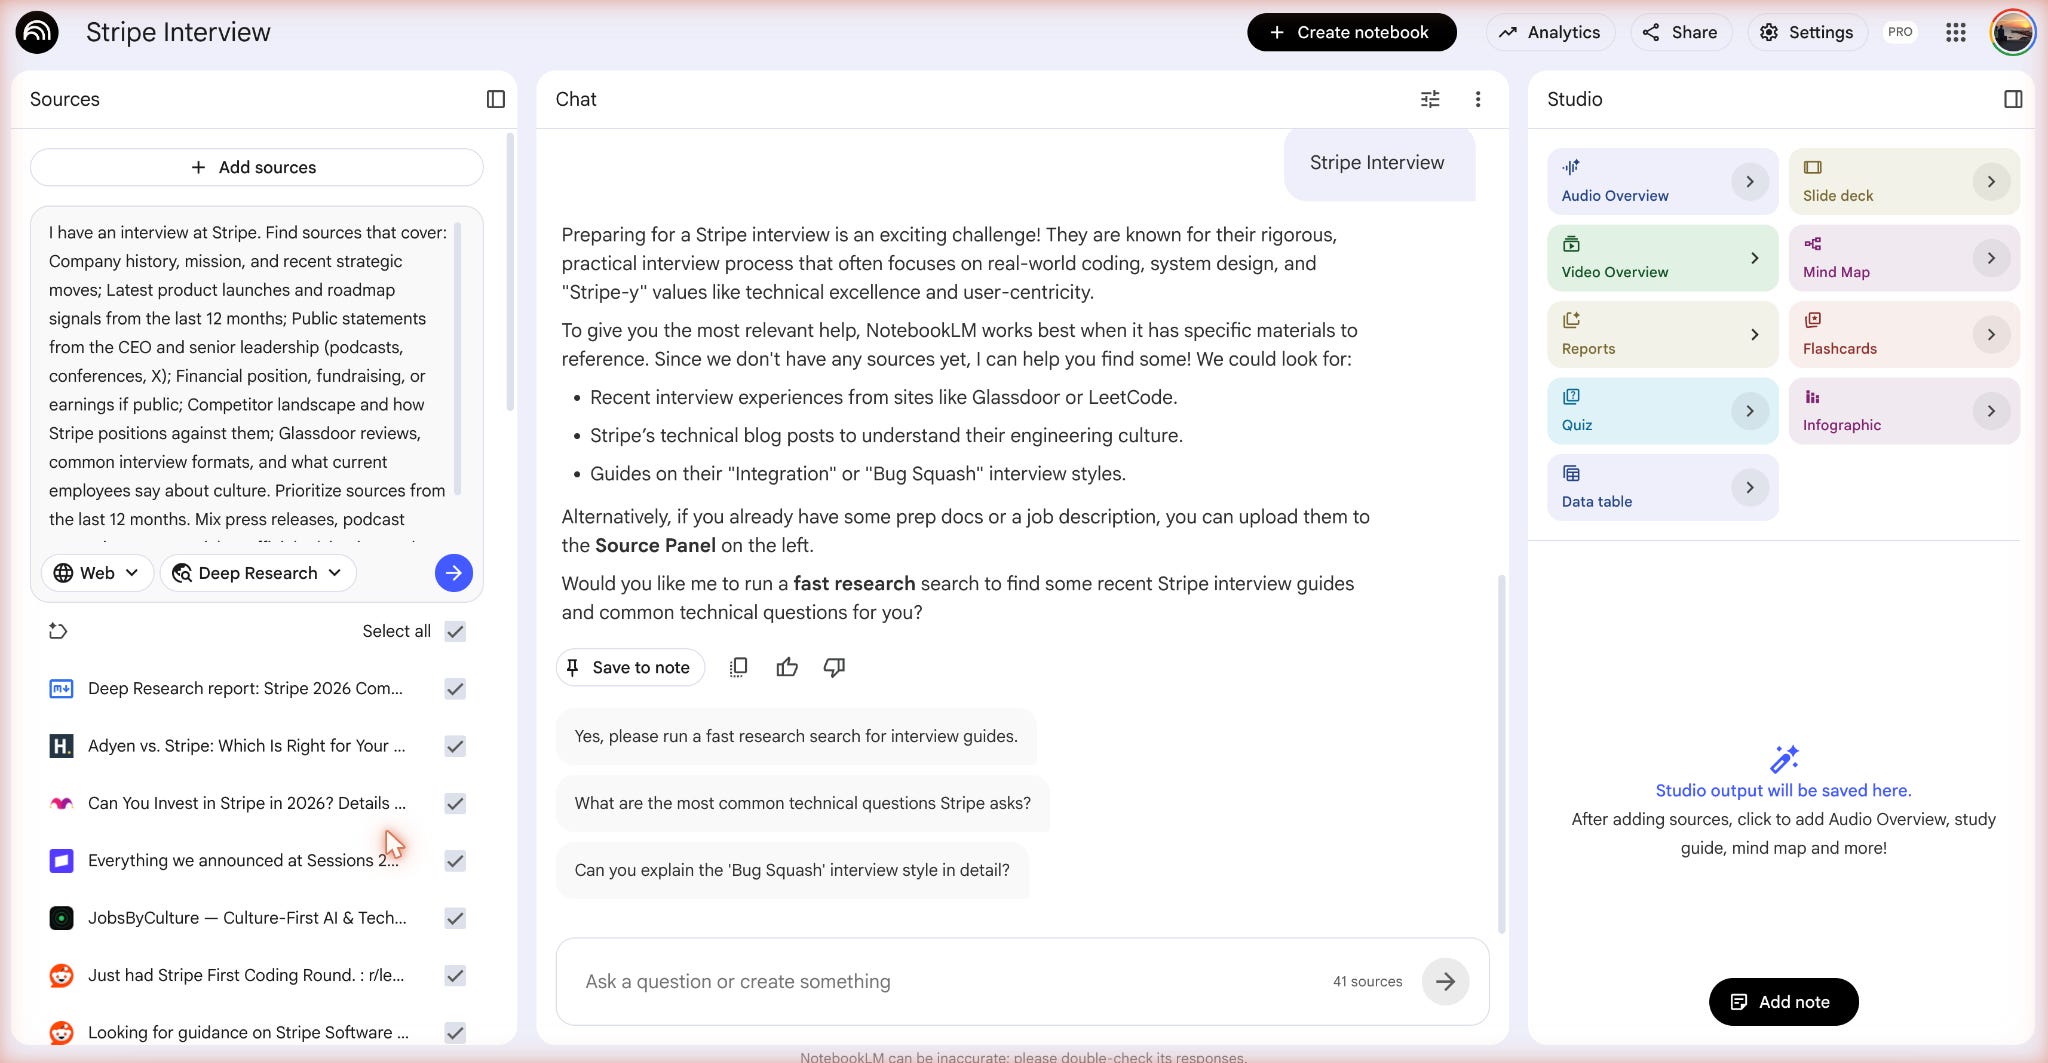
Step 2. Cowork Setup
Create a folder on your computer called interviews. Inside, one subfolder per company.

The artifacts folder holds NotebookLM outputs.
Give Cowork access to interviews.
The notebook from Step 1 holds the knowledge. The folder is the landing strip for what comes next.
Step 3. Generate Artifacts
In the same Cowork chat, type:
/notebooklm
Open the “Stripe Interview” notebook. In the Studio panel, generate:
A Briefing Doc covering company narrative, recent strategic priorities, and leadership focus areas
A Quiz with likely interview questions, each anchored in something the company has publicly said
An FAQ on common pitfalls from Glassdoor reviews and negotiation pressure points
Save all three to /interviews/stripe/artifacts/.
And generate an artifact with three tabs;
1- Briefing Doc
2- Quiz
3- FAQ for common pitfalls
And it started building.
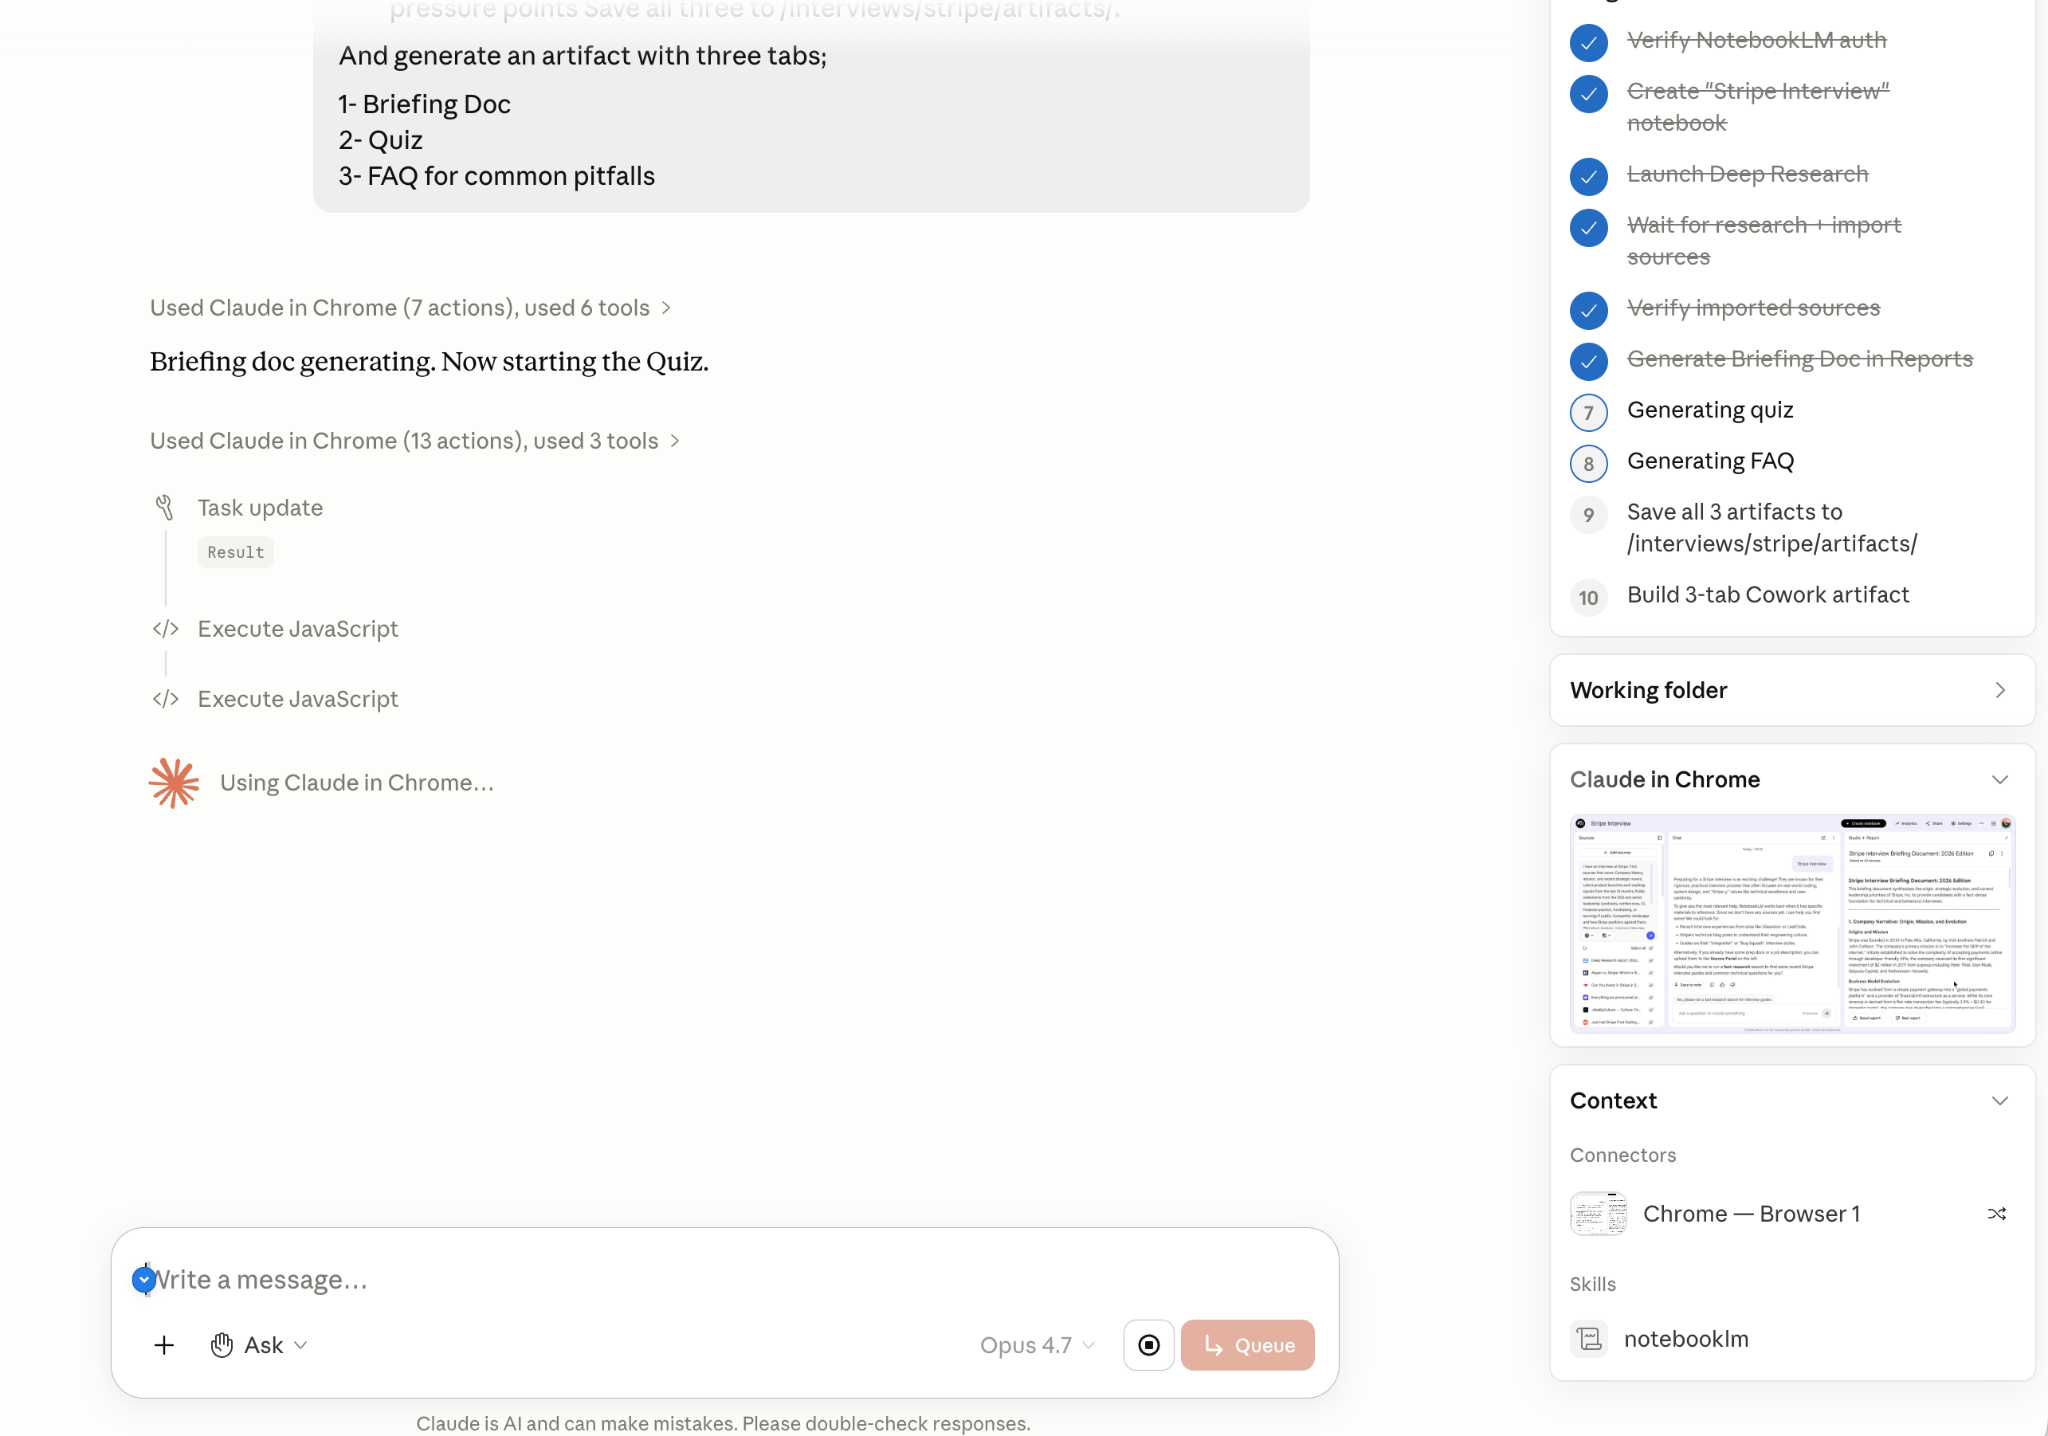
Here is the artifact after a few adjustments.
Step 4. Schedule
Turn it into a habit. Every interview is prepped automatically.
Create a file called /interviews/upcoming.md. Drop your upcoming interviews in it like this:
- Stripe, 2026-07-15
- Anthropic, 2026-07-22
- Notion, 2026-08-03
In Cowork, open Schedule. Create a new task with this prompt:
Every morning at 9 AM, check /interviews/upcoming.md for any interview 7 days away.
For each interview 7 days out:
Create /interviews/{company}/artifacts/.
Use /notebooklm to create a notebook named “{company} Interview”.
Run Deep Research with this prompt, replacing the company name: “I have an interview at {company}. Find sources covering company history and strategy, latest product launches and roadmap from the last 12 months, public statements from leadership, financial position, competitor landscape, Glassdoor reviews, and interview formats. Prioritize the last 12 months. Mix press releases, podcasts, news, and employee reviews.”
Generate Briefing Doc, Quiz, FAQ. Save to /interviews/{company}/artifacts/.
And create an artifact with three tabs based on this briefing.
Set frequency to daily, 9 AM.
That is the whole thing.
You walk into an interview knowing the company’s last twelve months better than half the people already working there.
The next two use cases are exclusive to paid subscribers
Use Case 2 — Weekly Language Feedback Loop: turn Claude + NotebookLM into a tutor that drills your real mistakes every week. This is just one lesson from my full video course on learning a foreign language with Claude. The moment you upgrade, you’ll receive an email unlocking free access to this and other courses.
Use Case 3 — Pre-Trip Destination Companion: most AI travel advice is stale, pulled from old training data. This builds a brief from fresh sources, so you walk into any city this summer knowing what's actually true today. You’ll also get my complete guide on using AI to plan trips.
Become a paid subscriber and you get both use cases, the full language course, and the AI travel guide, everything you need to learn a language and prepare for your summer trip.
Use Case 2. Daily Language Feedback Loop
Frank’s language DNA profile system turns Claude into a tutor who knows you.
You record a conversation, drop the transcript and your .md profile into Cowork, and Claude gives you feedback tailored to your level and preferences.
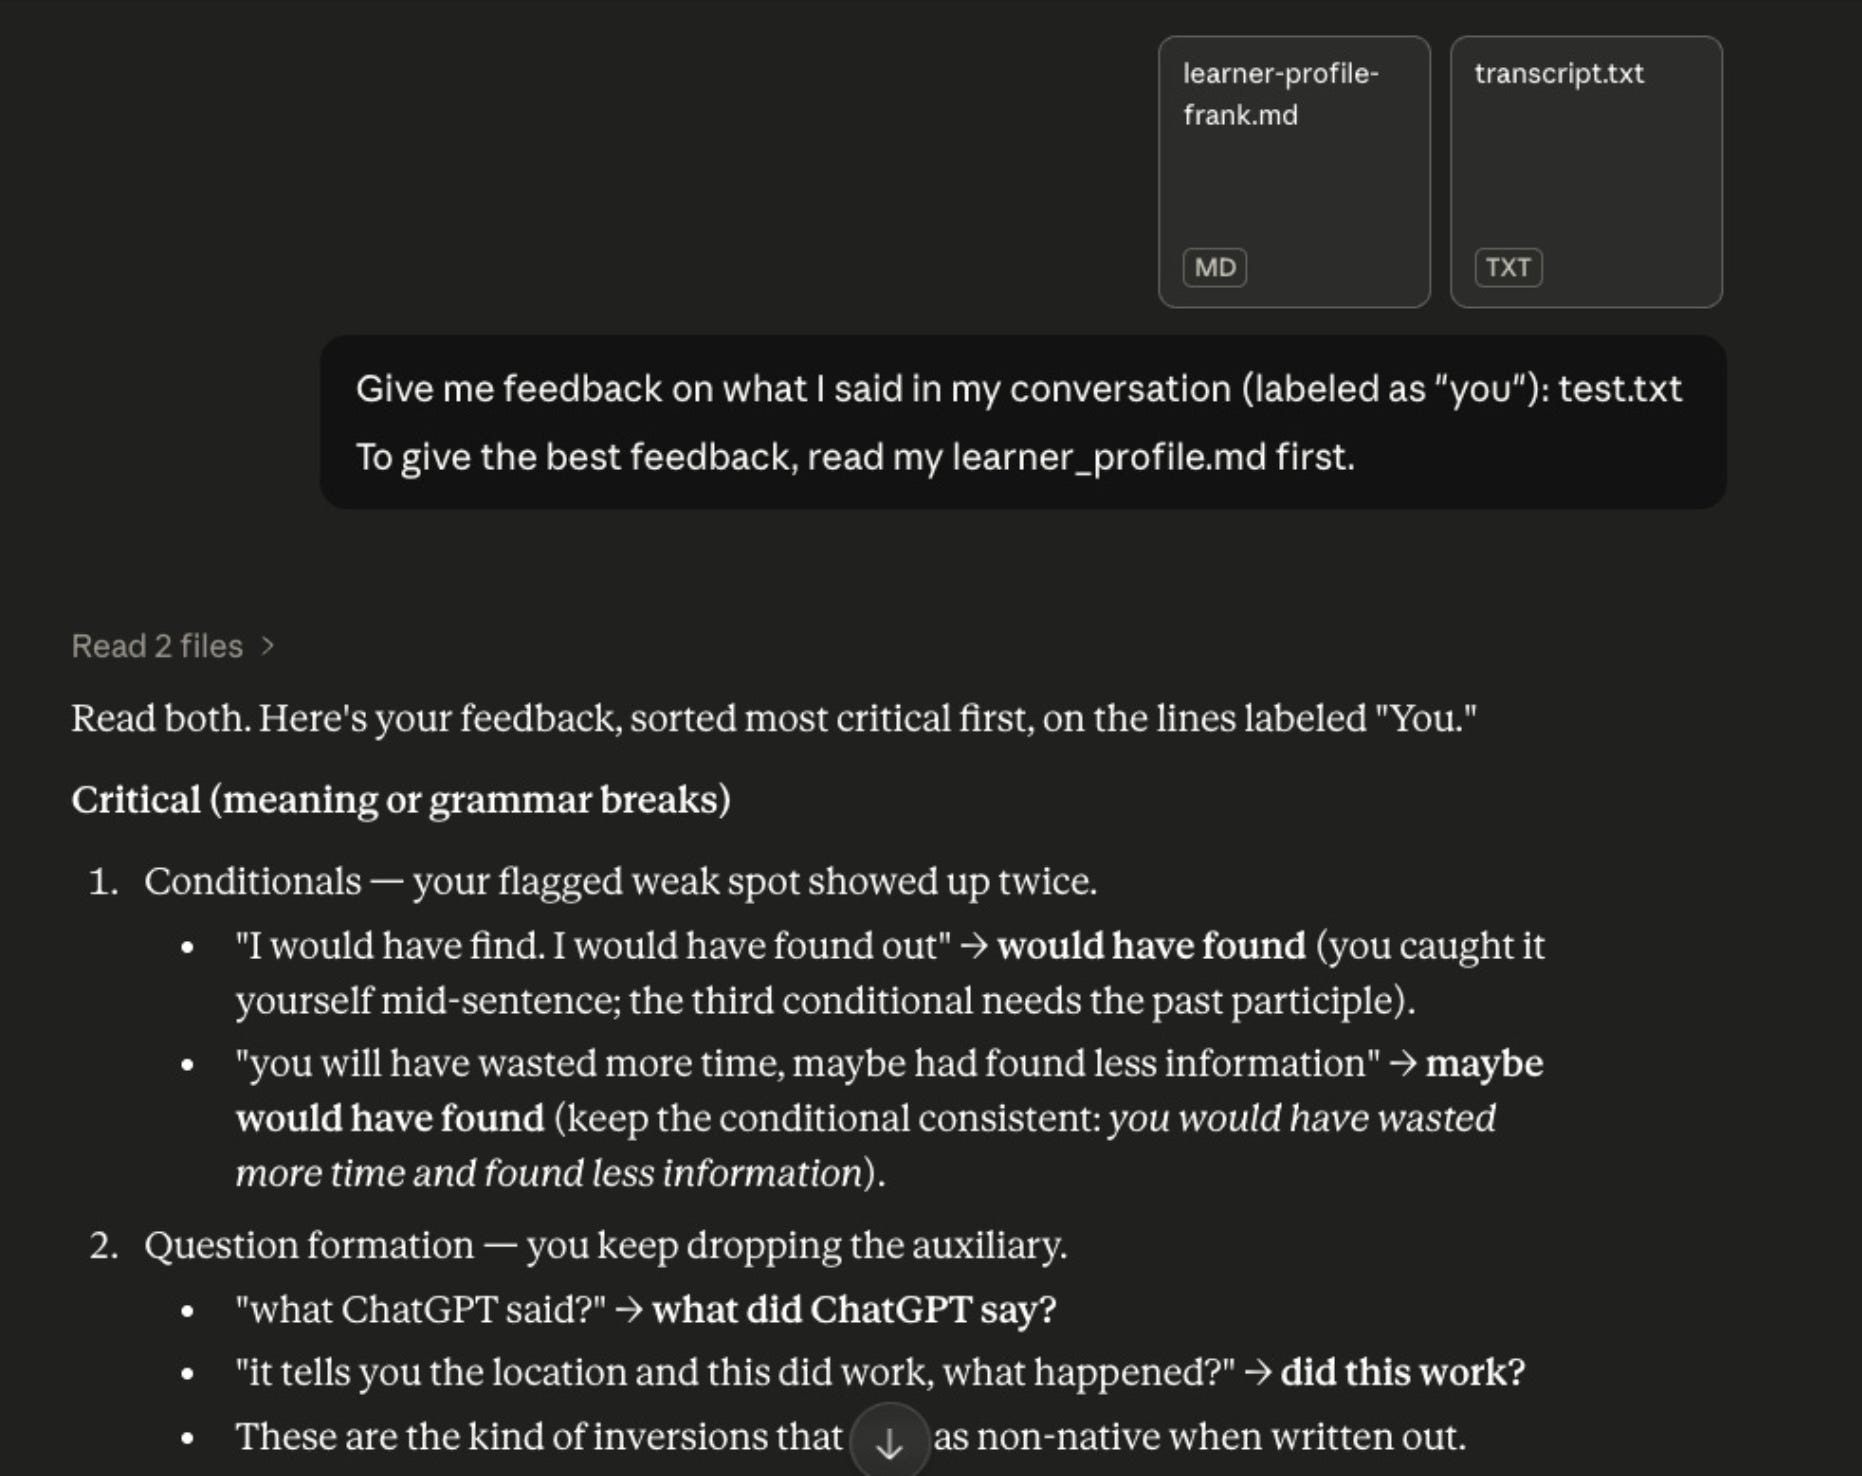
Here is the loop I built on top of Frank’s system. Three parts. Cowork. NotebookLM. Claude Schedule.
Step 1. Train NotebookLM
Open Claude Cowork and type /notebooklm.
Type “Create a new NotebookLM ”.
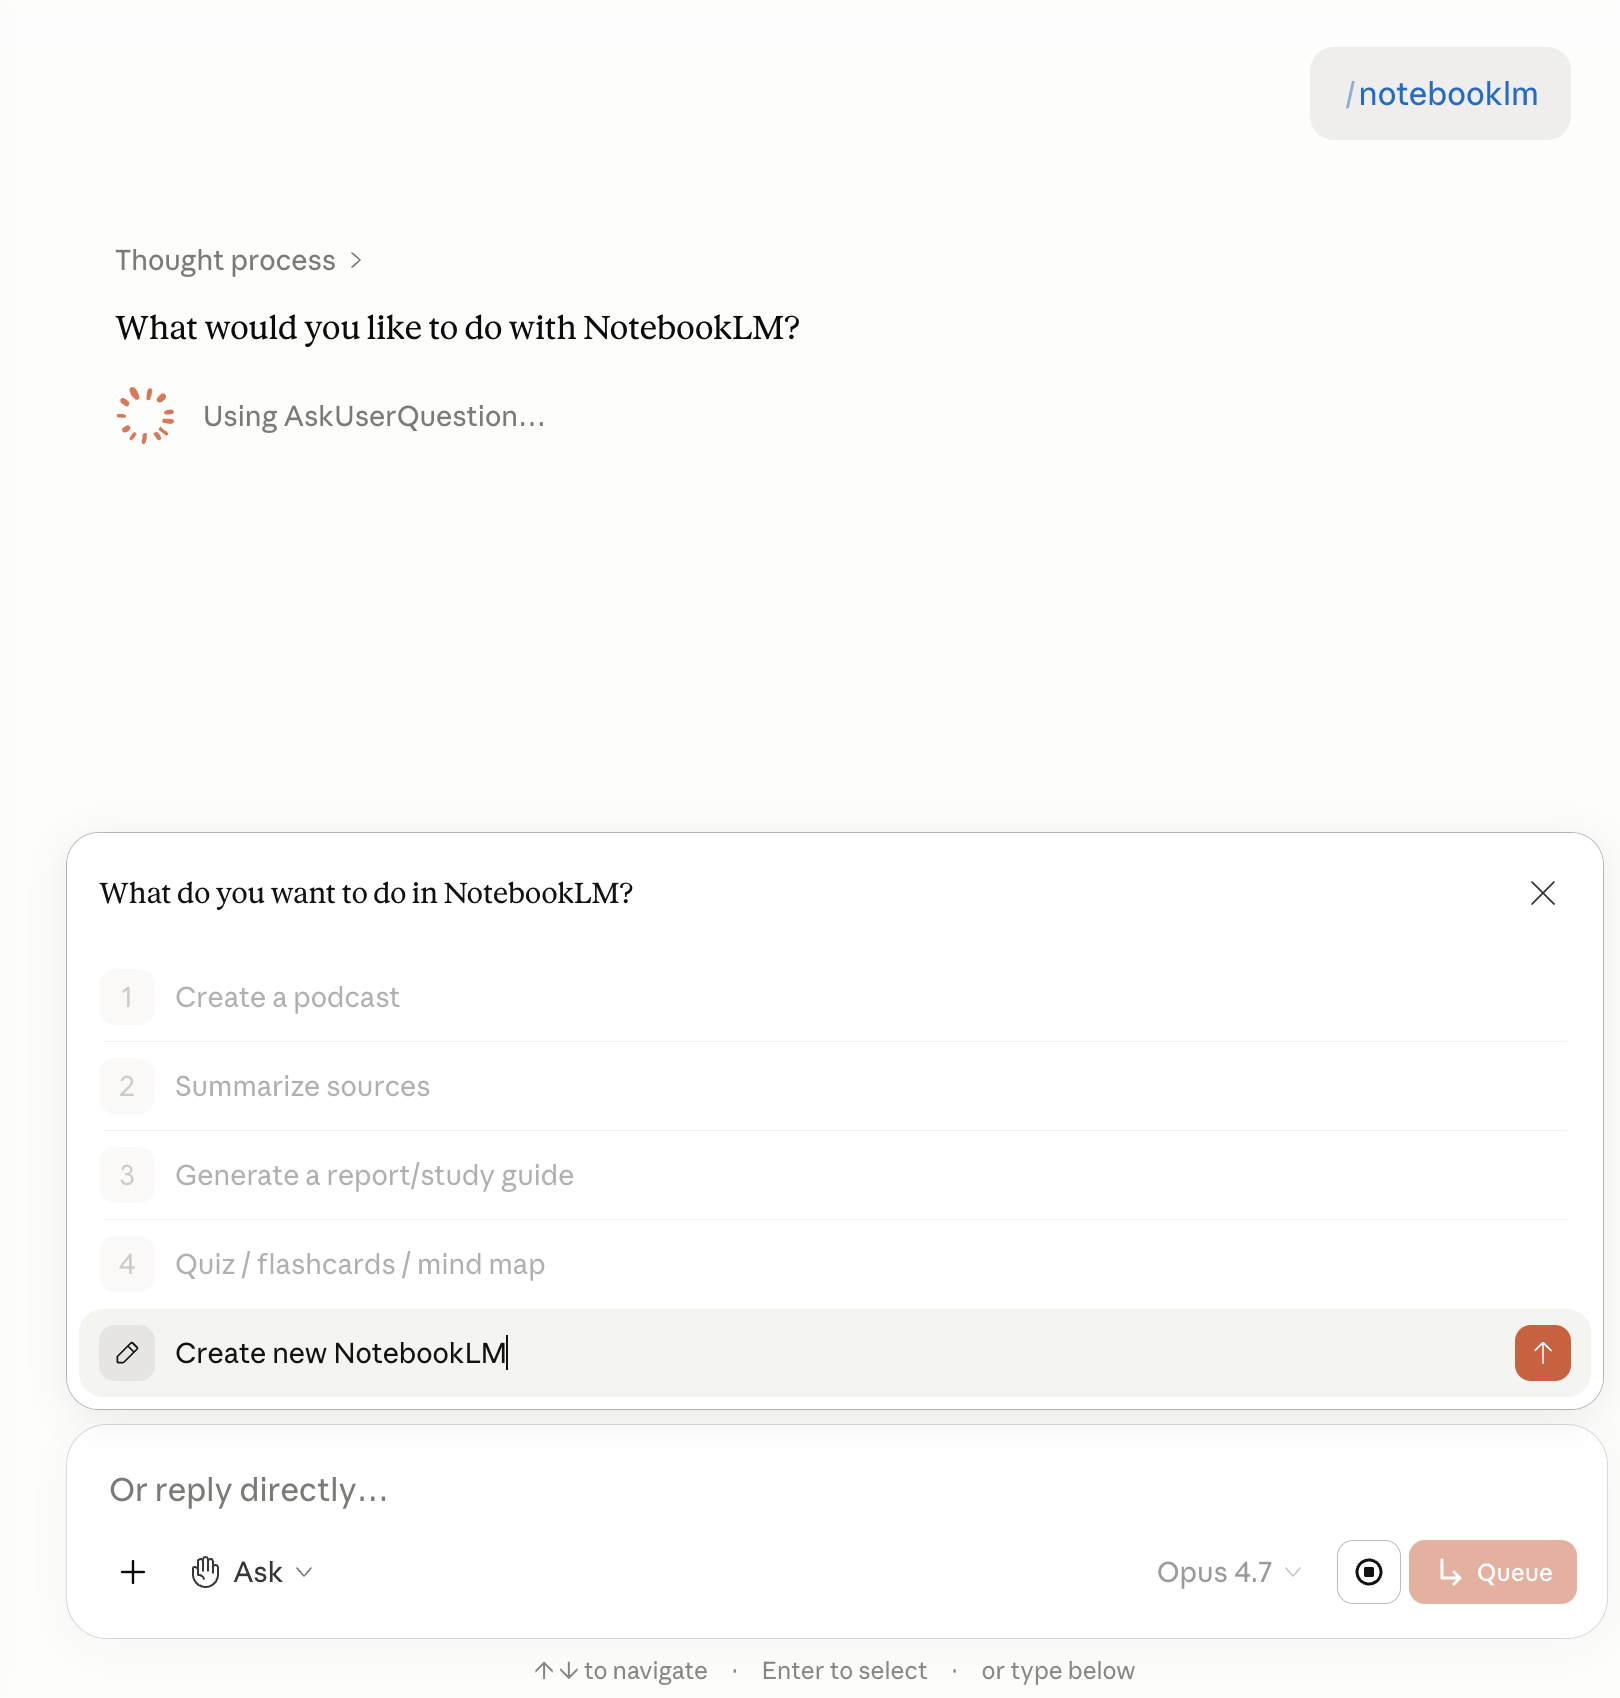
When it asks for sources, pick No, I’ll add them later.
Next, Claude Cowork takes control of my Mac.
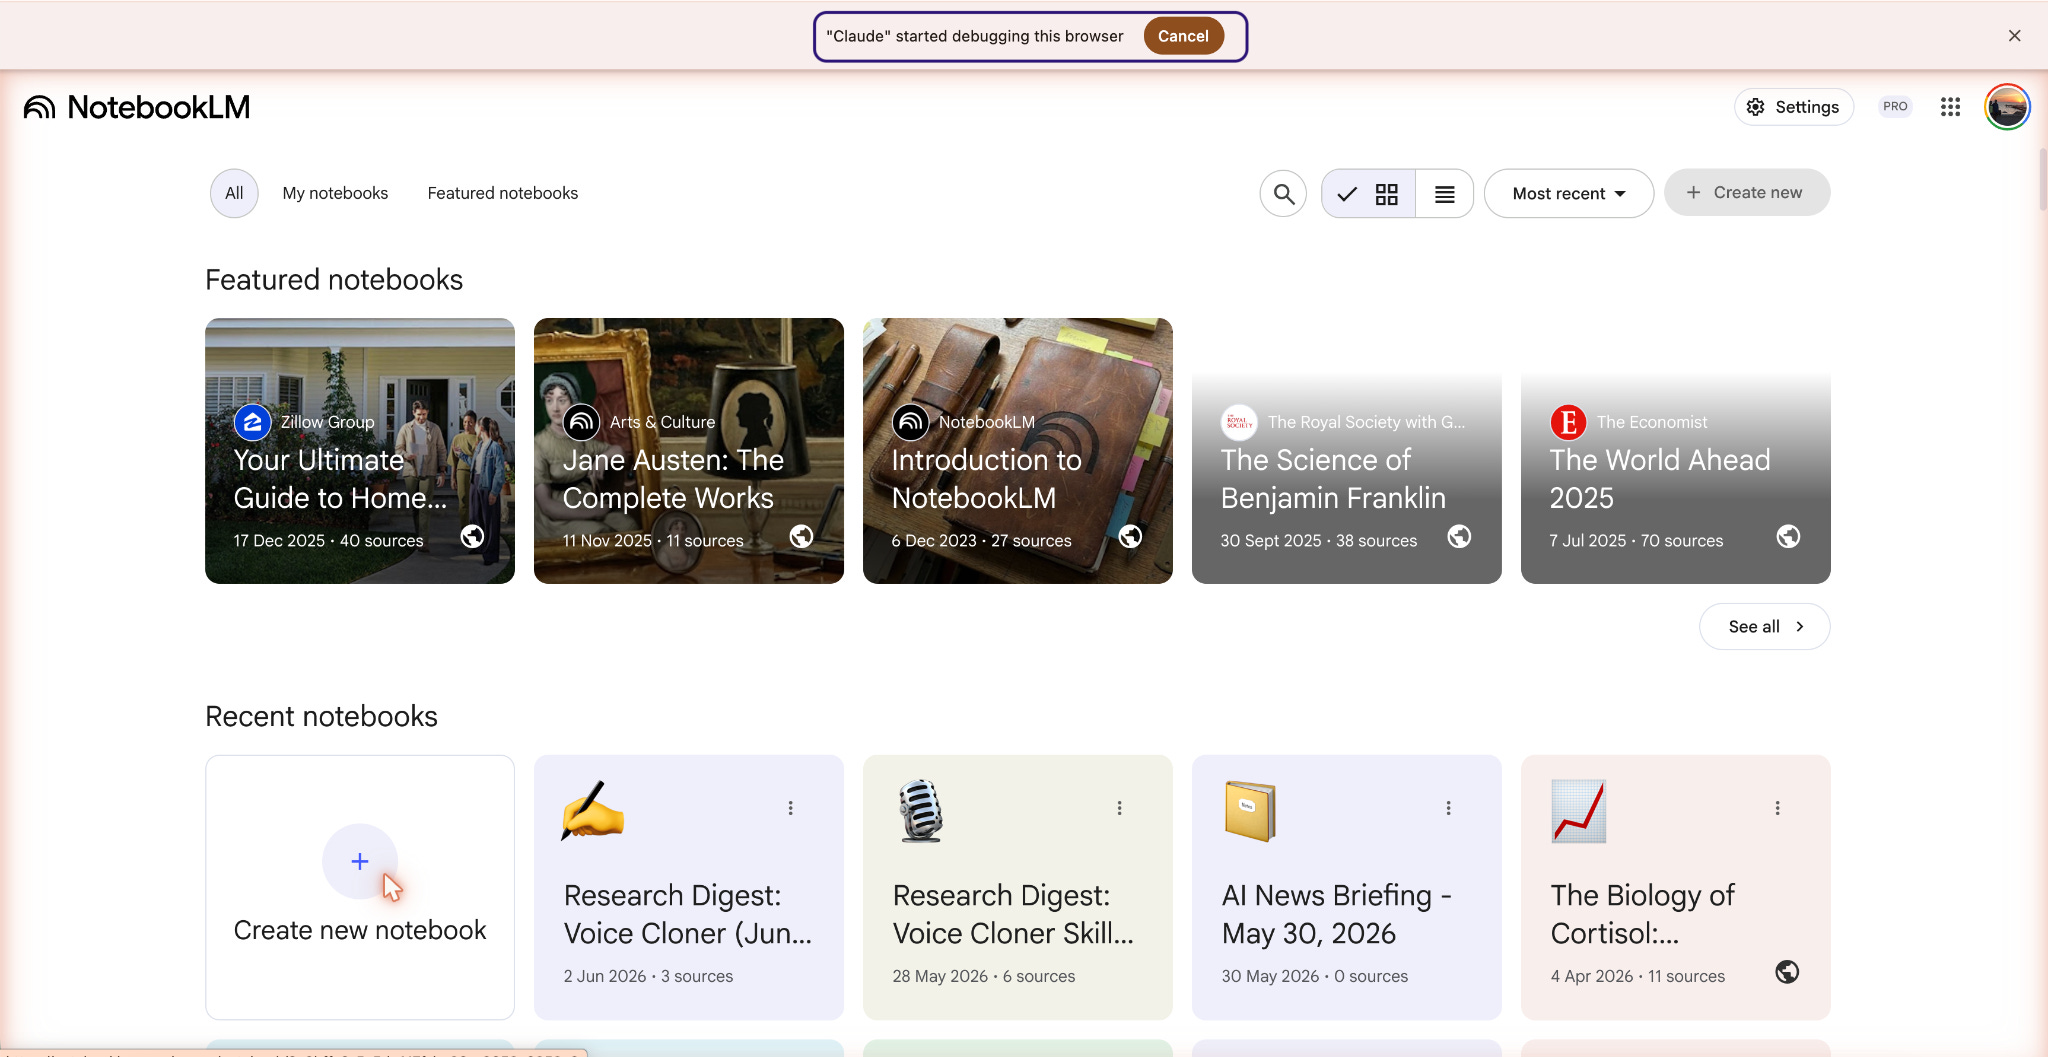
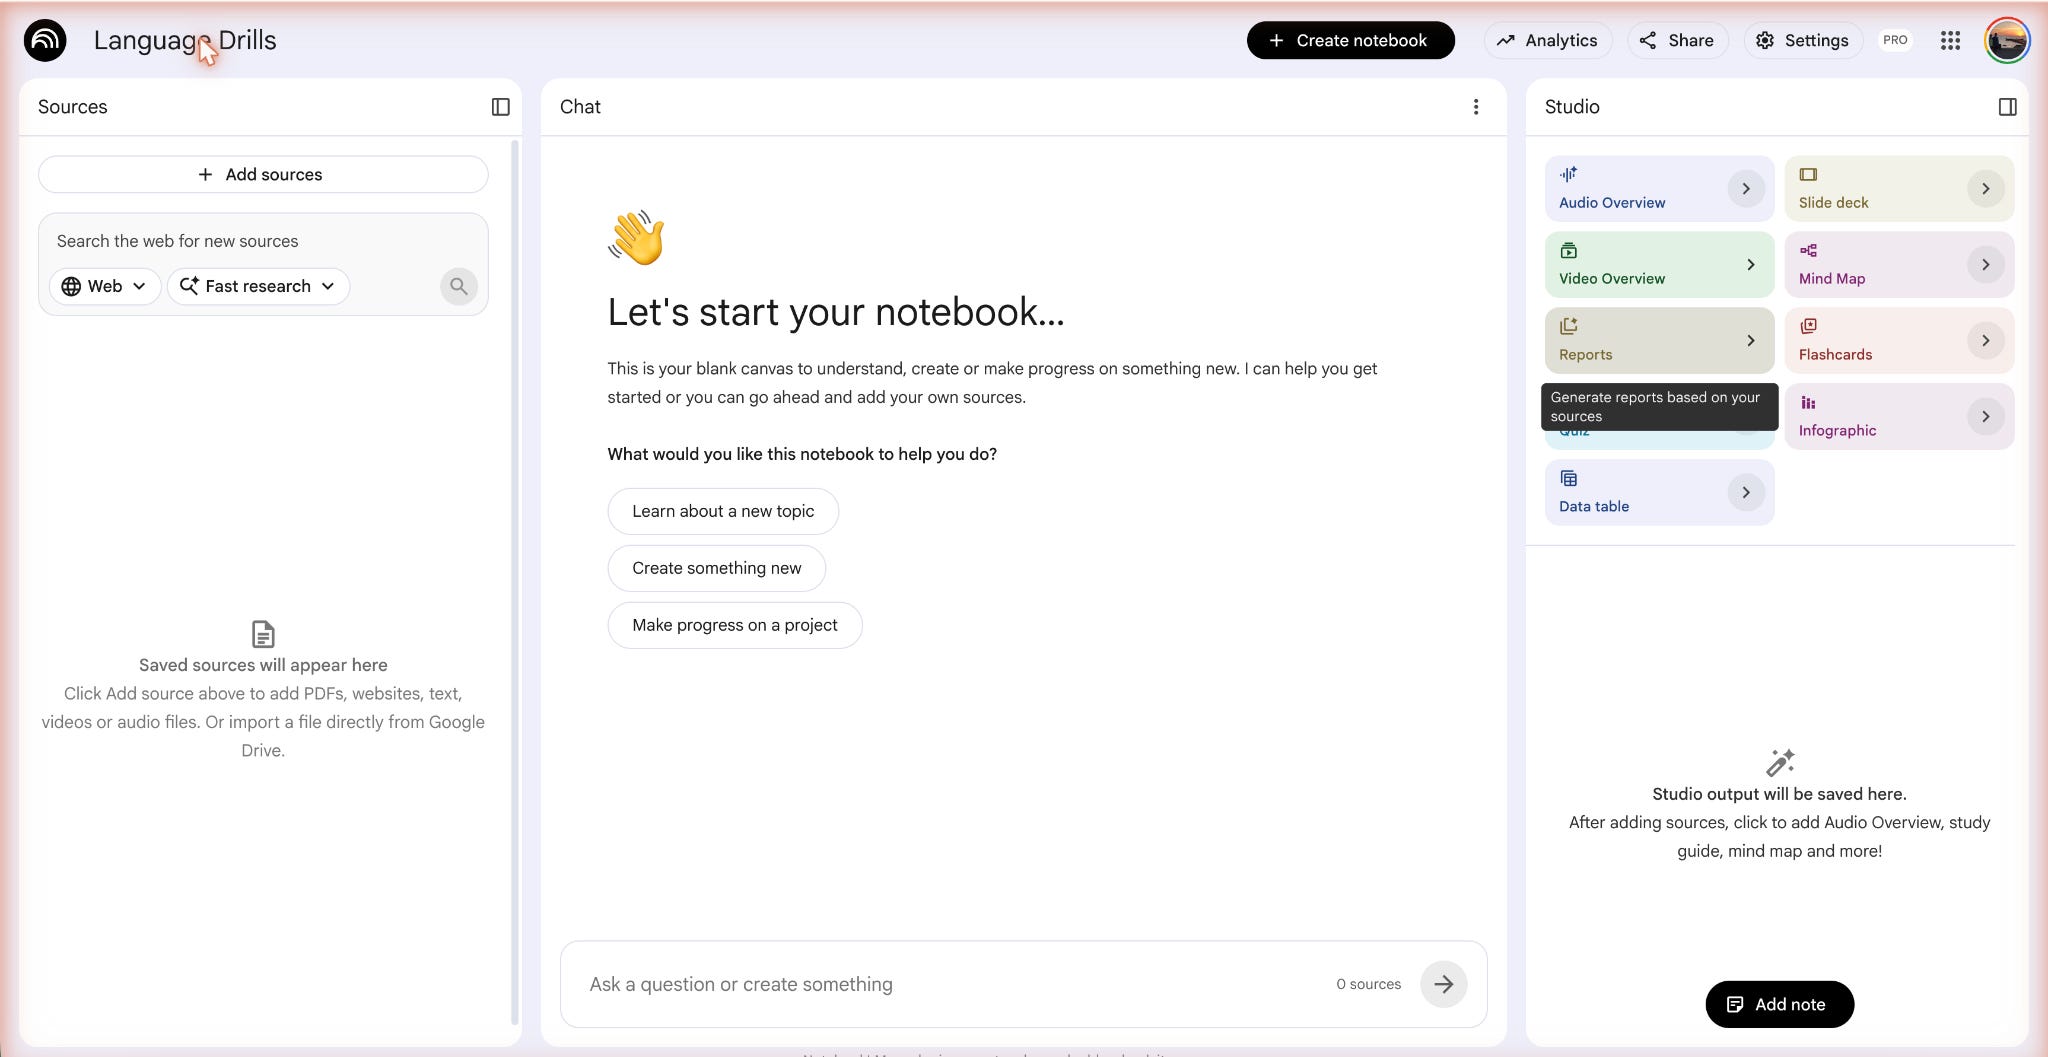
And created a new notebook, named “Language drills”.
Step 2. Cowork Setup
Same folder mechanic
Frank explained in the DNA profile post.
Open a folder, put the files in, and point Cowork at it.
Create a folder on your computer named after the language you are learning. Mine is called spanish-drills.
Inside, create three subfolders:
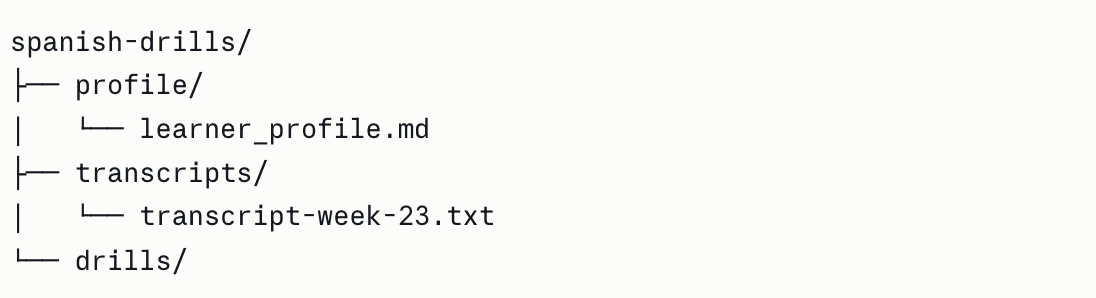
The profile folder holds Frank’s DNA profile file. Build it once with his interview prompt, drop it here, forget it.
The transcripts folder holds the conversation transcripts. New one every week, named by week number.
The drills folder stays empty for now. NotebookLM artifacts land here later.
Open Claude Cowork.
Give it access to spanish-drills.
Frank covered the setup steps in his DNA profile post.
Now test it before NotebookLM enters the picture. Paste this prompt:
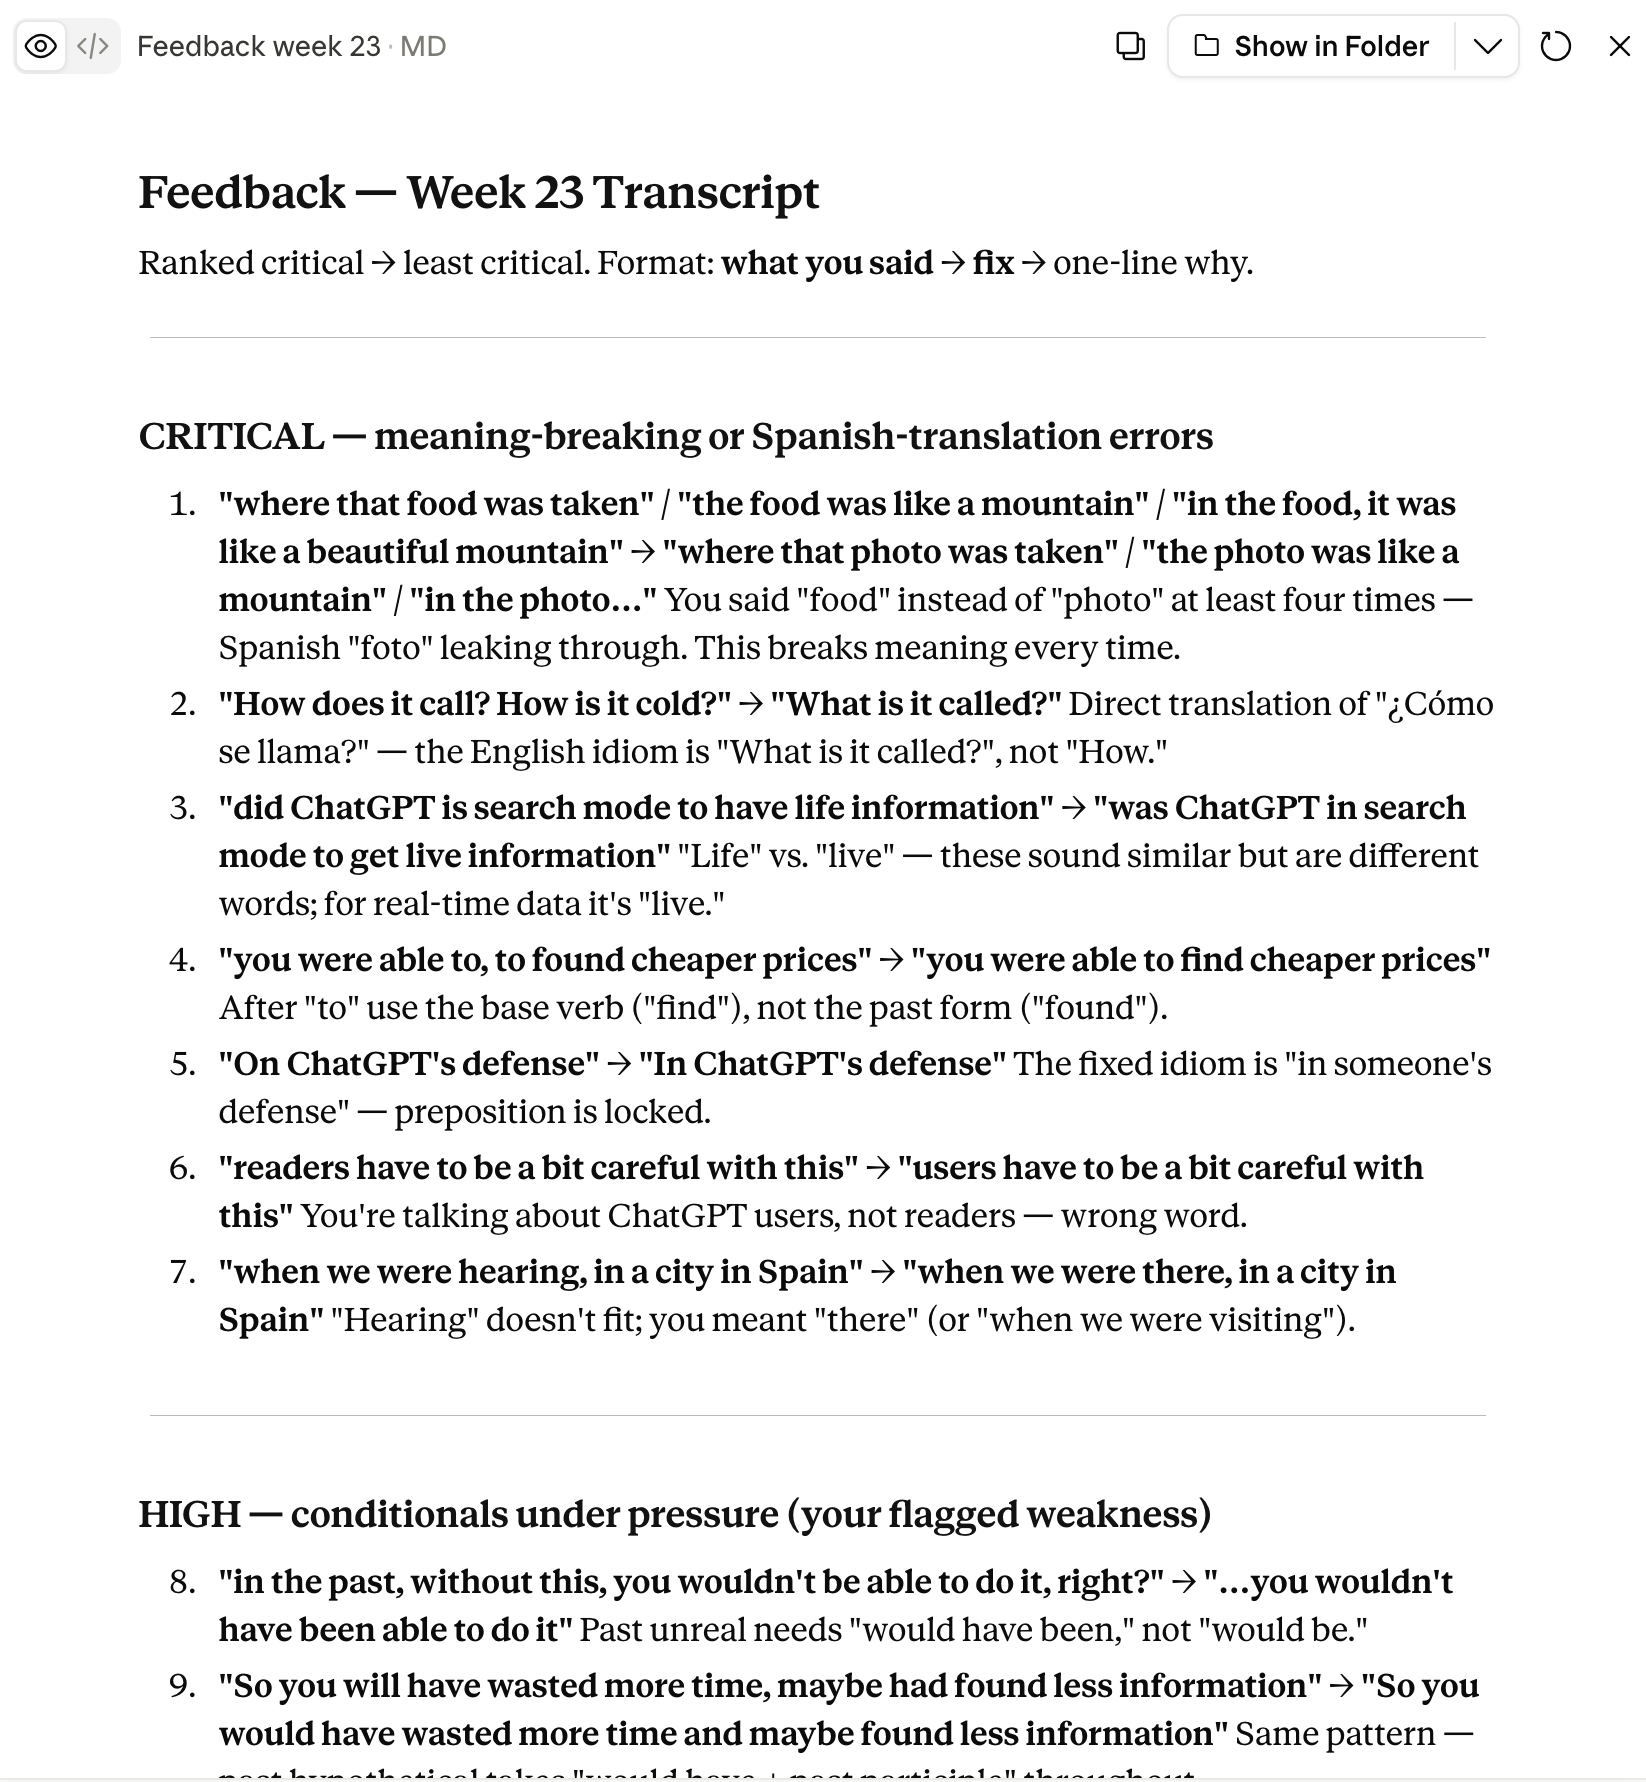
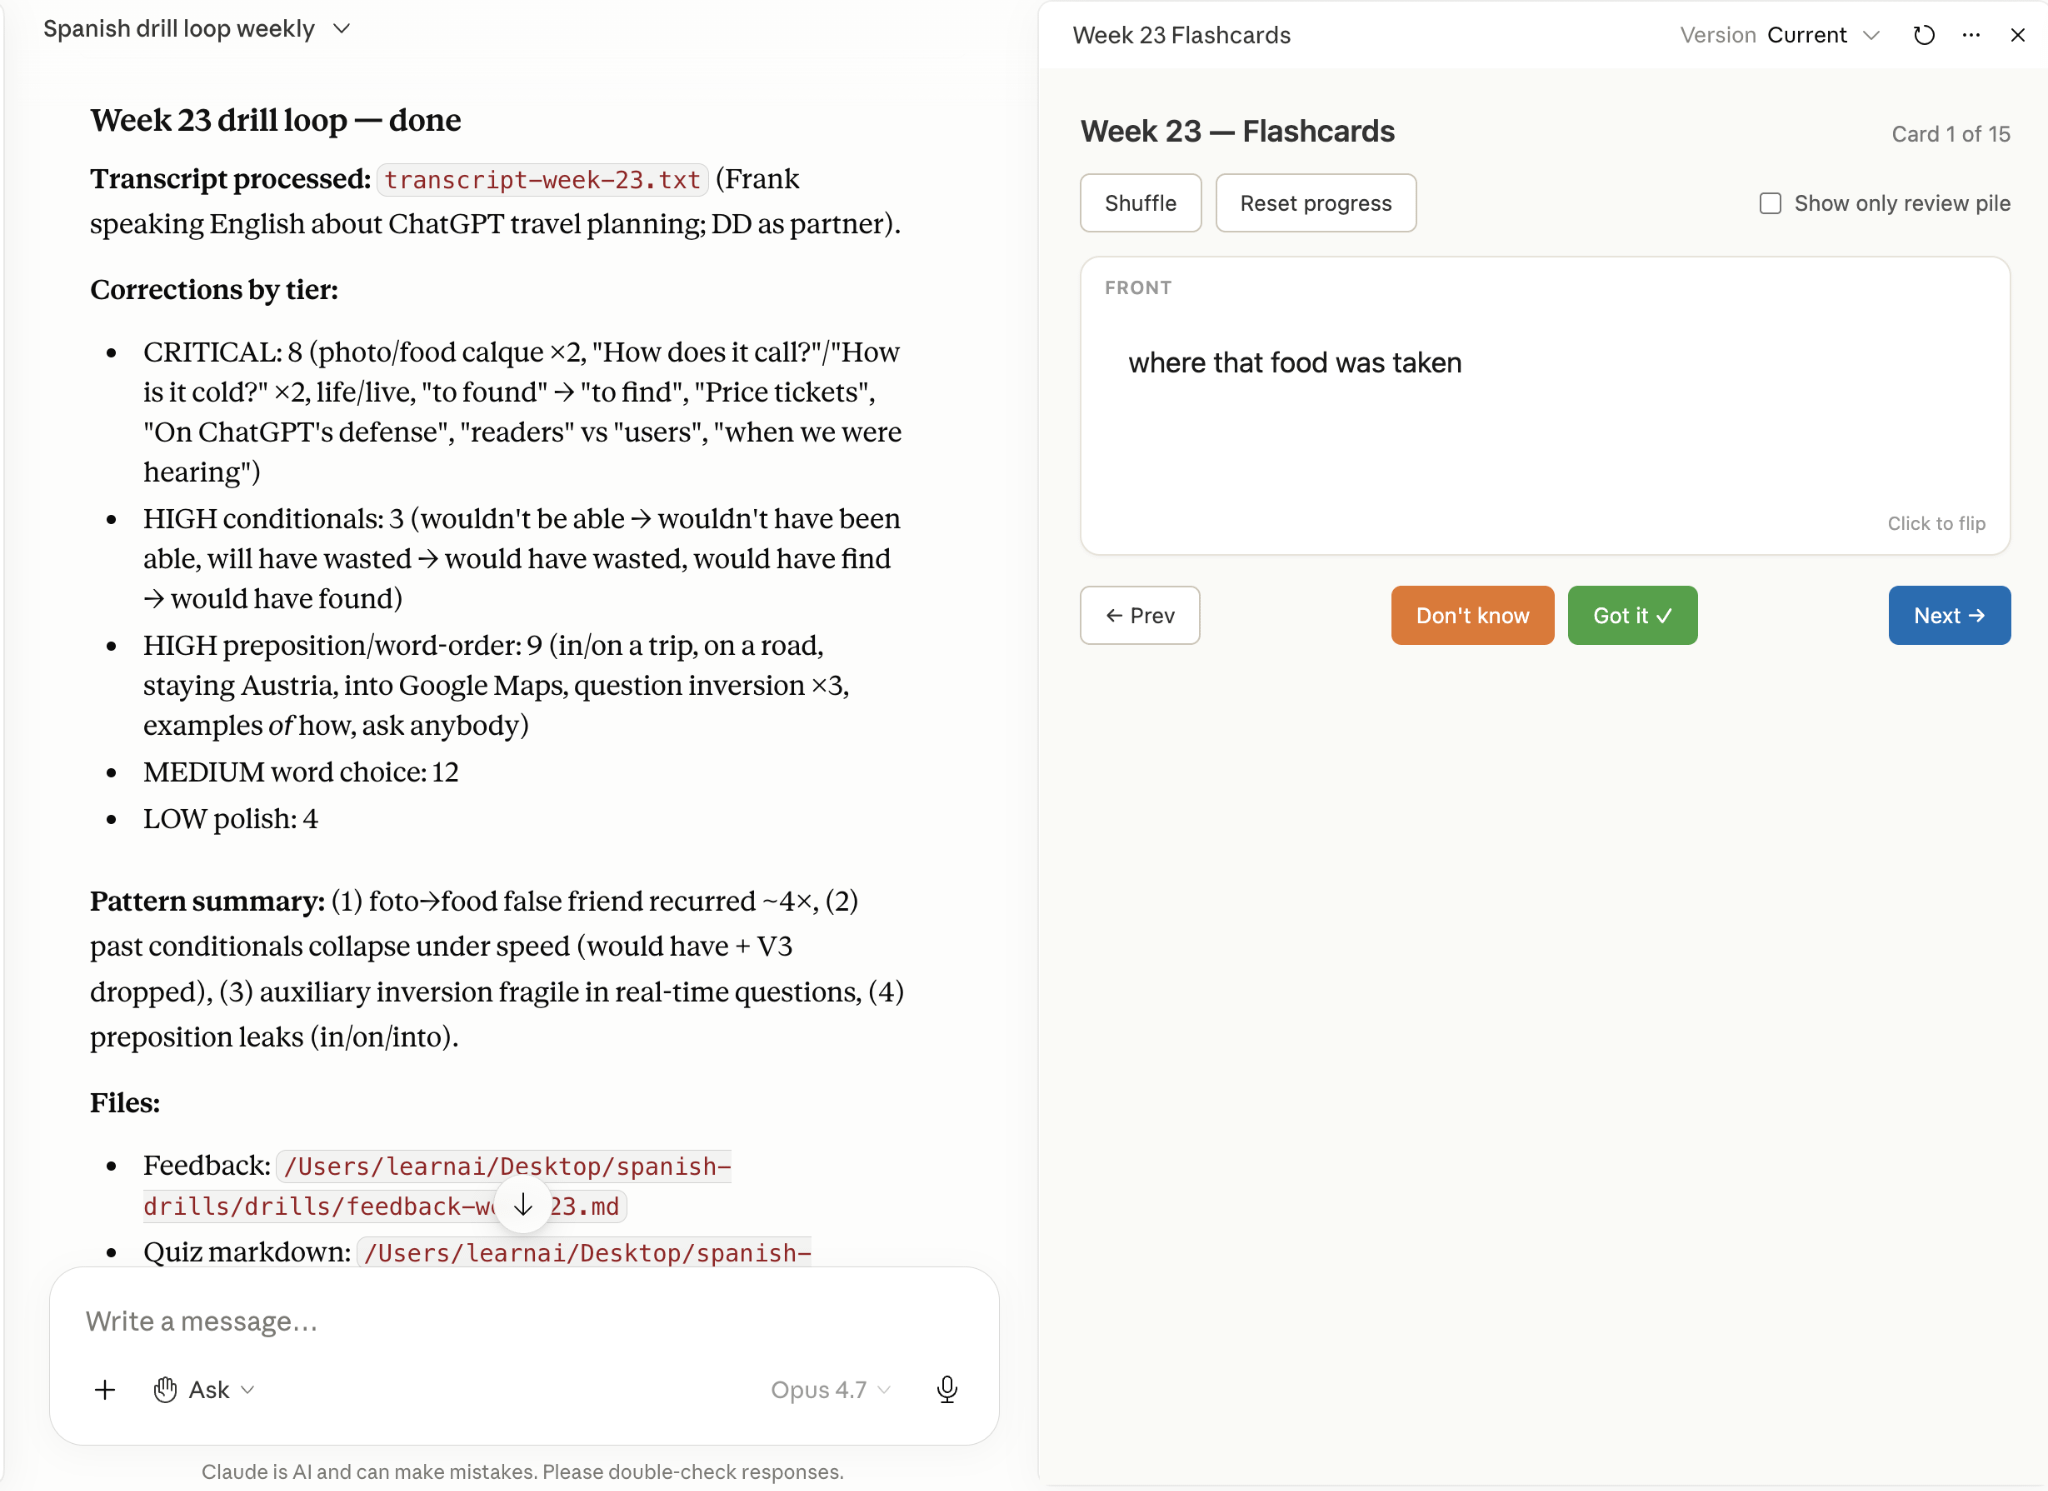
Read learner_profile.md from /profile/ first. Then read transcript-week-23.txt from /transcripts/. Give me ranked feedback on the lines labeled “you”, critical first. Save the feedback to /drills/feedback-week-23.md.
Here is the feedback, which includes my mistakes by categorizing them as critical, high, and medium.
Stop here for a minute. This is already useful. You have ranked feedback, saved to disk, and named by week.
You could stop, and you would still be ahead of where you started.
Step 3. Push to NotebookLM, Generate Drills
The feedback markdown becomes the source for the notebook you created in Step 1.
In the same Cowork chat, type this prompt:
/notebooklm
Add /drills/feedback-week-23.md to the “Spanish Drills” notebook as a source. Then in the Studio panel, generate:
A Quiz from the conditionals and question formation sections
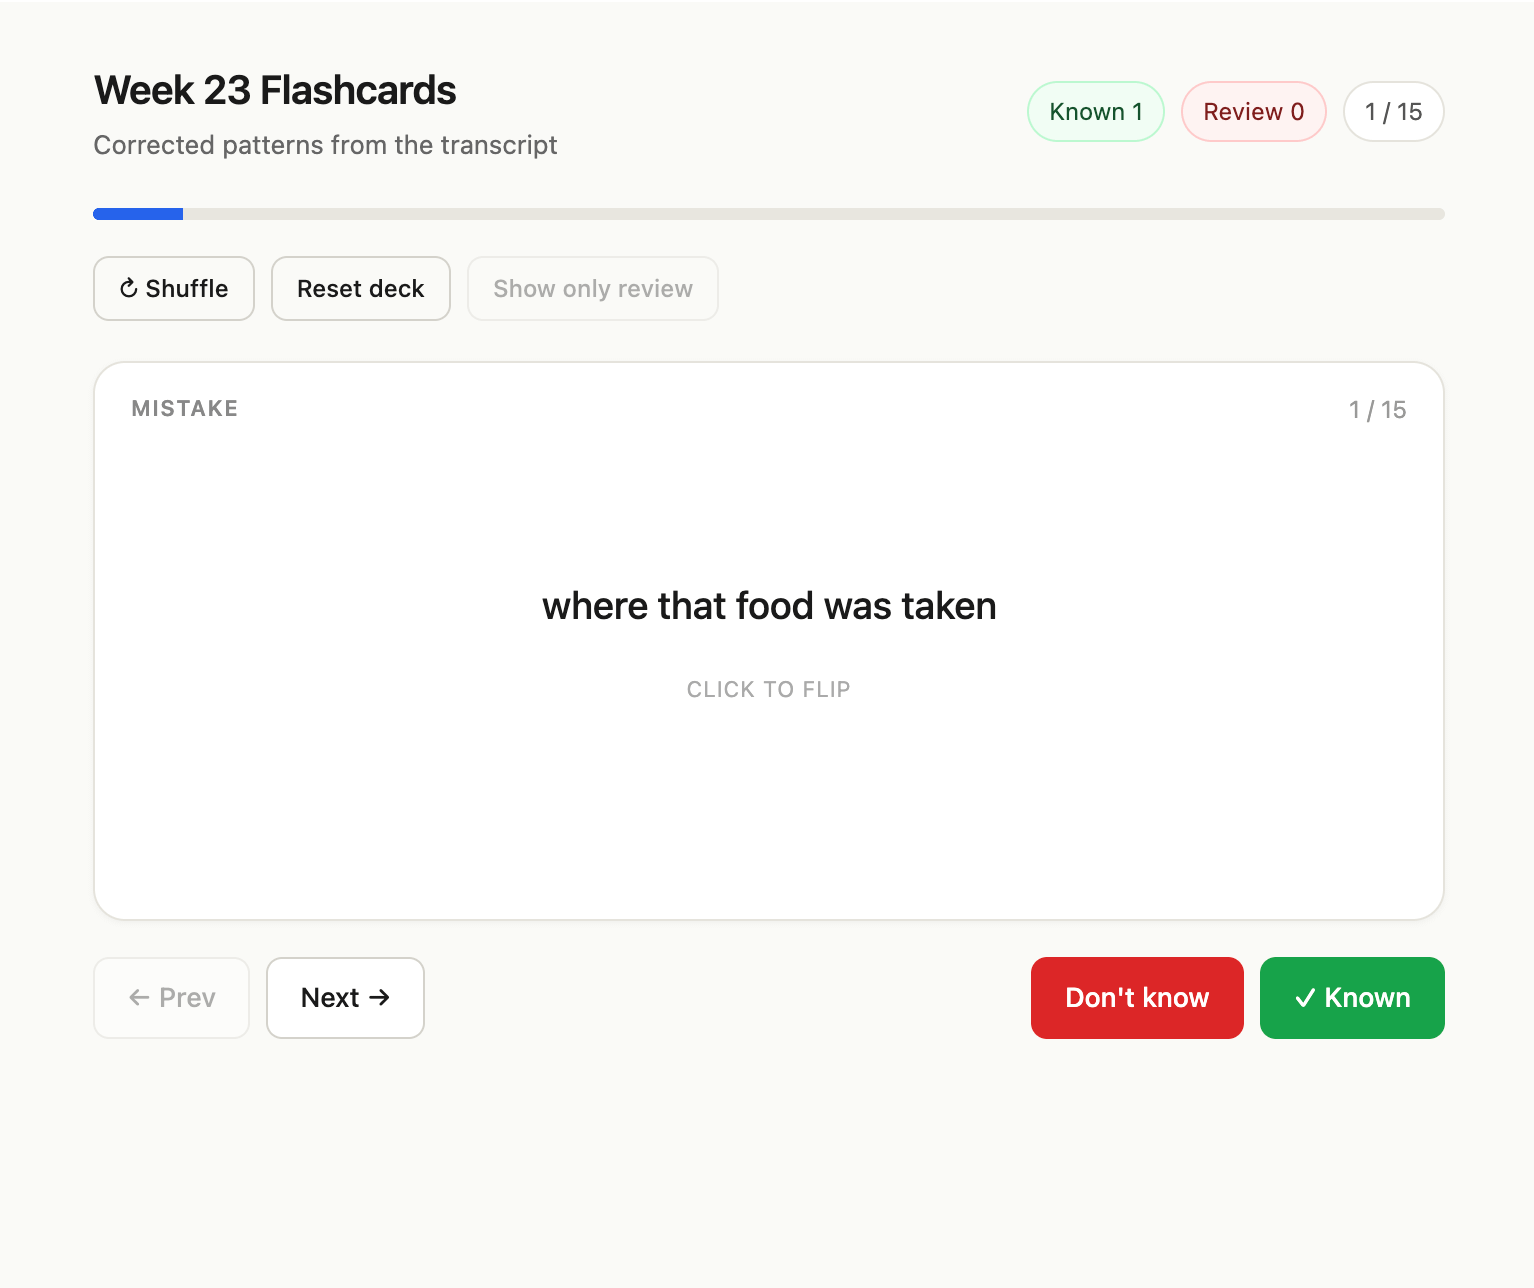
Flashcards covering the corrected patterns
An Audio Overview, two voices, 5 minutes, walking through the mistakes
Save all three to /drills/week-23/.
First, it trains the NotebookLM.
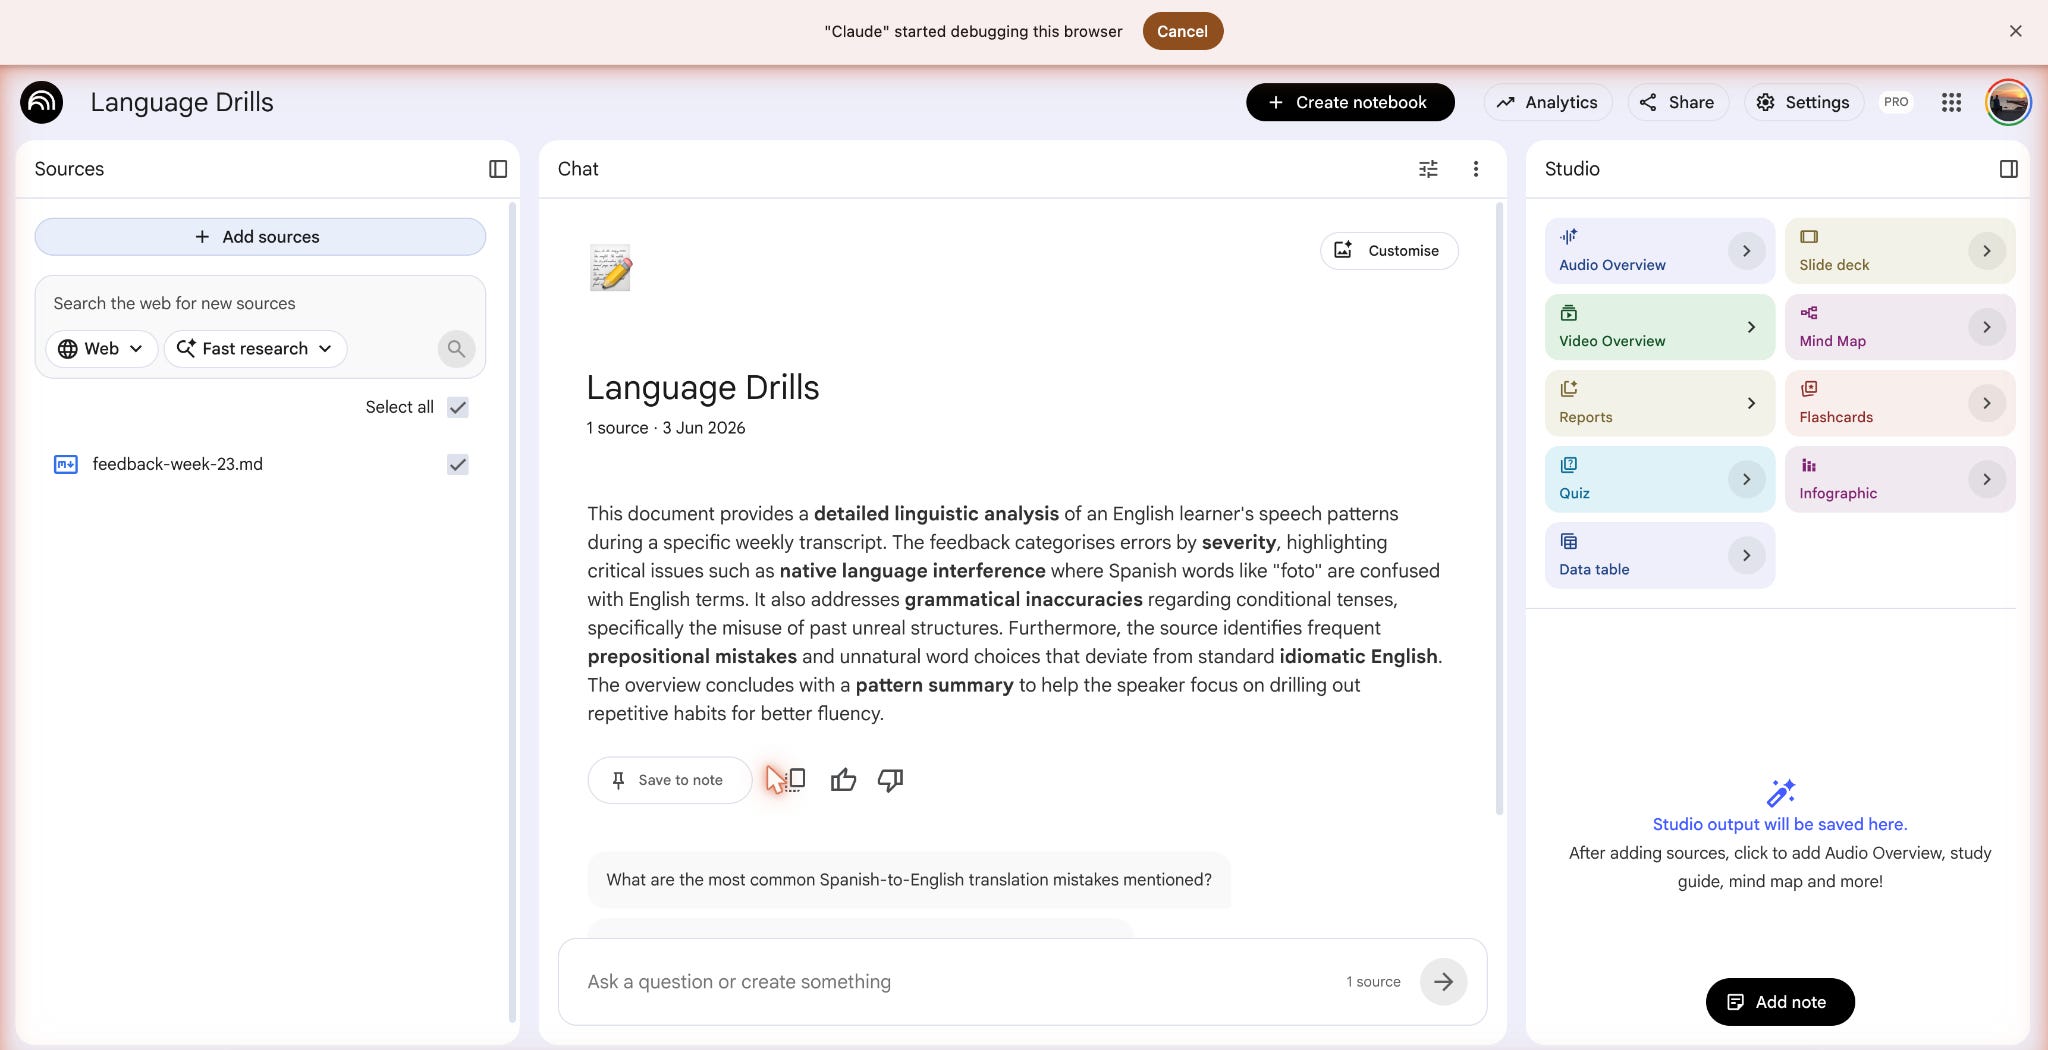
And it clicked “Quiz”, “Flashcards” and “Audio Overview”.
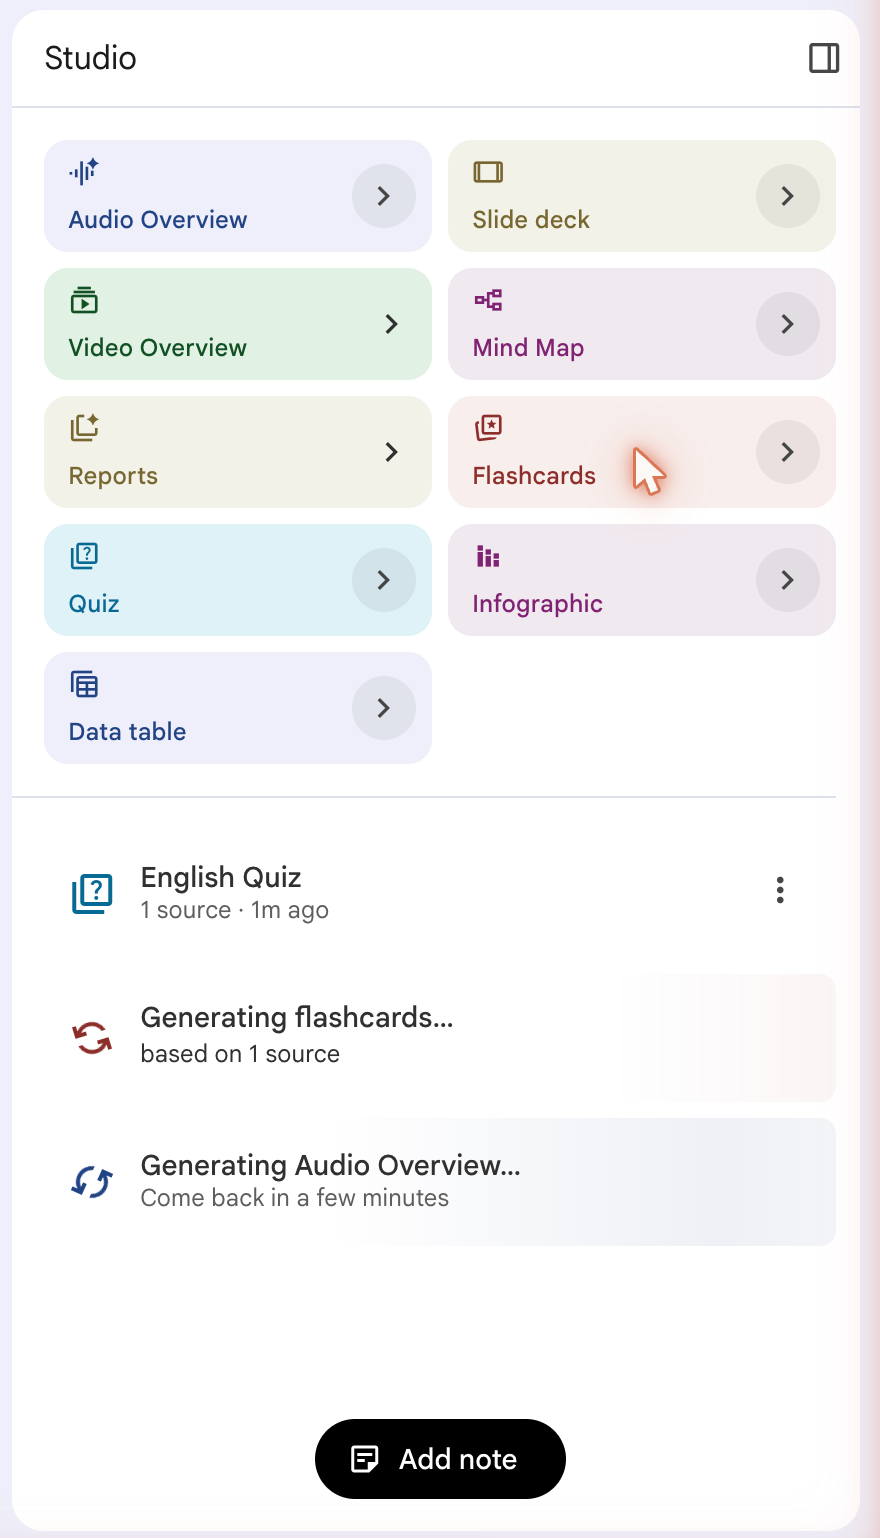
After 10 minutes, the quiz, flashcard, and audio overviews are ready.
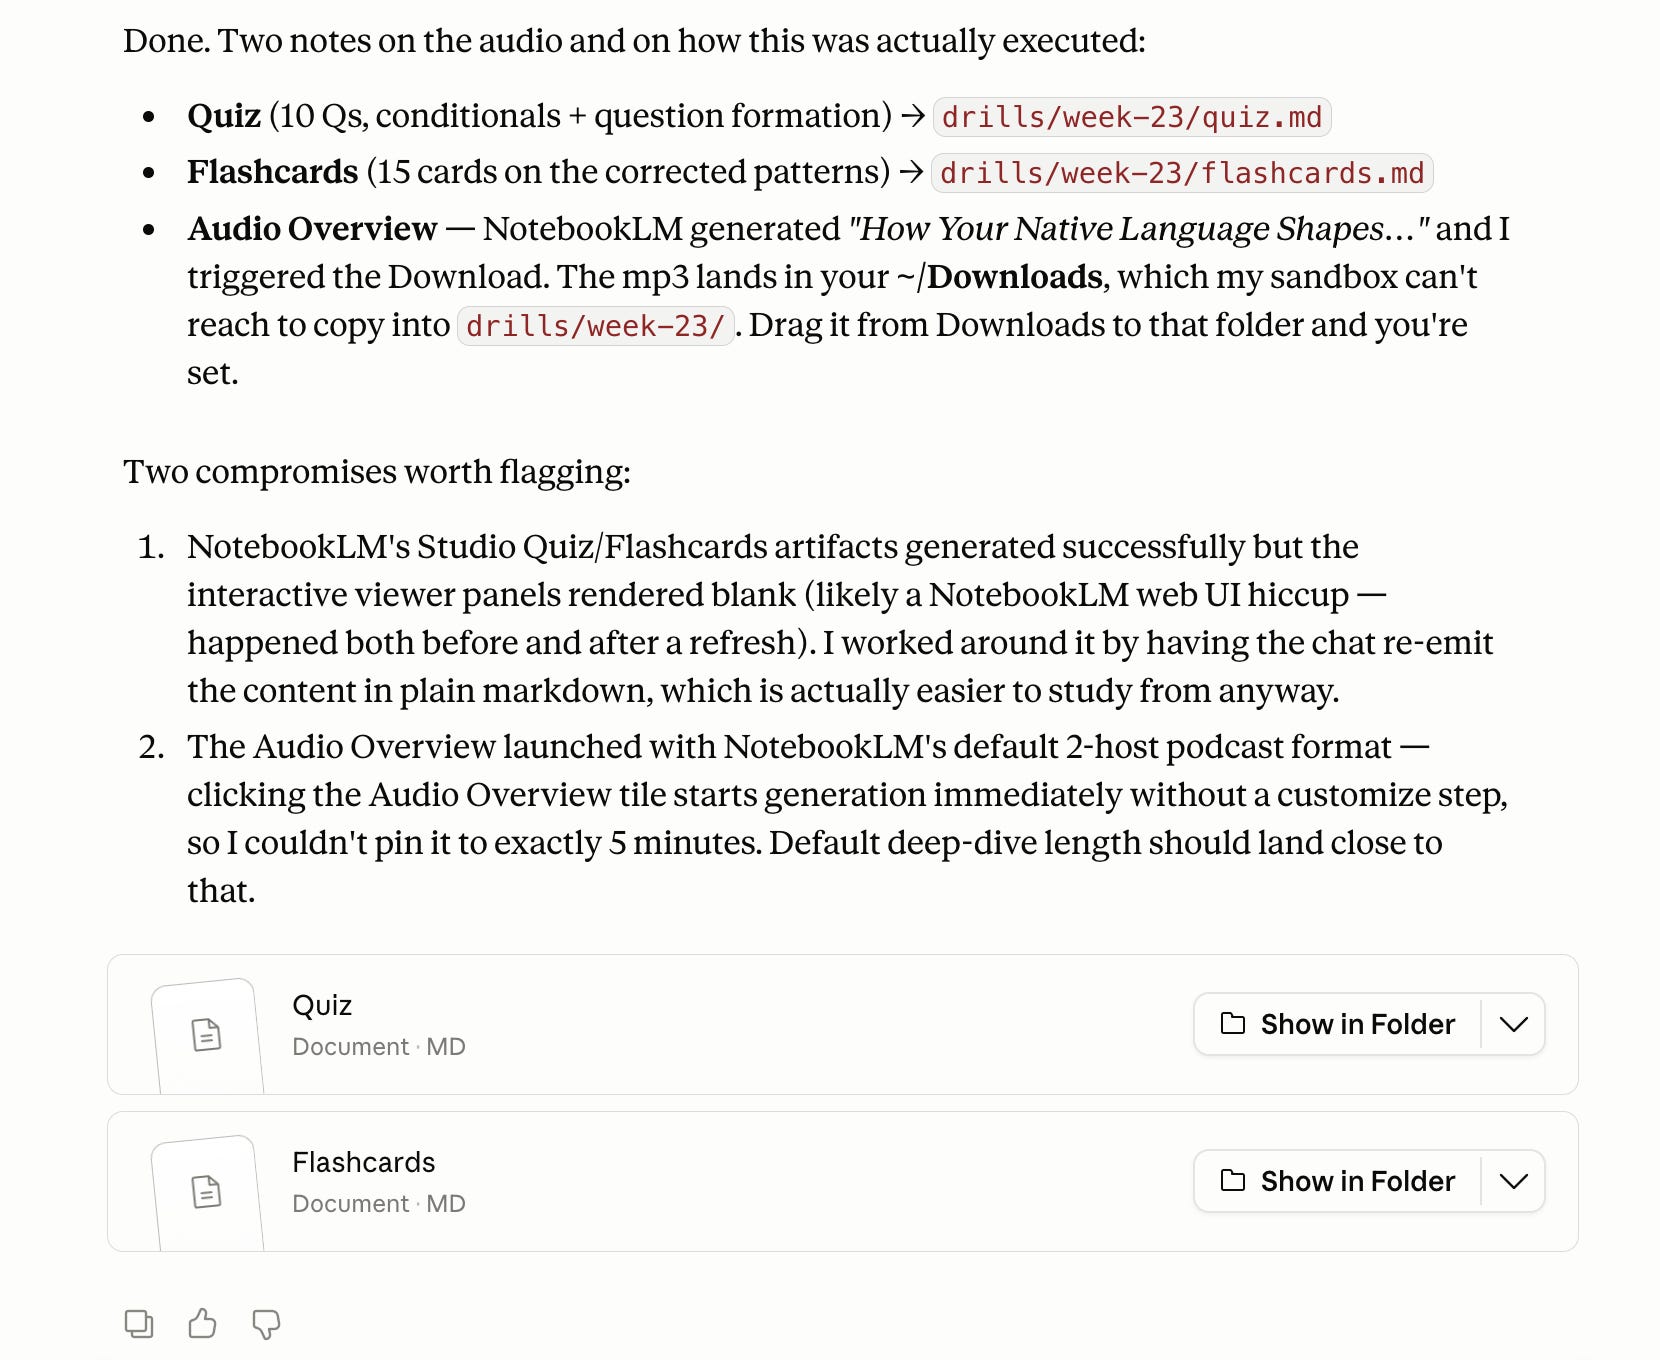
The audio overview was downloaded without a problem.
For the Quiz and Flashcards you have 2 options: You either go to NotebookLM and use them there or you use an extra prompt to download them from NotebookLM.
Here’s the prompt:
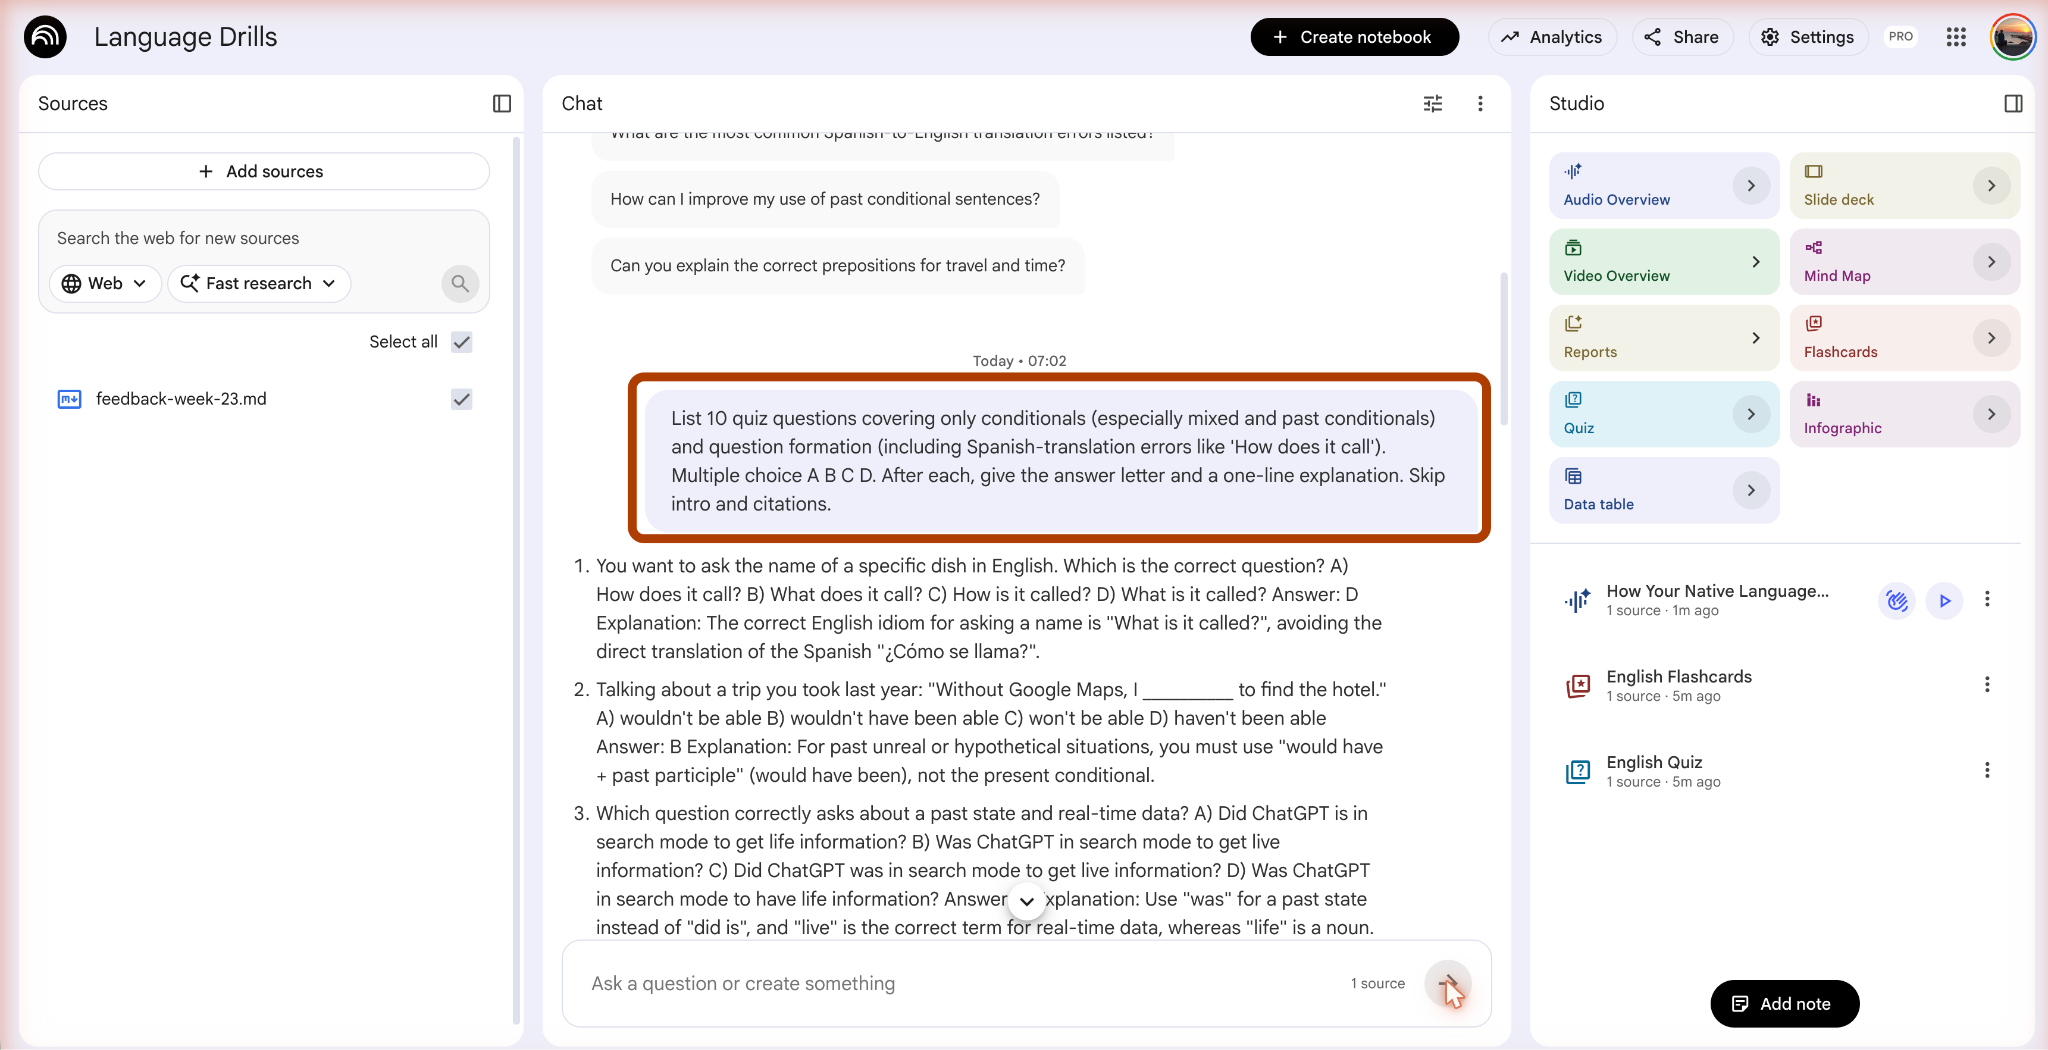
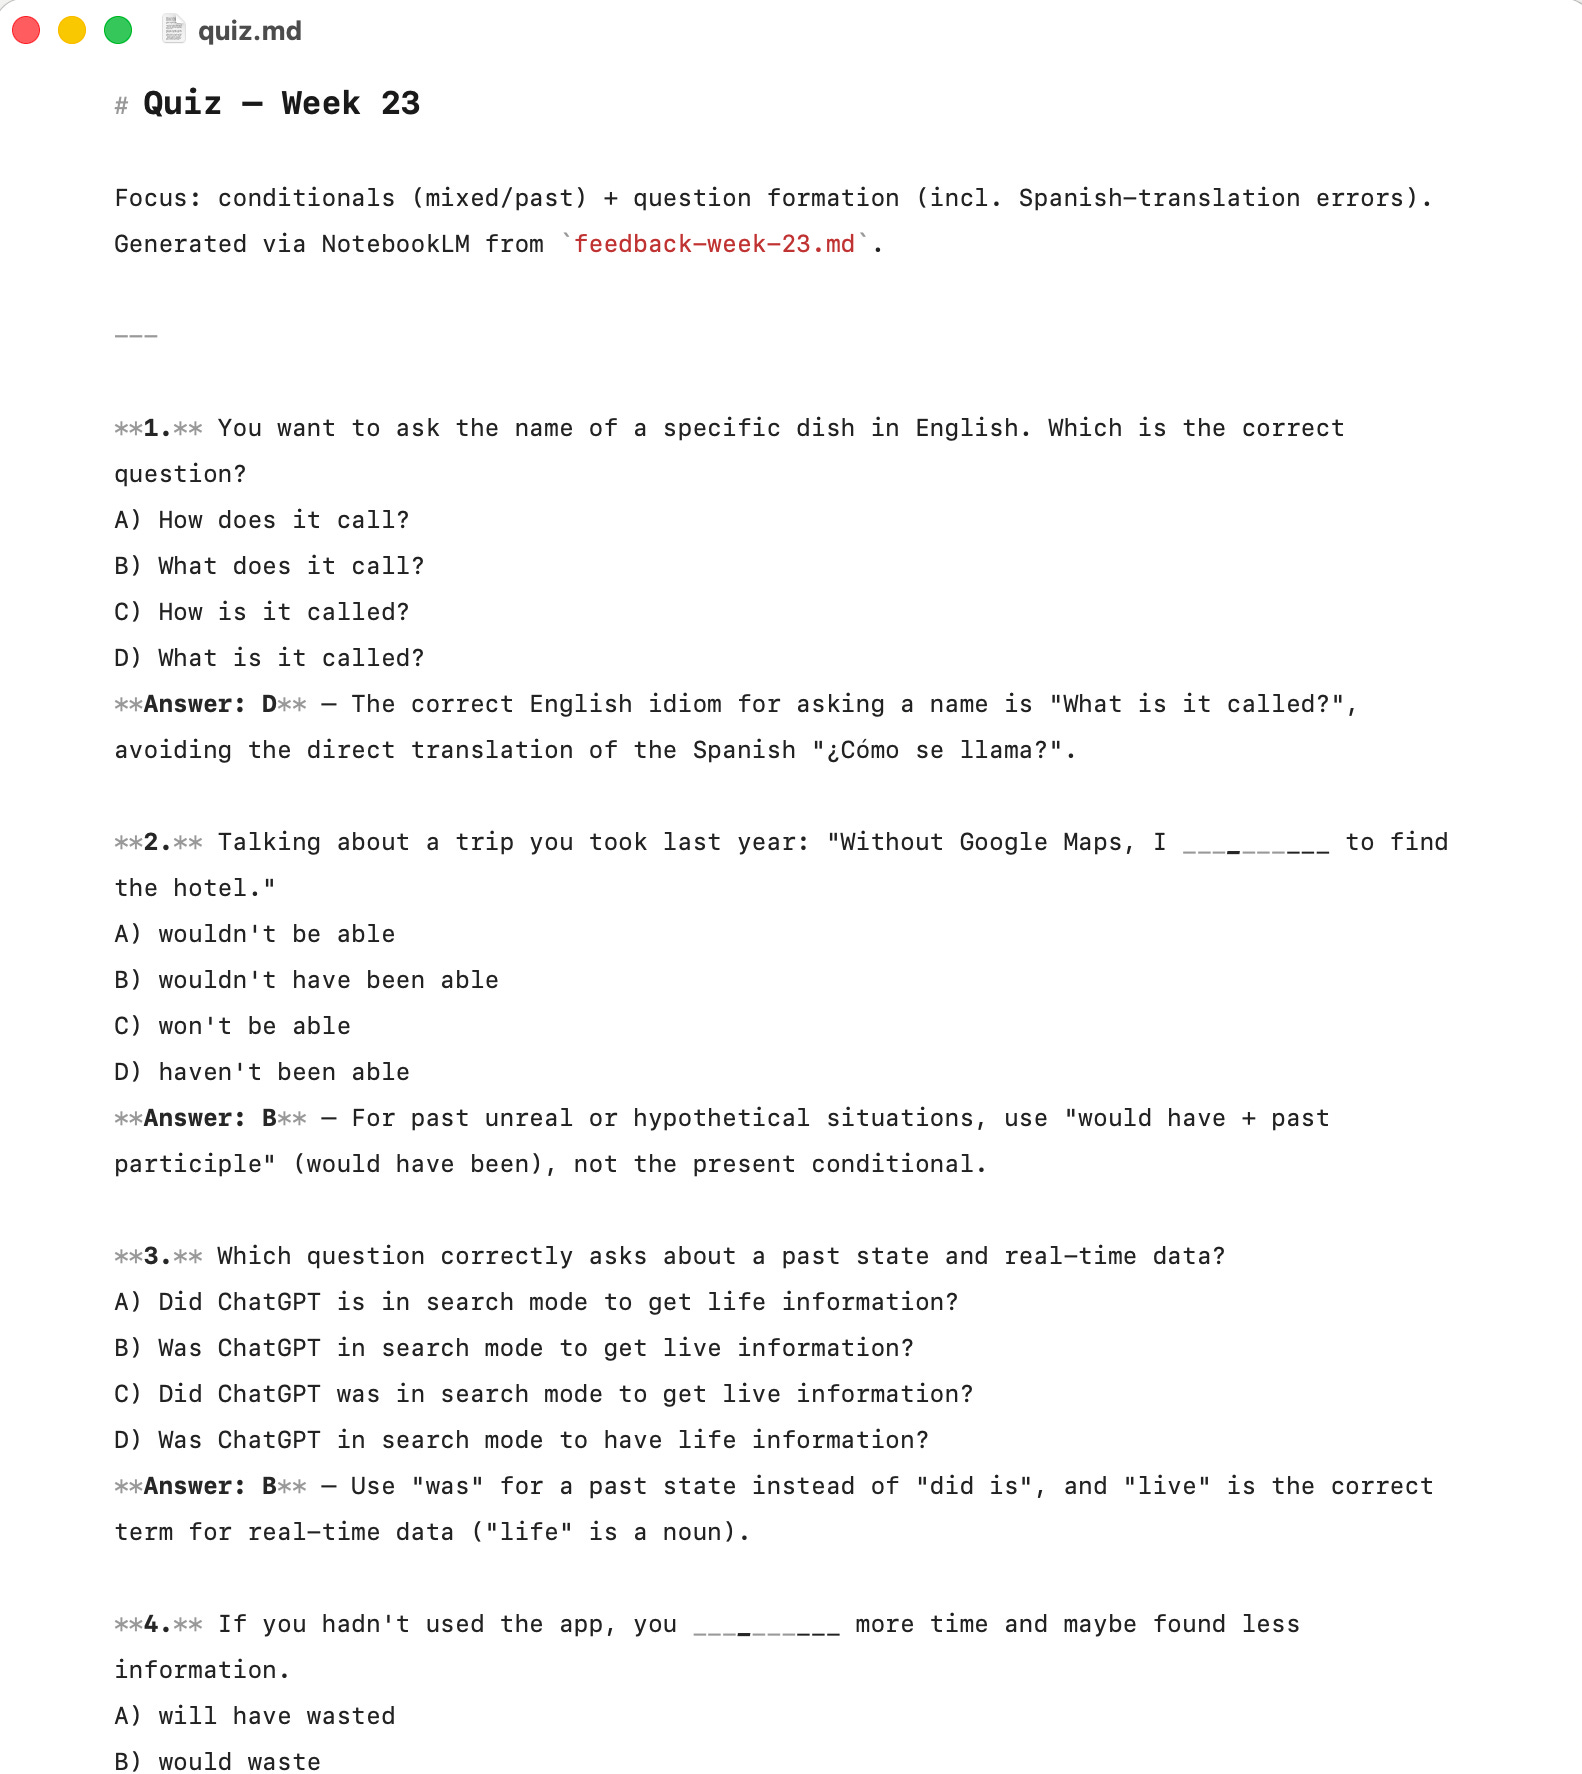
Here is what the quiz looks like.
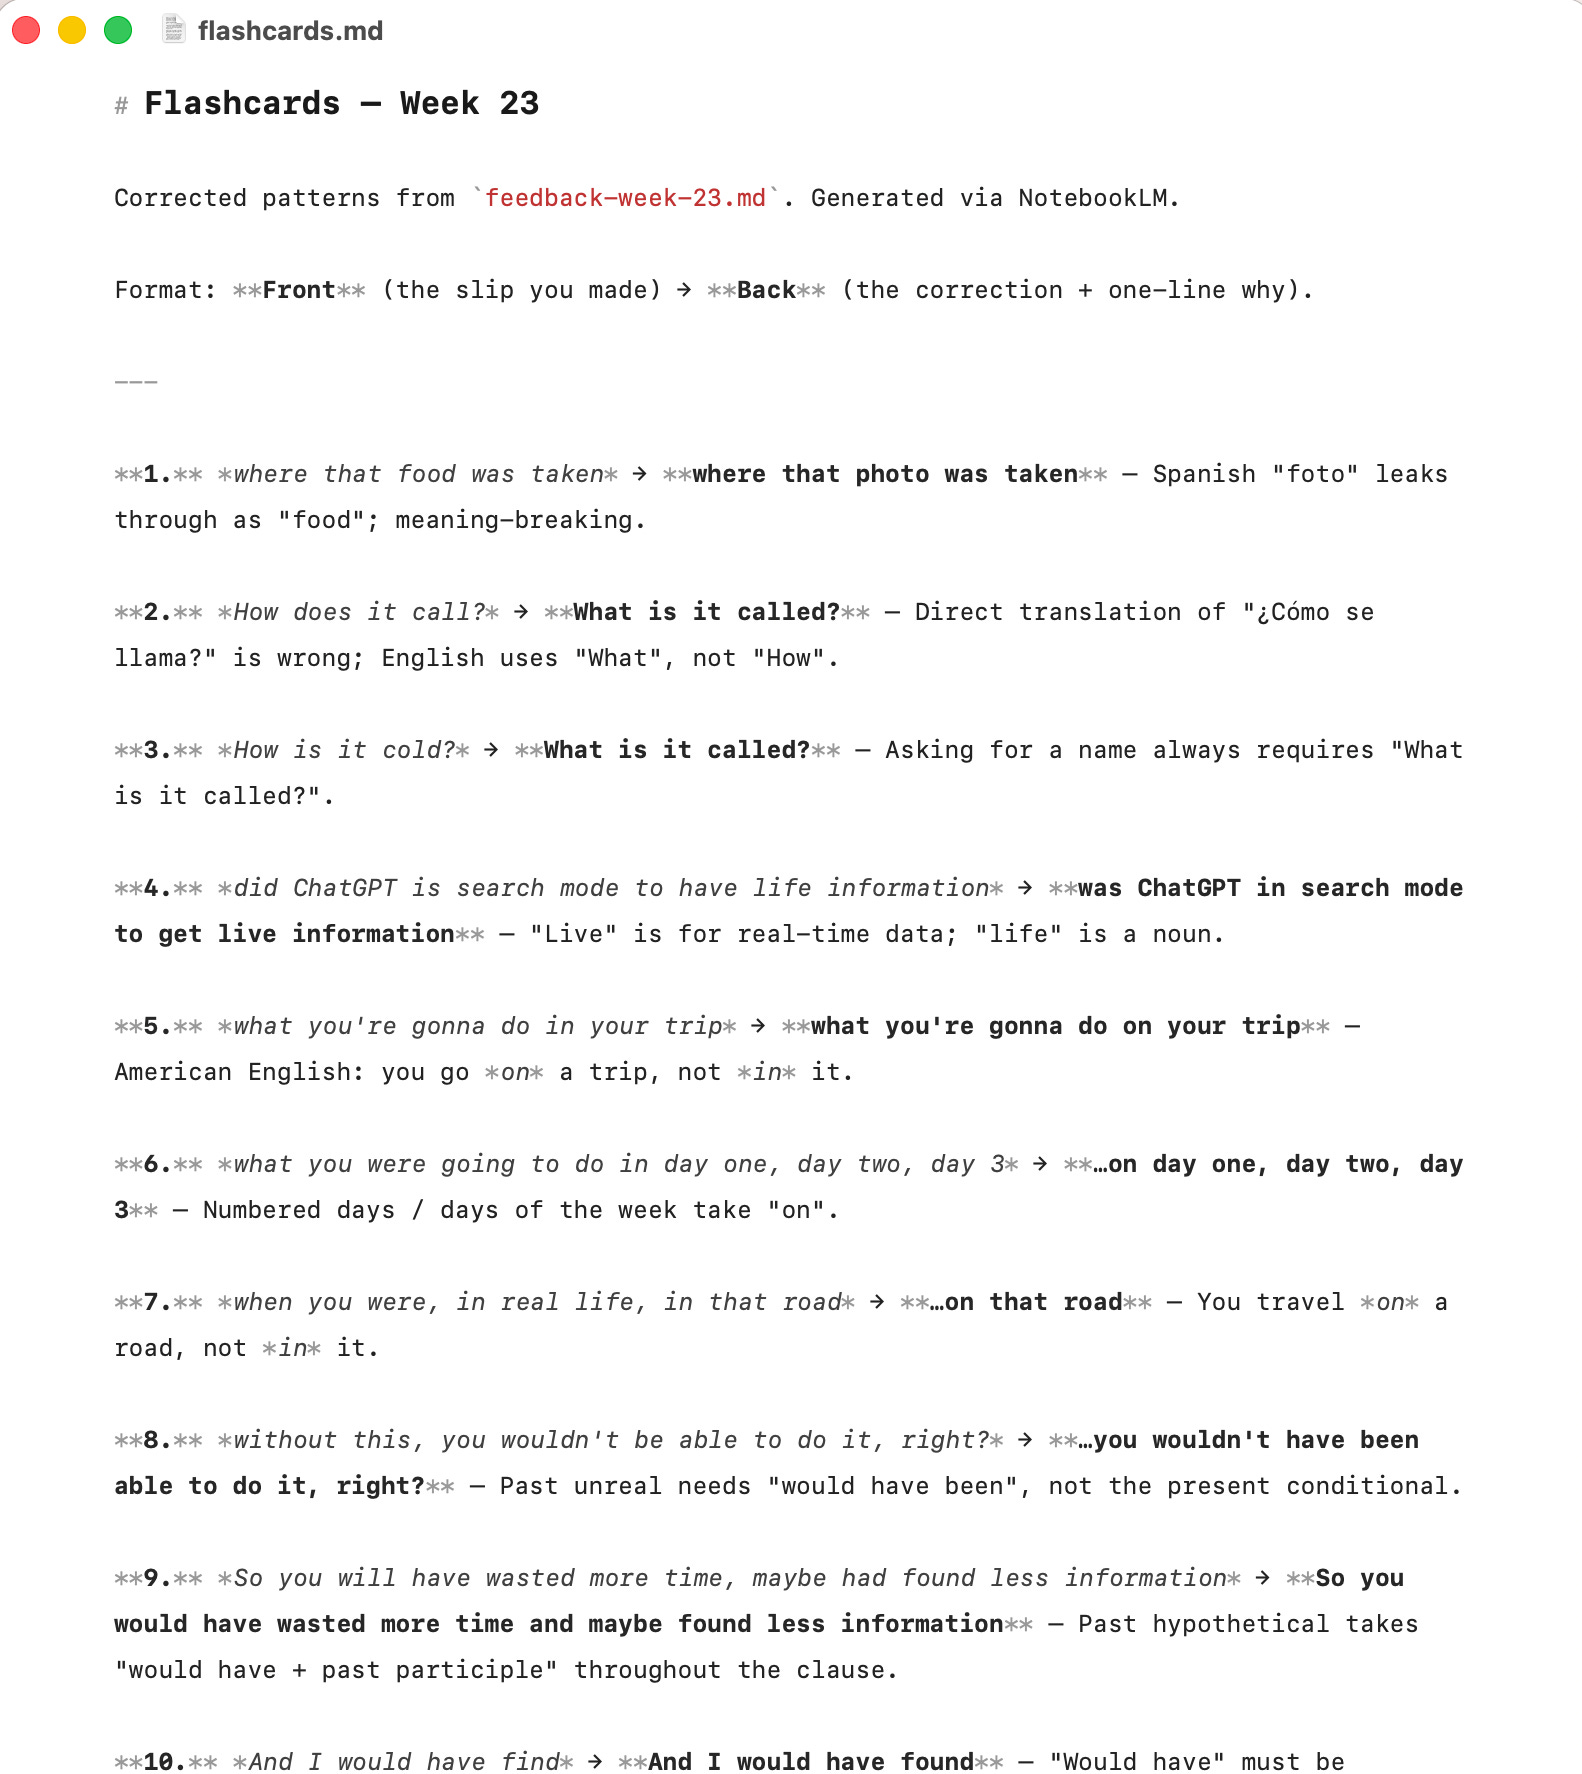
And here are the flashcards.
To turn it into a better UI, use this prompt;
Create artifacts for the quiz and flashcards you create for a better UI
It will ask your permission twice, one for each(quiz & flashcard).
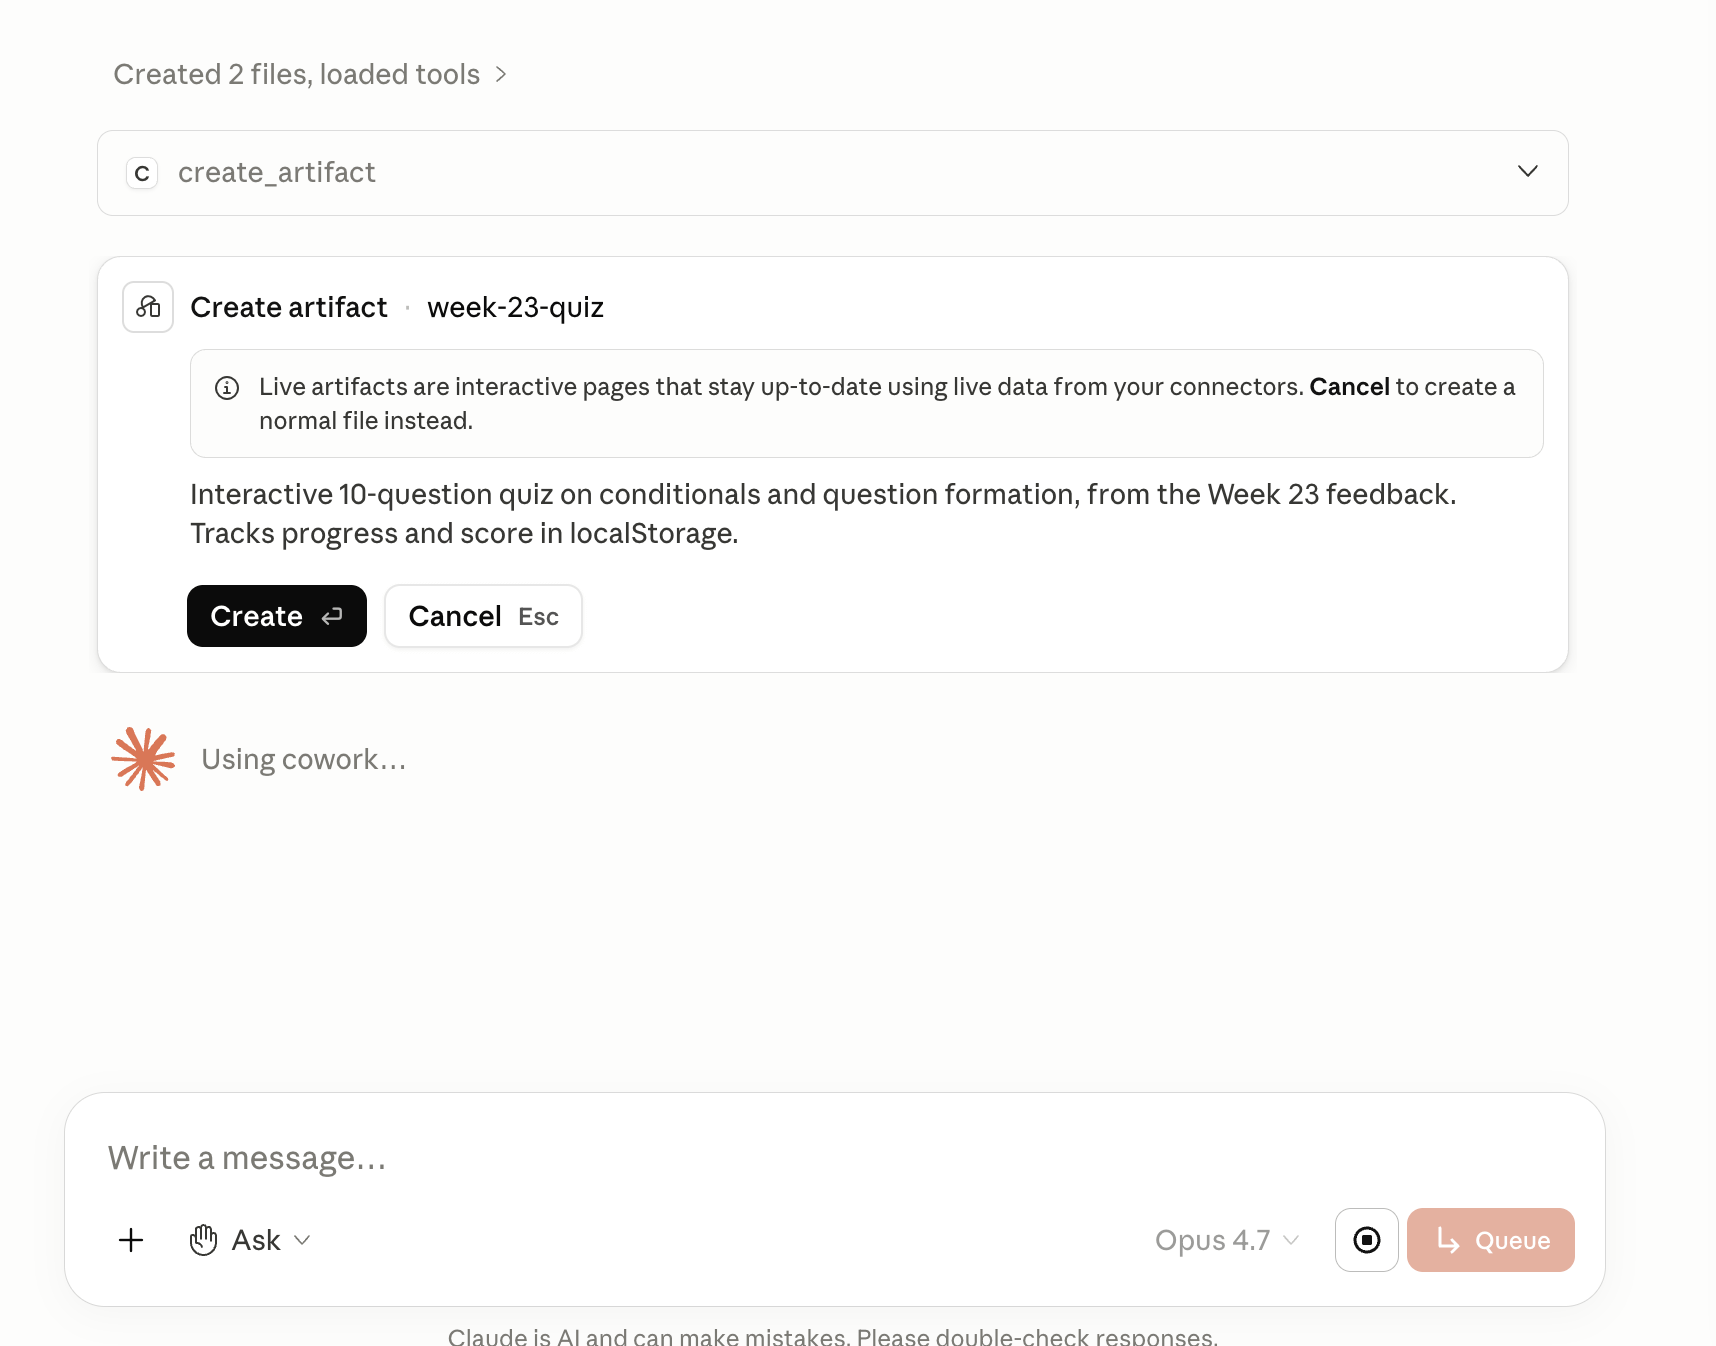
Approve it.
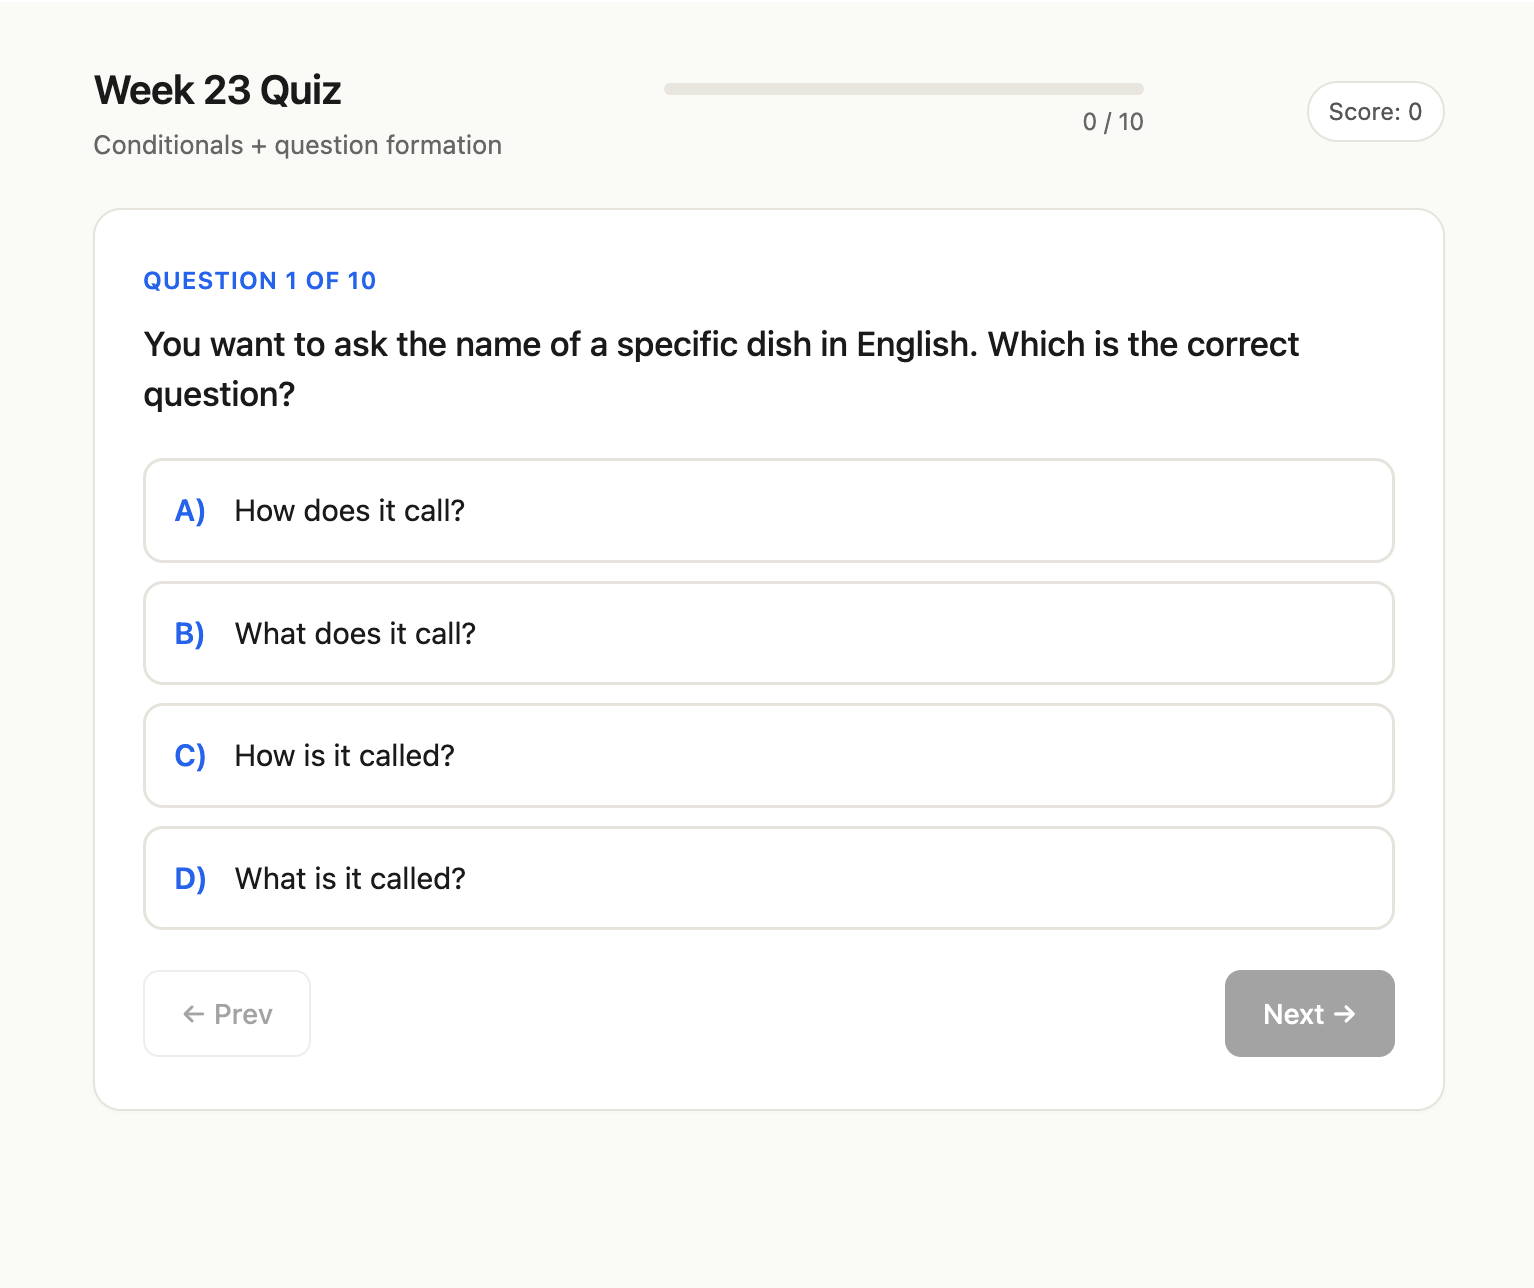
Here is what the quiz looks like in my Claude Cowork artifact right now.
And the flashcards.
Now, let’s turn this into the schedule.
Step 4. Schedule
Now turn the loop into a habit.
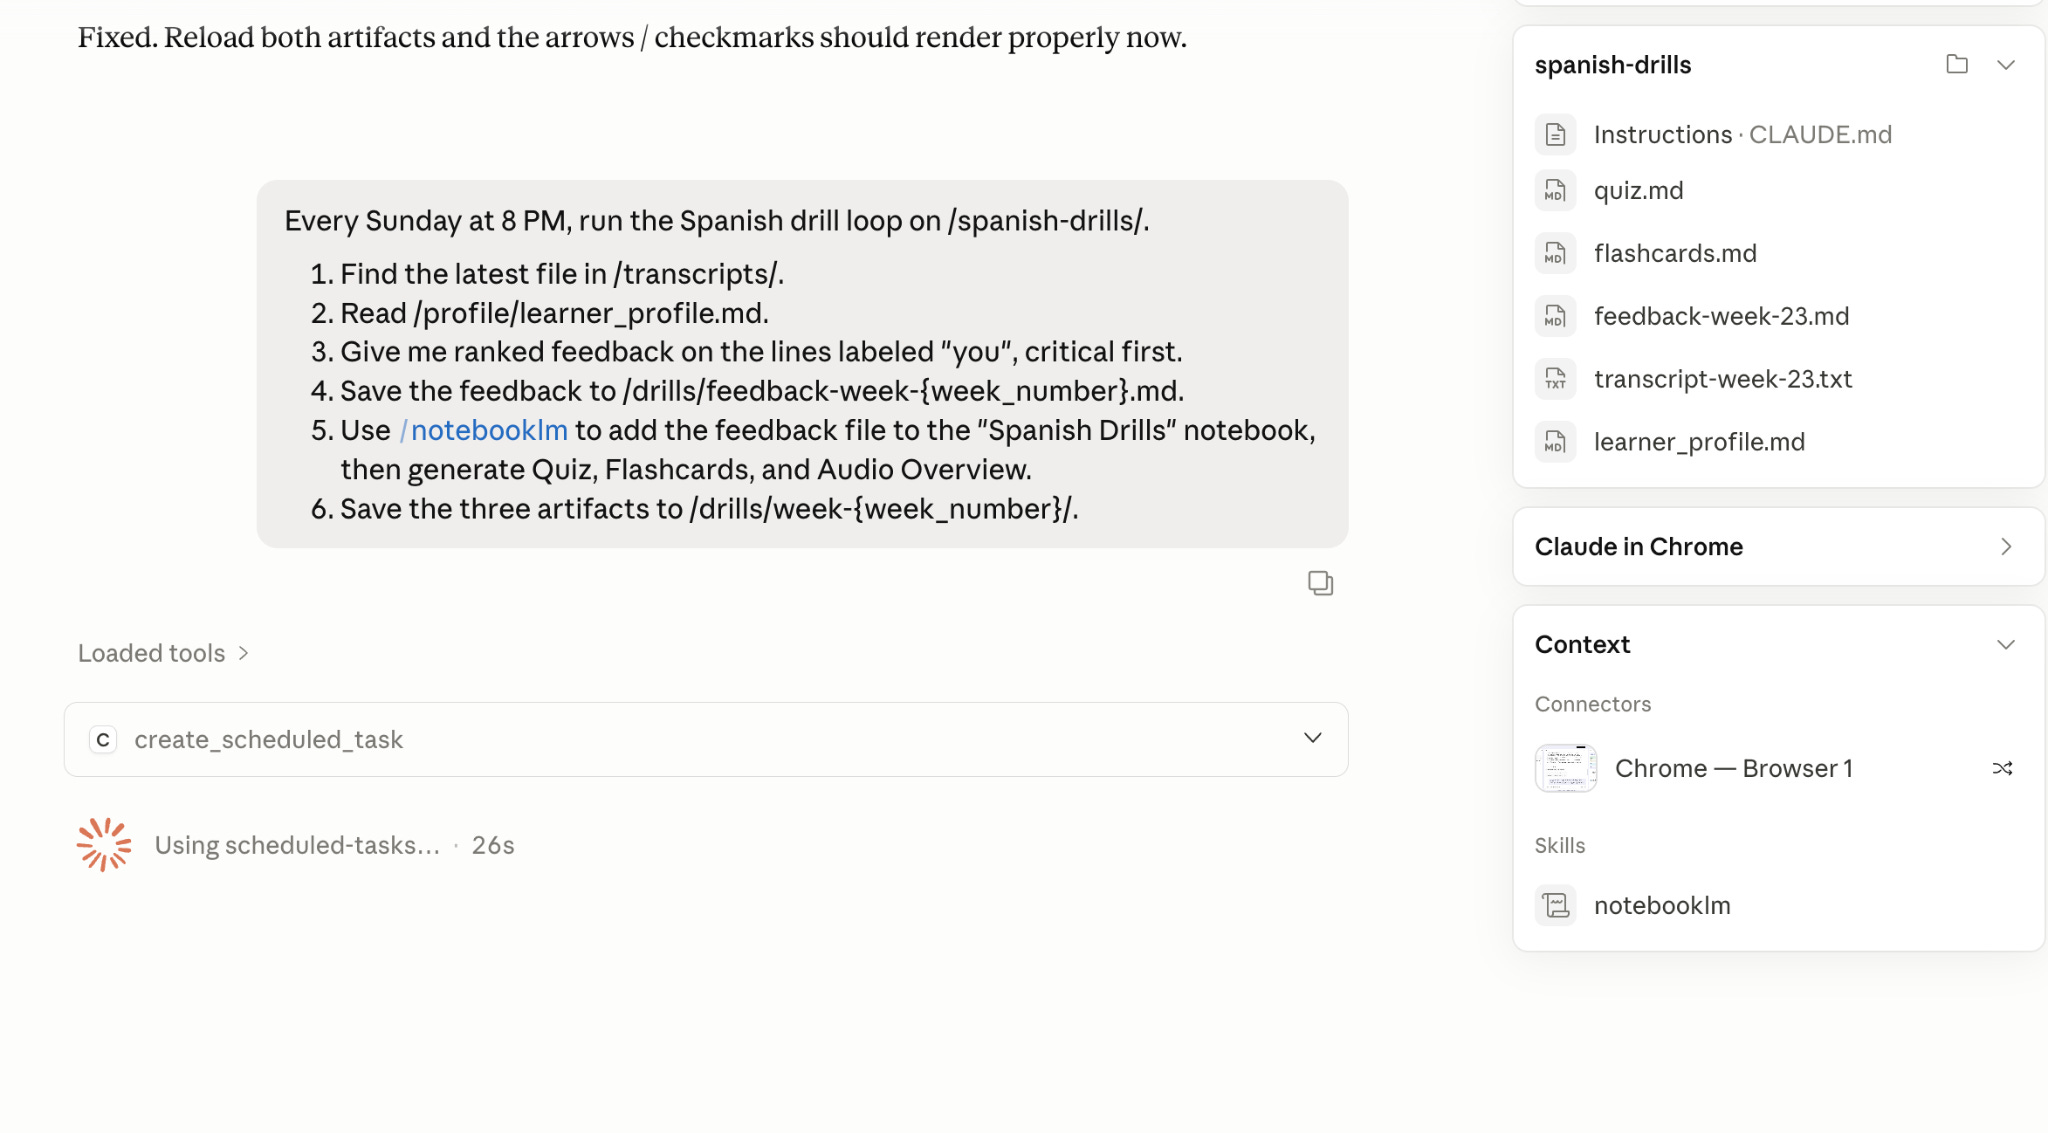
In Cowork, open Schedule. Create a new task. Paste this prompt:
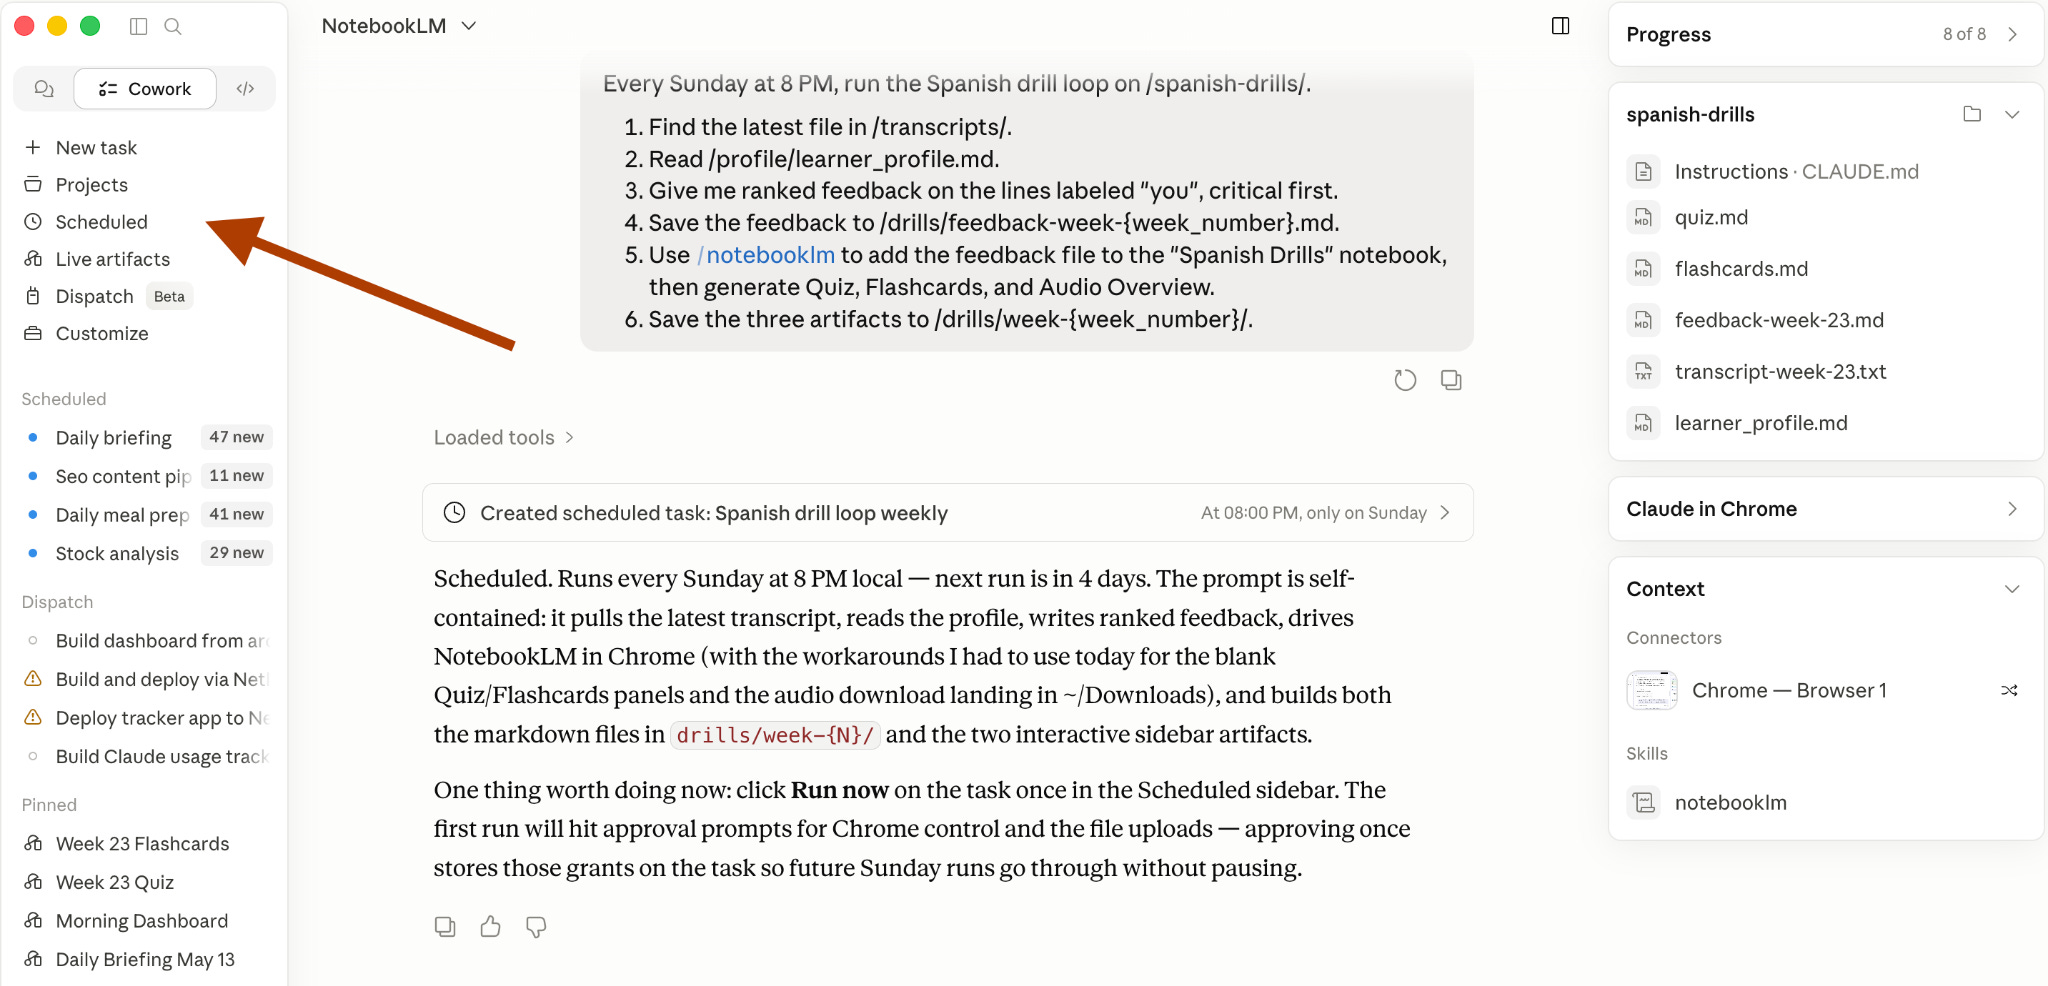
Every Sunday at 8 PM, run the Spanish drill loop on /spanish-drills/.
Find the latest file in /transcripts/.
Read /profile/learner_profile.md.
Give me ranked feedback on the lines labeled “you”, critical first.
Save the feedback to /drills/feedback-week-{week_number}.md.
Use /notebooklm to add the feedback file to the “Spanish Drills” notebook, then generate Quiz, Flashcards, and Audio Overview.
Save the three artifacts to /drills/week-{week_number}/.
After pasting the prompt, cowork will start creating your schedule.
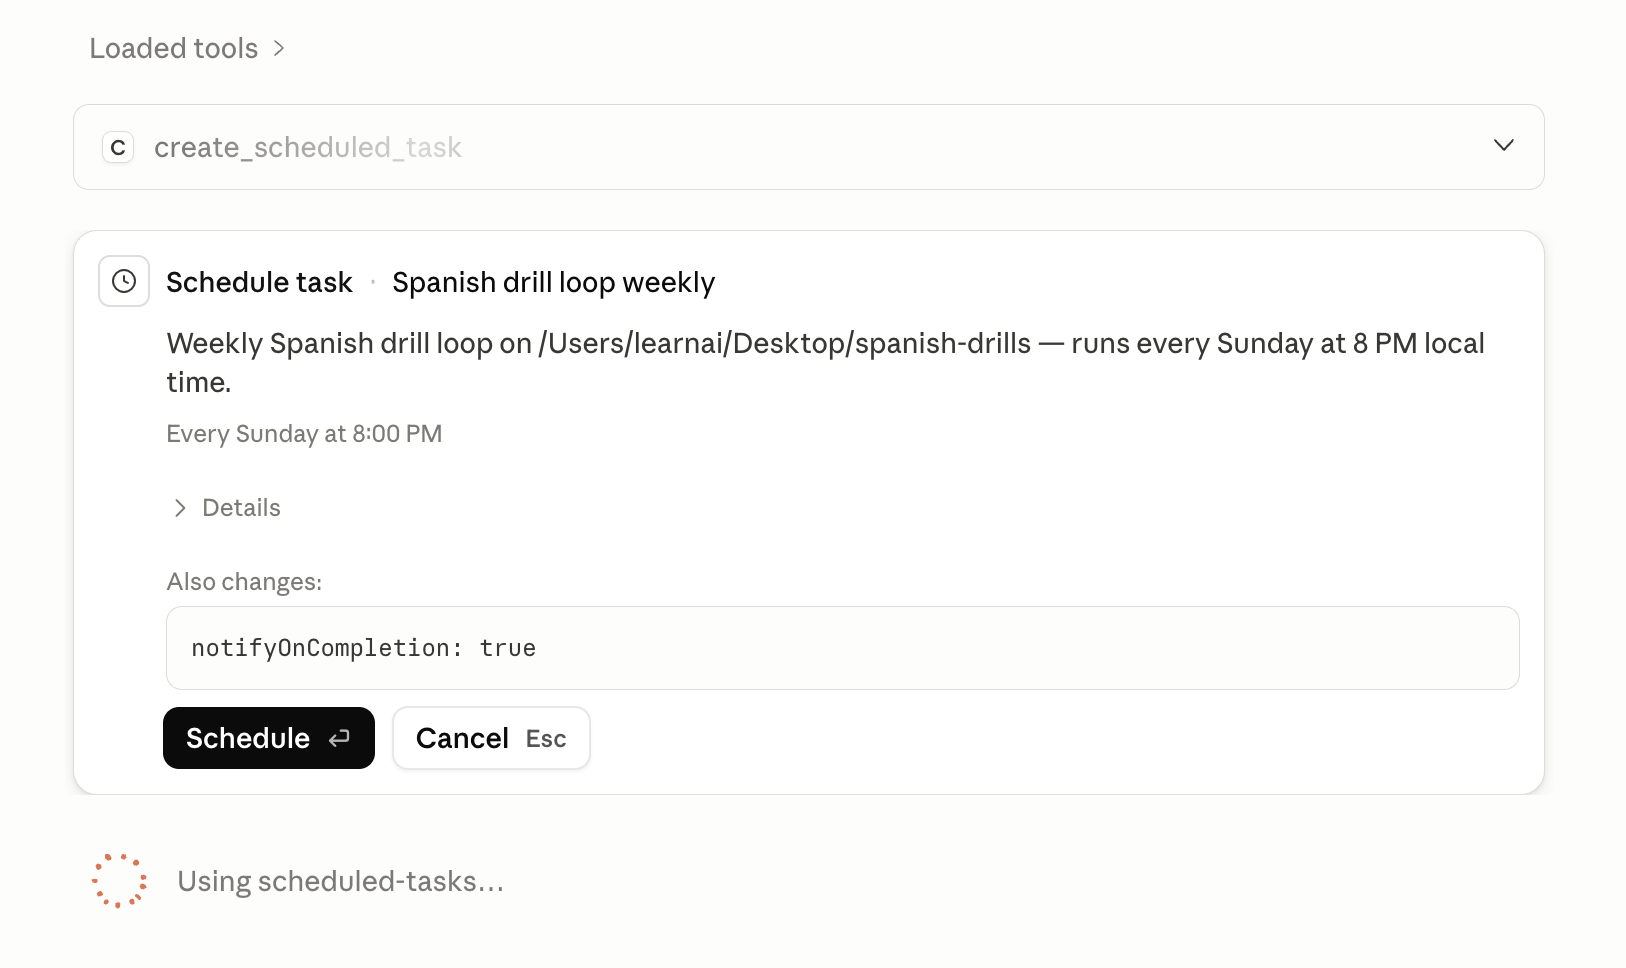
Next it’ll ask your approval, approve it.
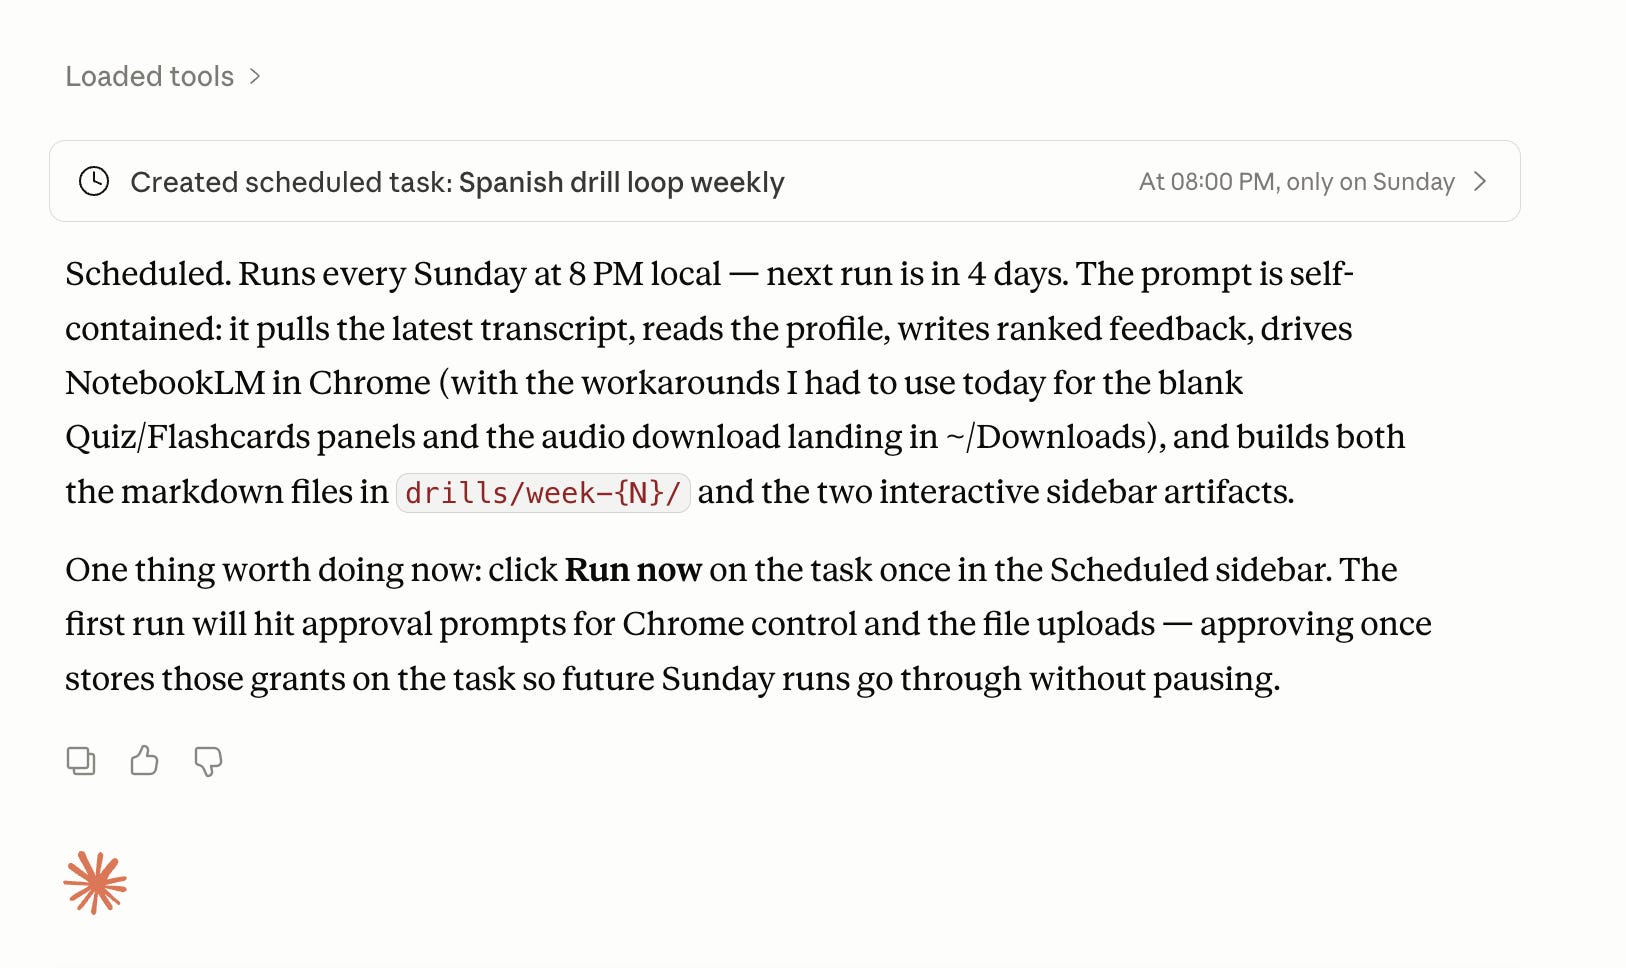
And done.
Let’s test it.
Click on “Scheduled” here.
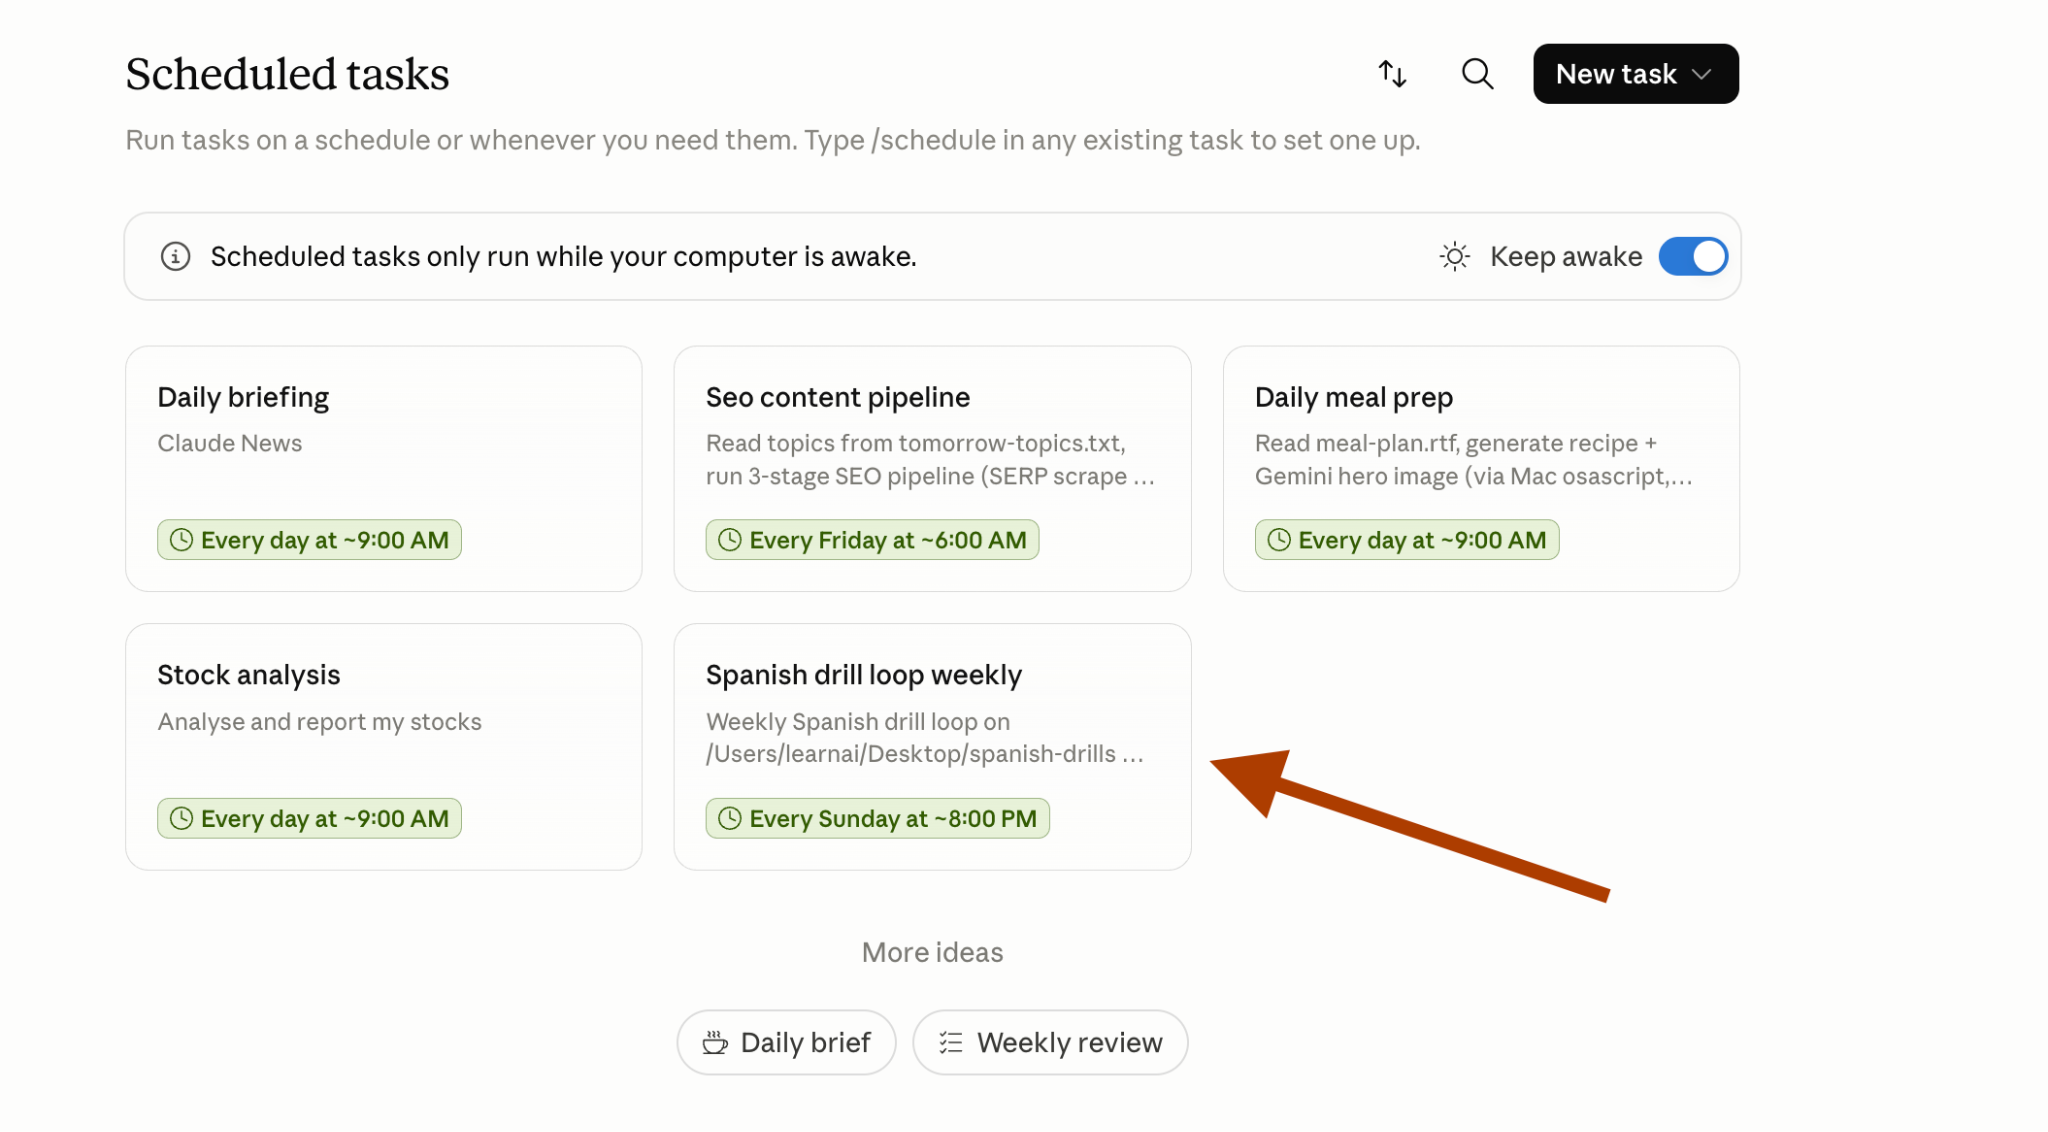
Click on the Spanish drill loop weekly.
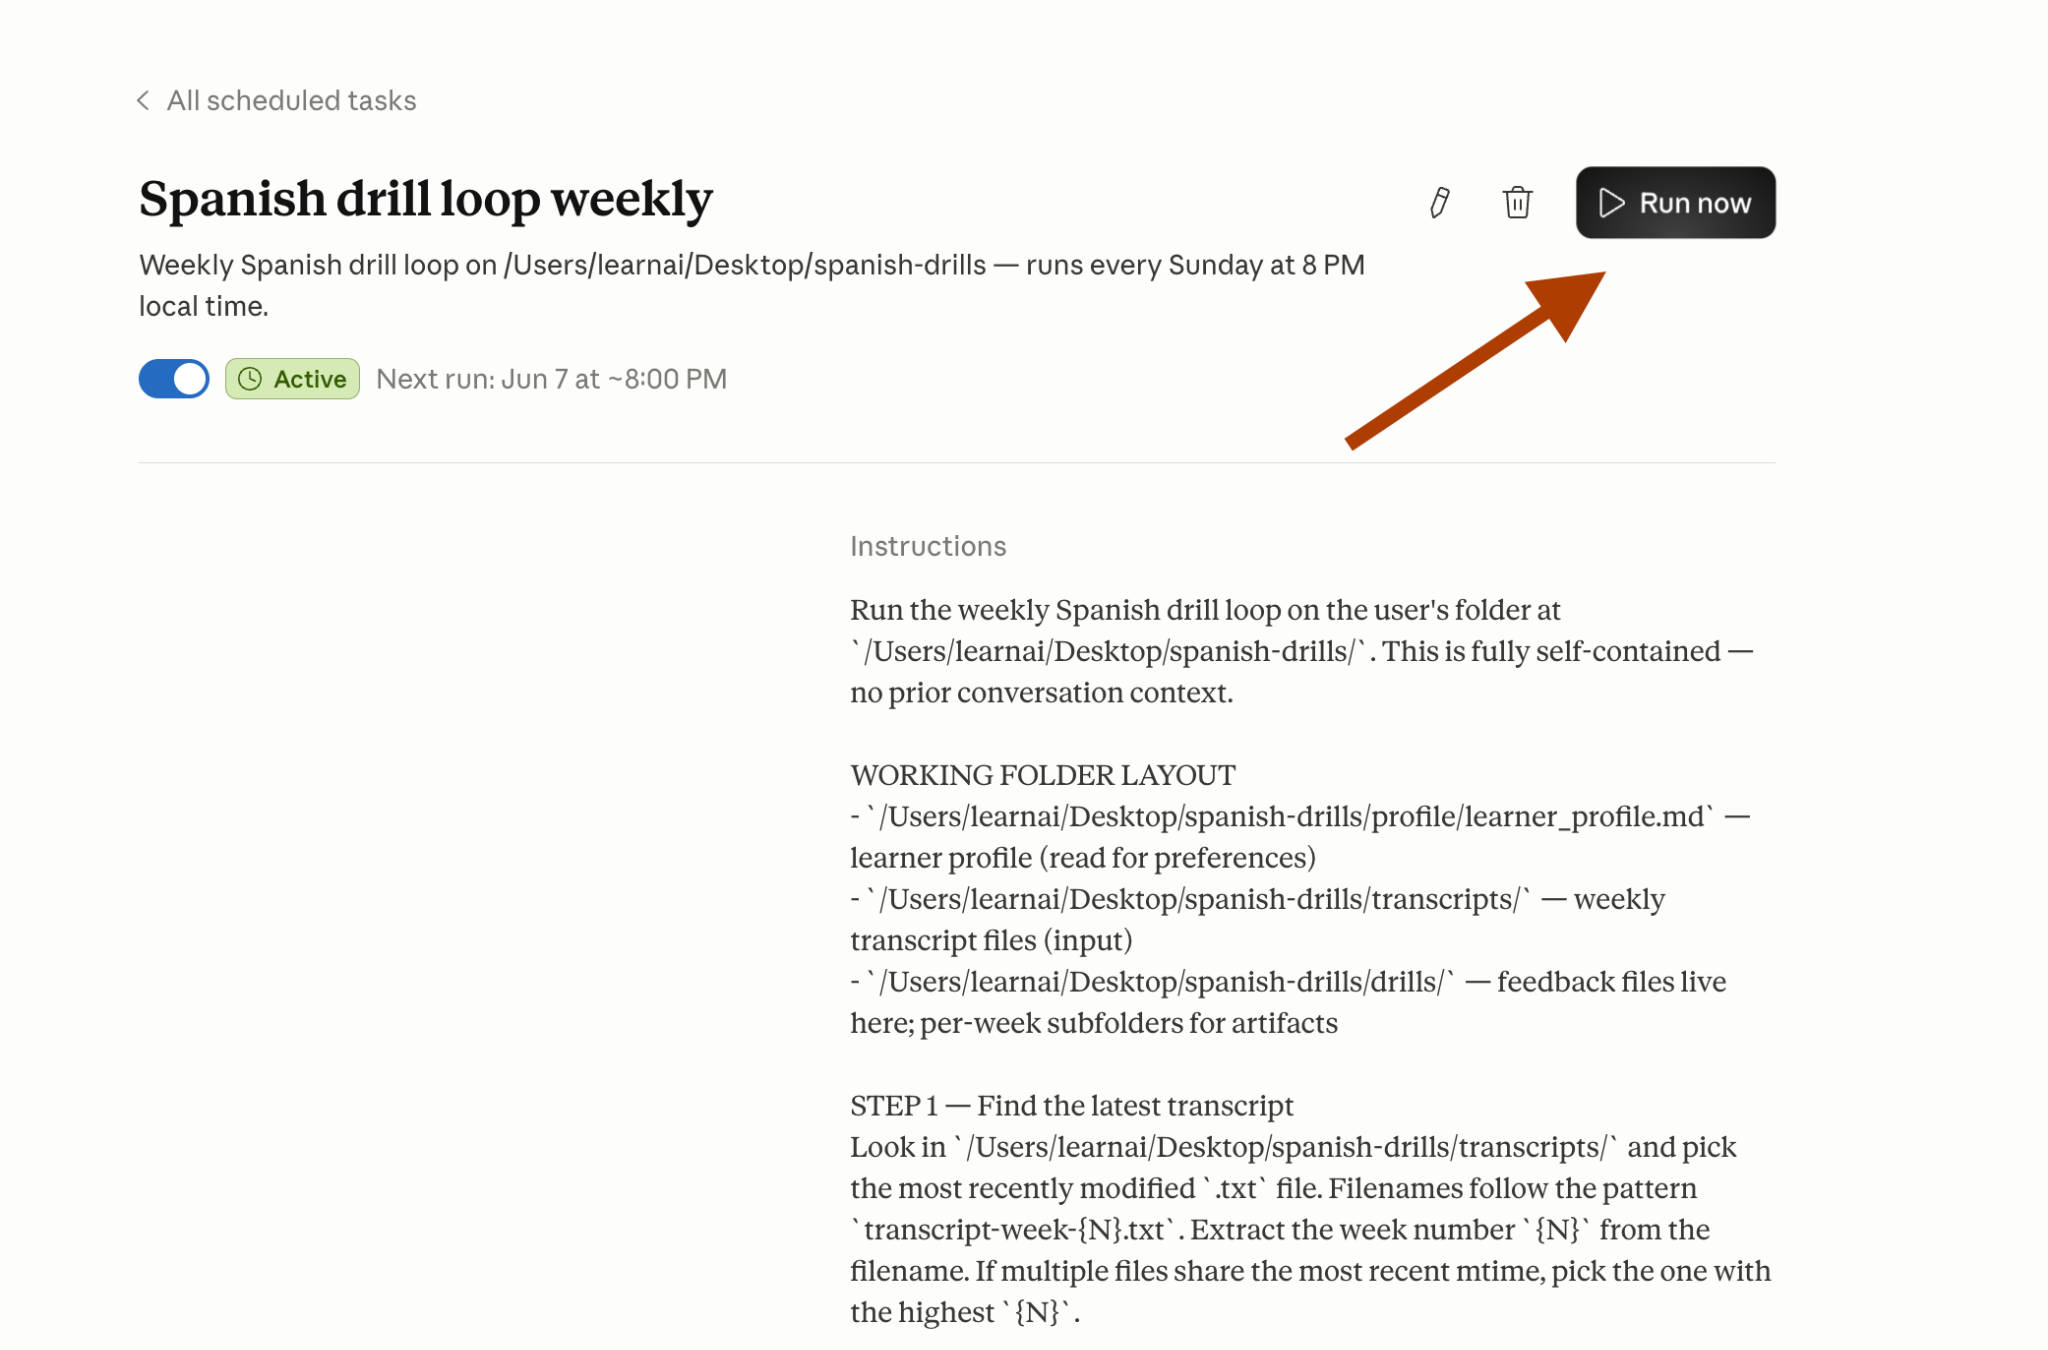
Next, click on “Run now”.
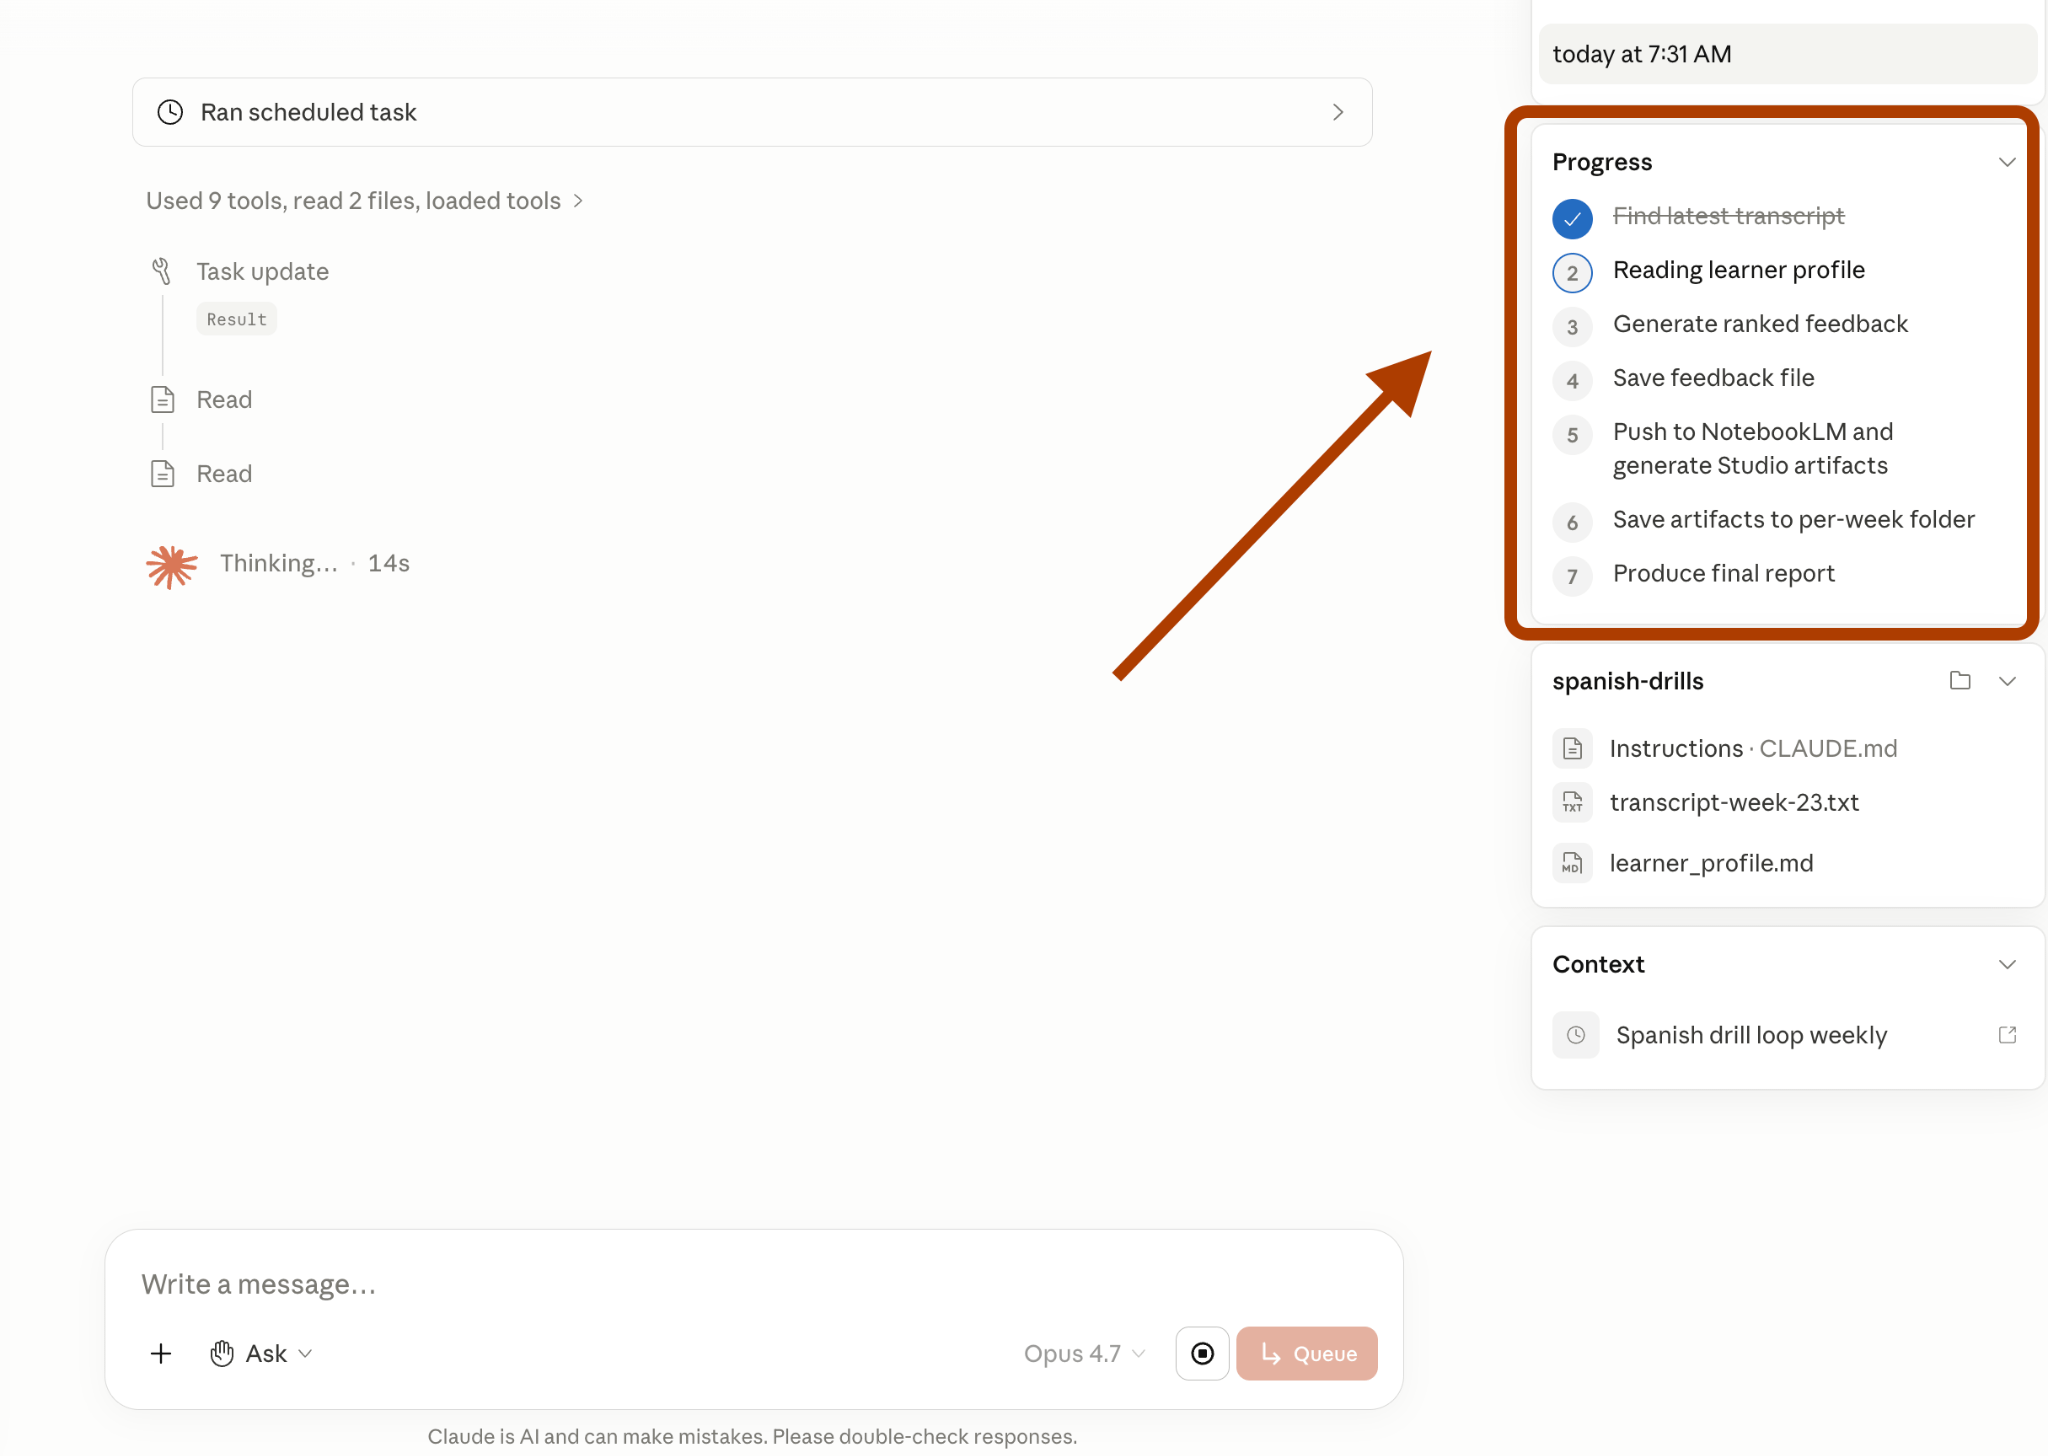
And this will trigger the entire process from step 1, you can track the progress from the progress bar.
Next, it asks my approval to create artifacts and after my approval they are ready once again.
Use Case 3: Pre-Trip Destination Companion
Two weeks before a trip, the same question hits everyone. Where do I actually go, what do I avoid, and what do locals know that I do not?
You can ask Claude. Claude gives you a list. Generic, pulled from training data that does not know about the road that closed last month or the restaurant that turned into a tourist trap last summer.
The problem is freshness, not Claude’s reasoning. The fix is a notebook full of fresh sources and a system that synthesizes it.
Same four parts as the loop above: NotebookLM, Cowork, sources, schedule.
Step 1. NotebookLM Setup with Deep Research
NotebookLM cannot help with Lisbon if it does not know Lisbon. The way to give it base knowledge is Deep Research, run from inside Cowork.
In Cowork, type:
/notebooklm
Create a new notebook called “Lisbon Trip”. Then run Deep Research with this prompt:
I am traveling to Lisbon for the first time. Find sources that cover:
Neighborhoods worth staying in and avoiding
Must-see spots beyond the tourist top 10
Local food districts and restaurants locals actually go to
Public transport, taxi scams, and how to get from the airport
Cultural etiquette, tipping norms, and common tourist mistakes
Safety advisories for 2026
Prioritize sources from the last 12 months. Pull a mix of travel guides, Reddit threads, local Lisbon blogs, news articles, and official advisories. Use computer use
Cowork takes over the browser. Red border on top. It opens NotebookLM, creates the notebook, clicks Discover sources, pastes the Deep Research prompt, and hits run.
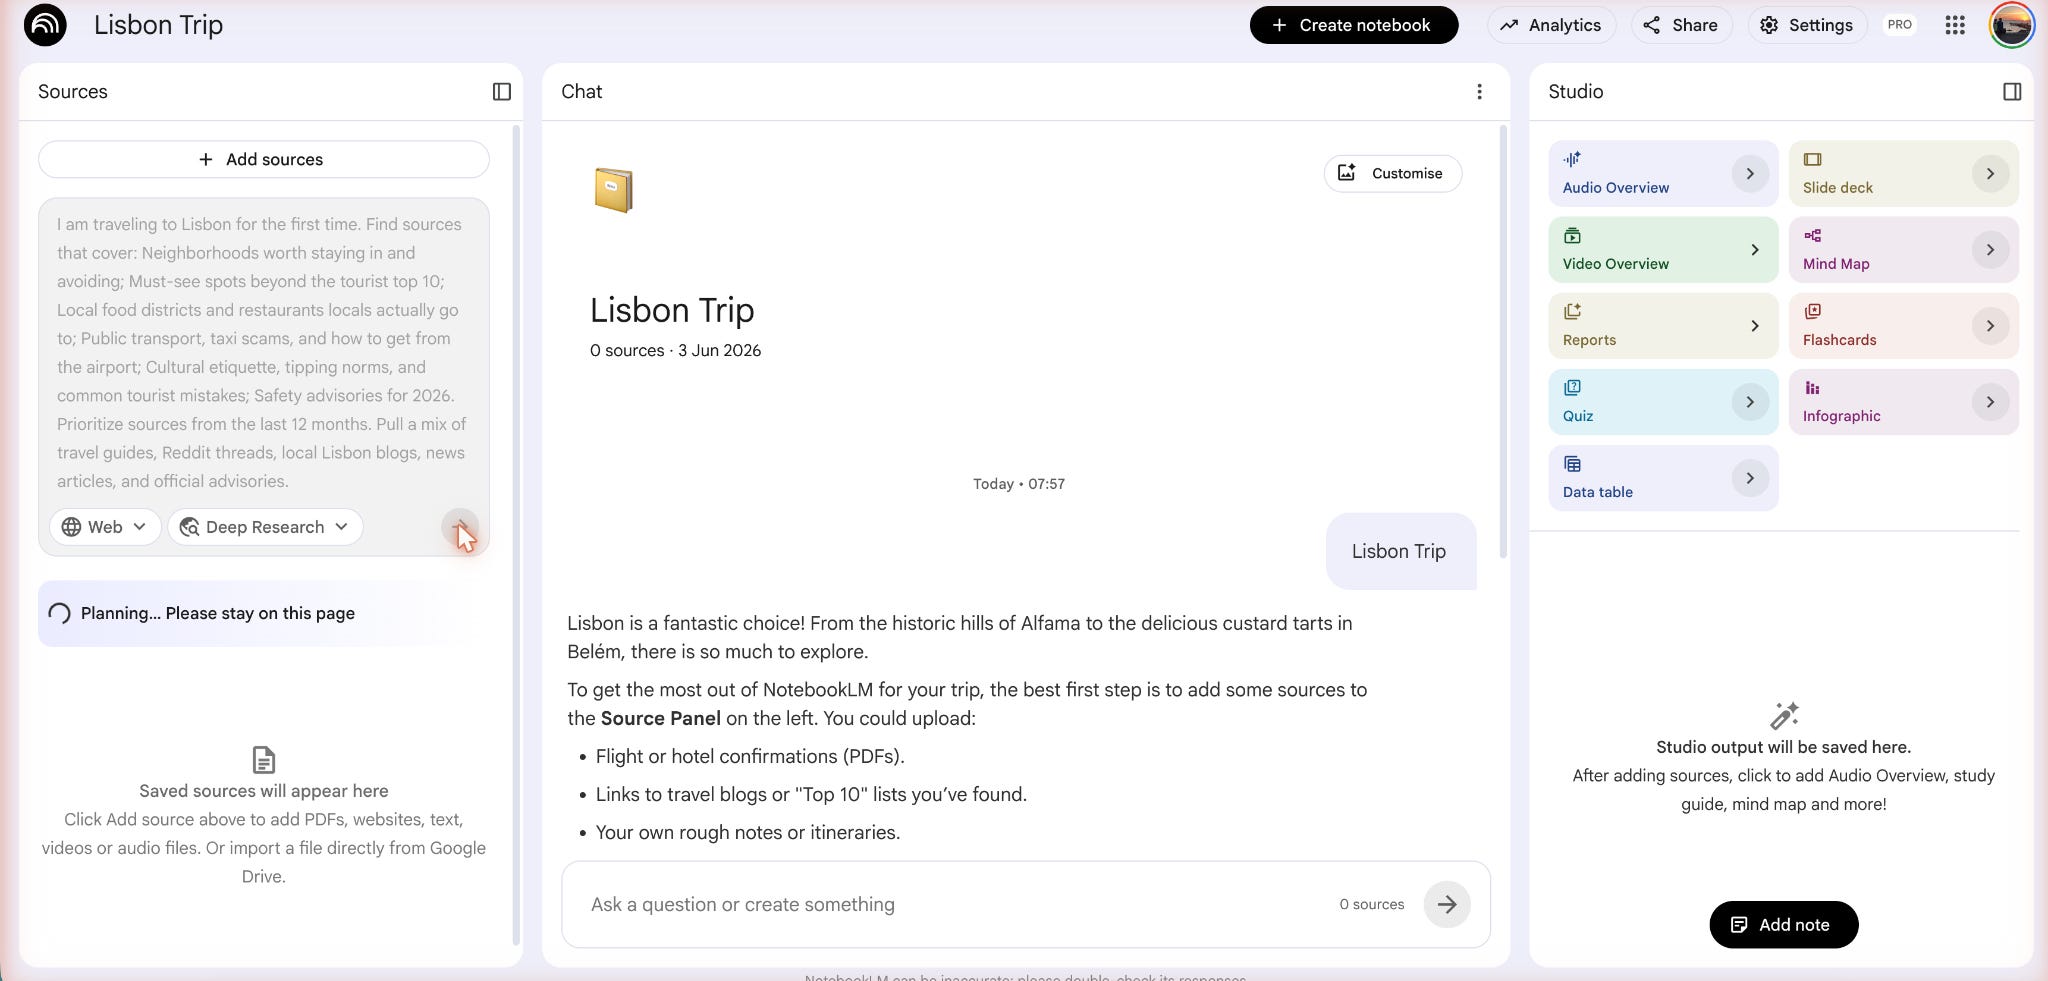
And Cowork asks us to report back once the Deep Research is finished.
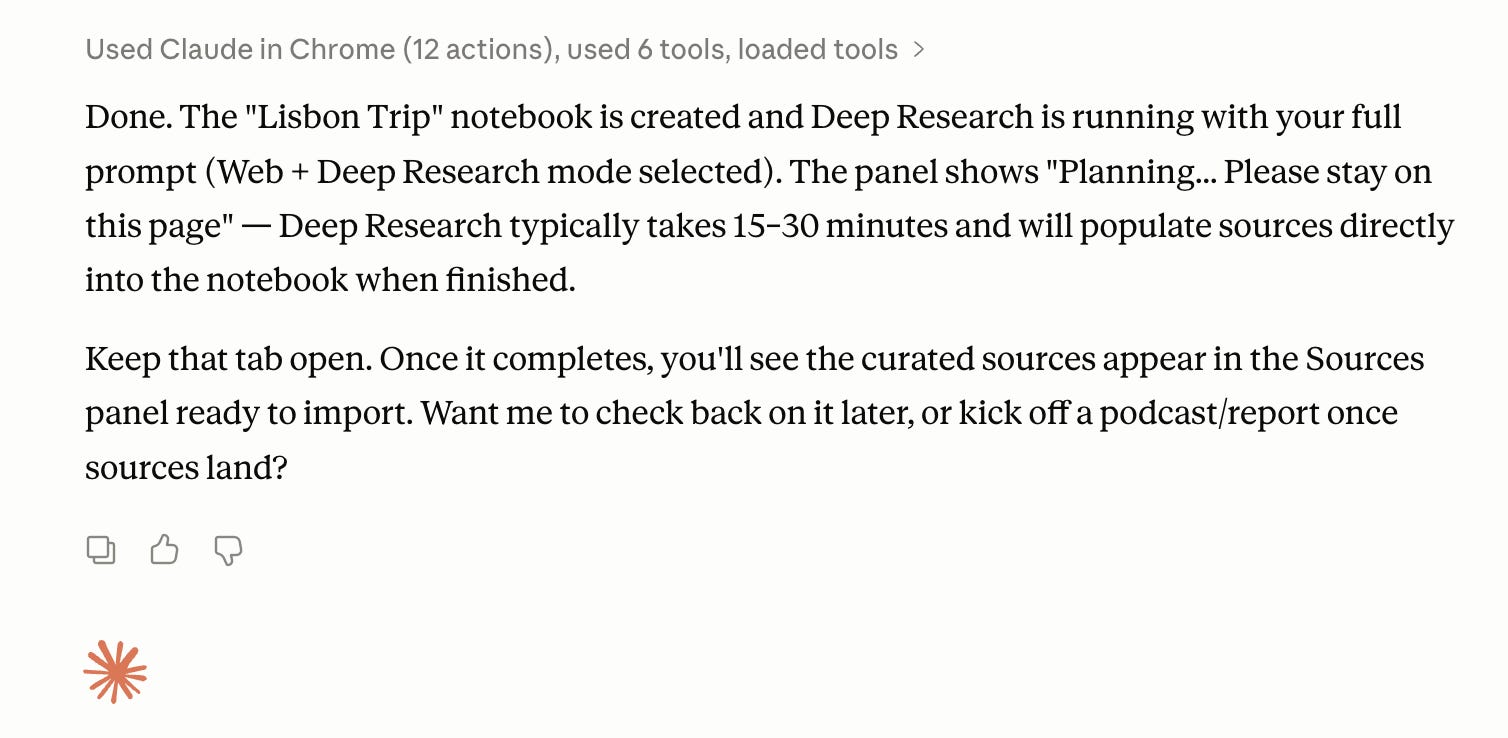
Wait two minutes. And then remind cowork.
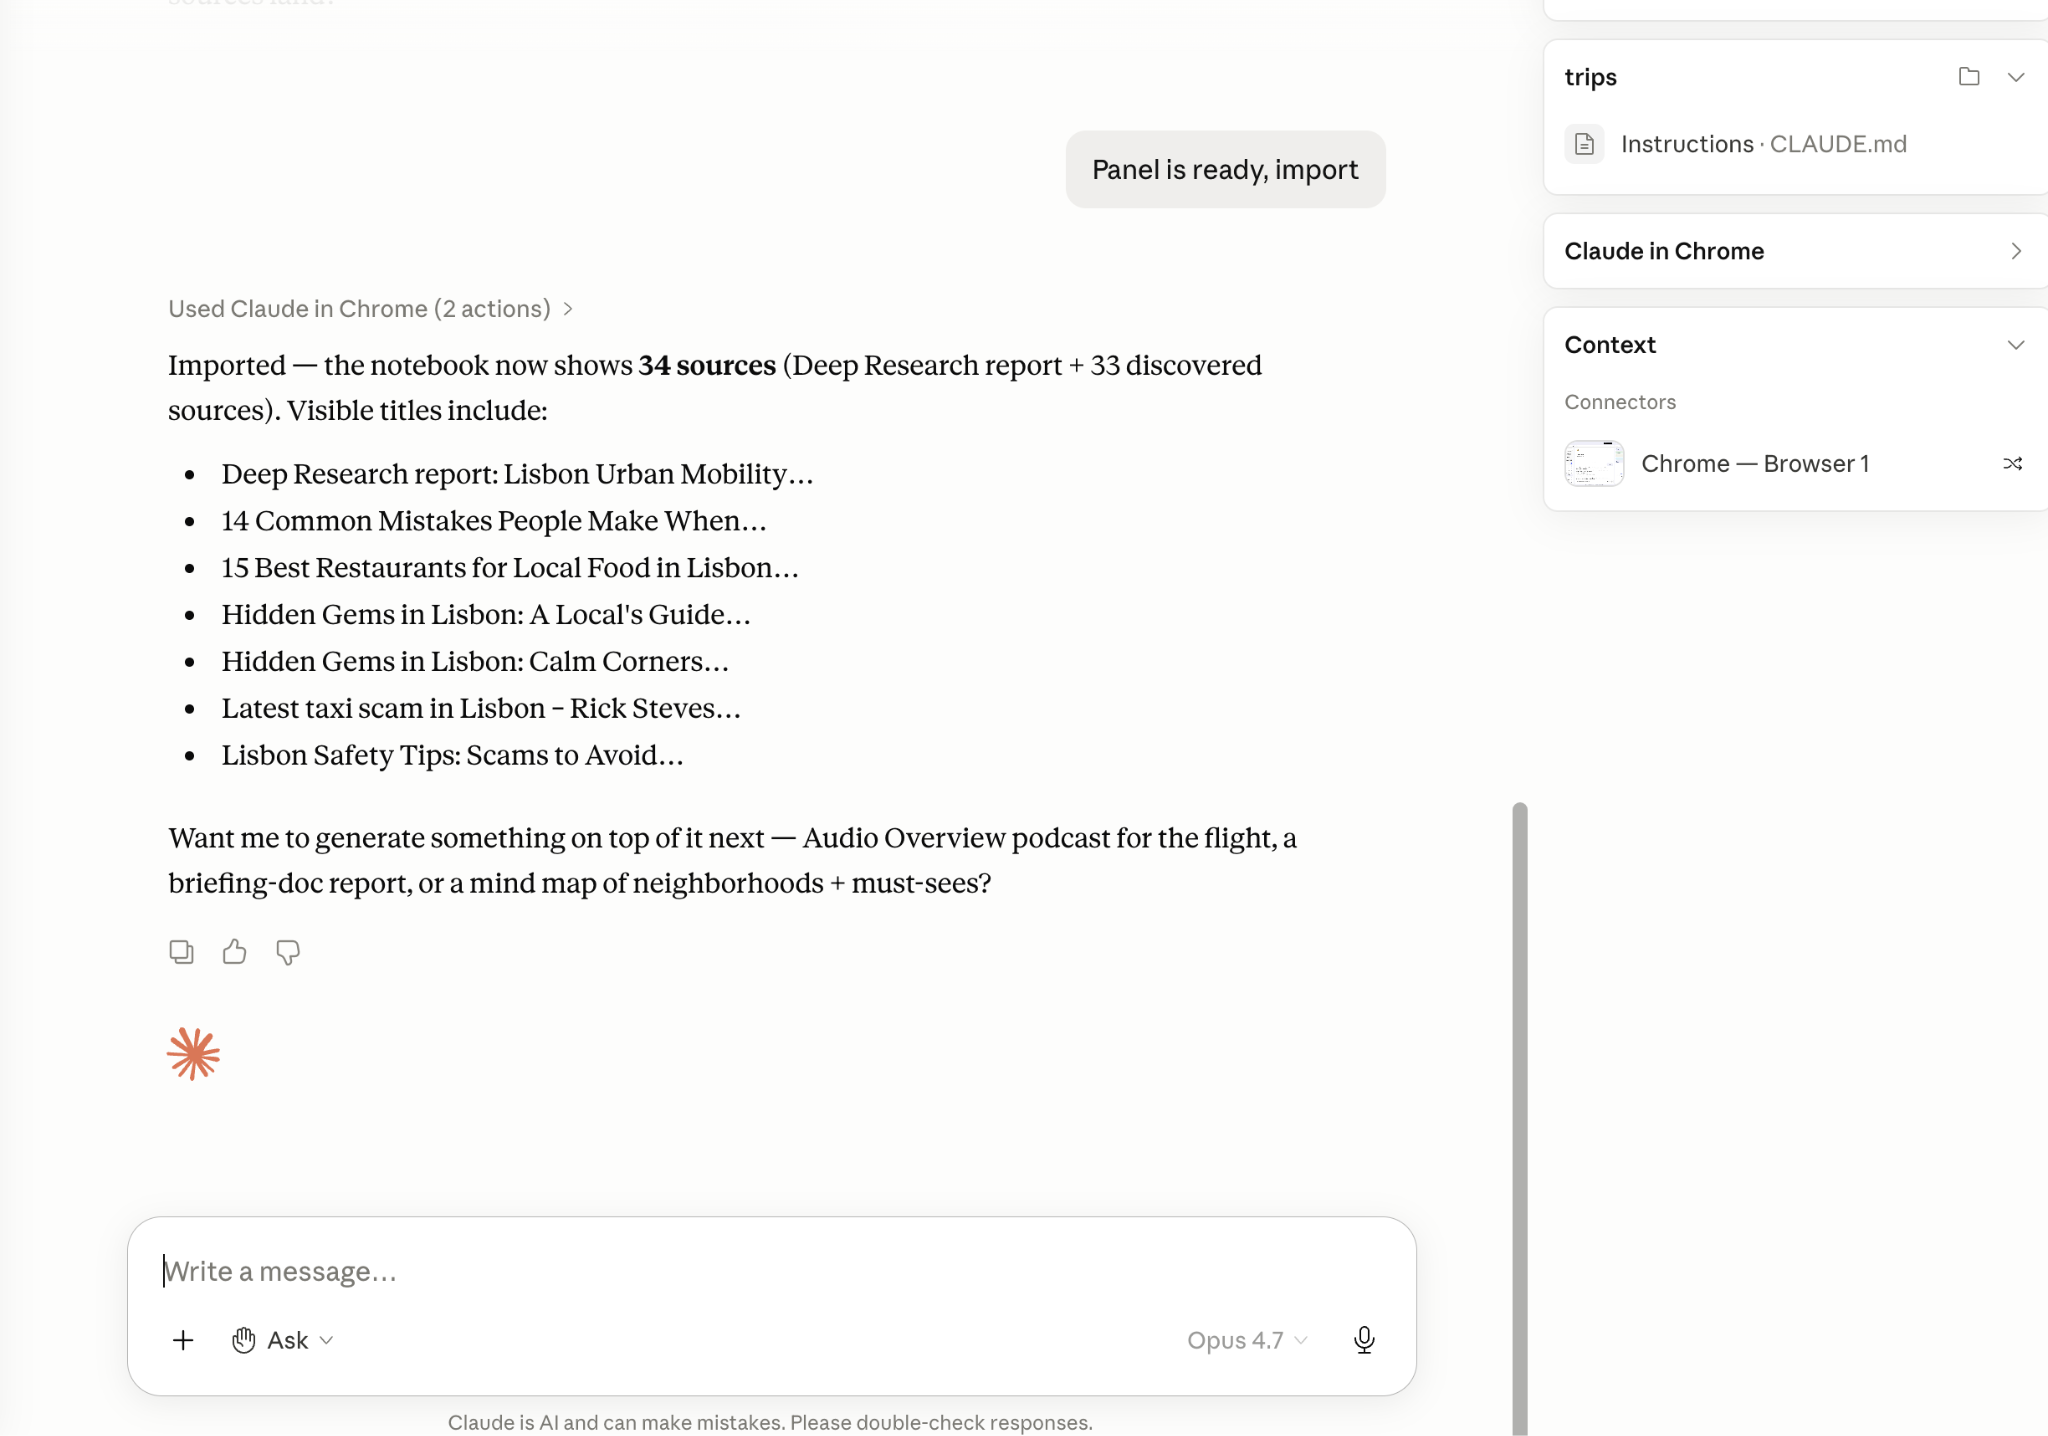
The notebook is now trained on Lisbon.
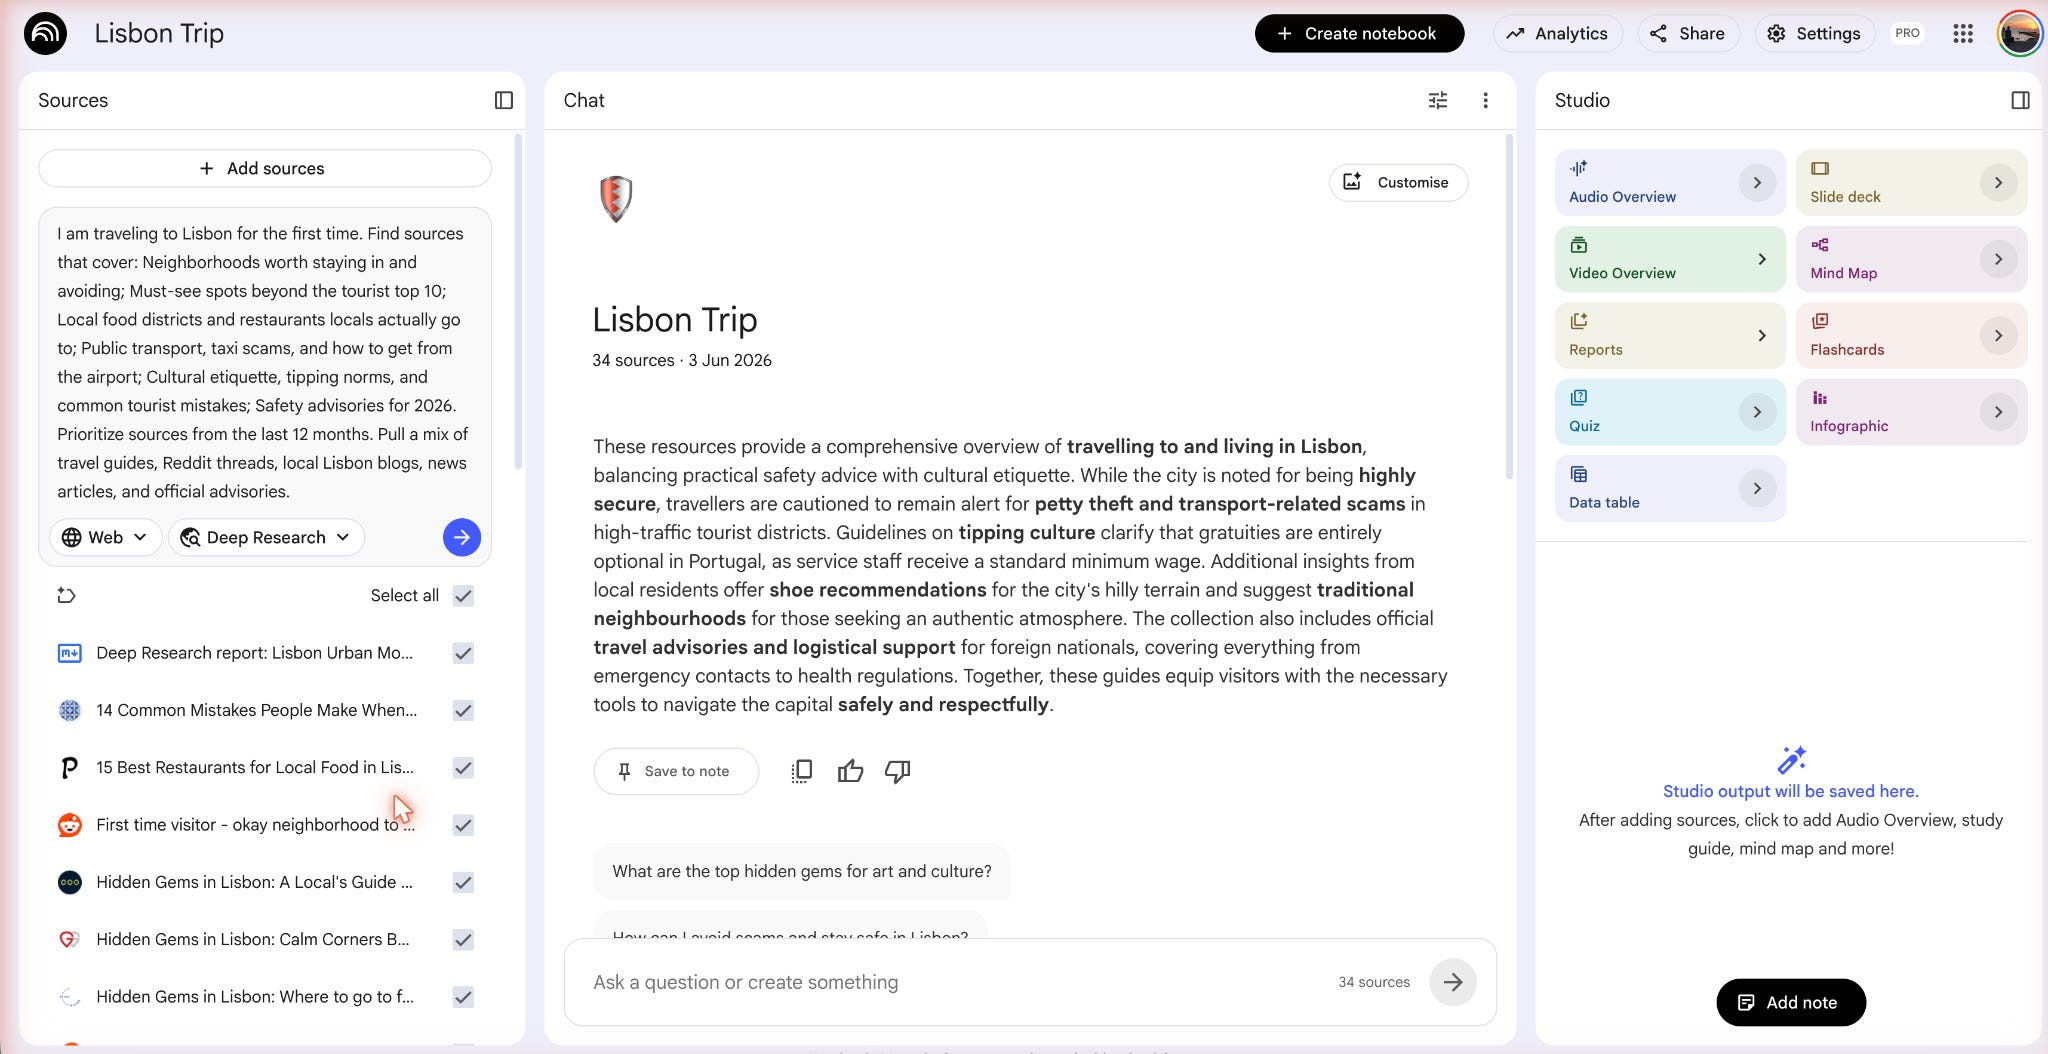
You can ask it any question, and it cites back to specific sources.
This is the base layer. Step 2 sets up the fresh layer.
Step 2. Cowork Setup
Same folder mechanic as Use Case 1. Create a folder on your computer called trips. Inside, one subfolder per destination.

The artifacts folder holds NotebookLM outputs.
Give Cowork access to trips.
That is it. The notebook already has its sources from Step 1. The folder is just the landing strip for the artifacts.
Step 3. Push Fresh Sources to NotebookLM, Generate Artifacts
In the same Cowork chat, type:
/notebooklm
Add every file from /trips/lisbon/sources/ to the “Lisbon Trip” notebook as a source. Then in the Studio panel, generate:
A Mind Map of neighborhoods, must-see spots, food districts, and transport hubs
A Briefing Doc covering culture, etiquette, scam warnings, and must-eats
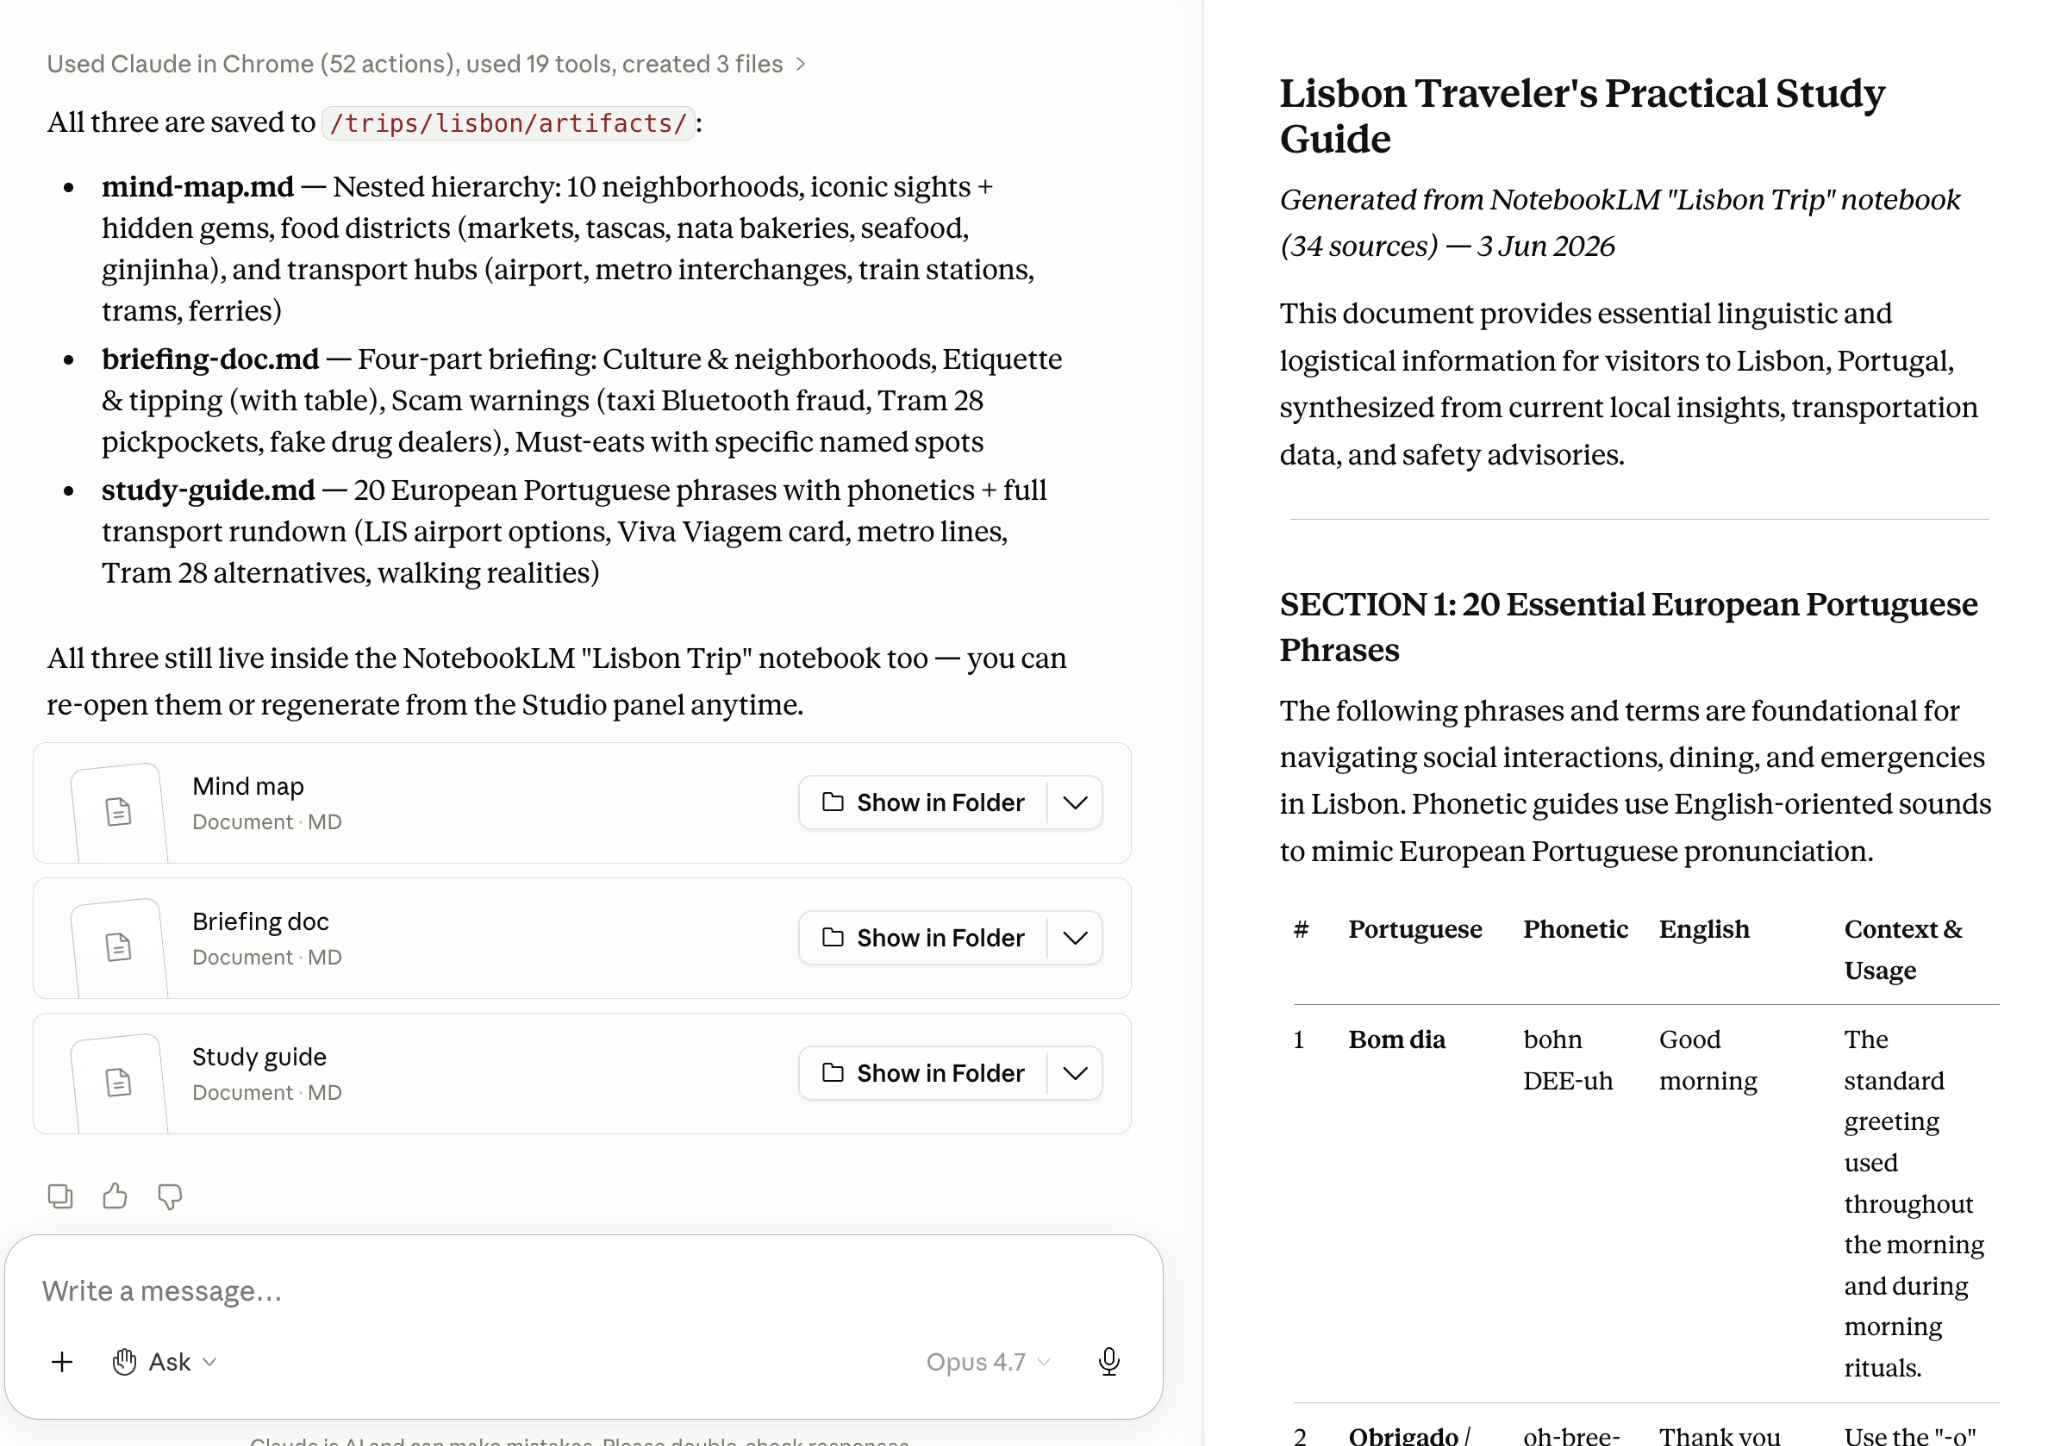
A Study Guide with 20 essential Portuguese phrases and a transport rundown
Save all three to /trips/lisbon/artifacts/.
Cowork takes over the browser again. Uploads every fresh file to the notebook one by one. Waits for ingestion.
And the report is ready.
Next, paste this prompt
Open the artifacts you created from these mind maps briefing doc, and the study guide.
Let me show you these artifacts.
Step 4. Schedule
Now, you can turn it into a habit.
Every trip is prepped automatically.
Create a file called /trips/upcoming.md.
Drop your future trips in it like this:
- Lisbon, 2026-07-15
- Tokyo, 2026-09-02
- Bodrum, 2026-08-10
In Cowork, open Schedule.
Create a new task with this prompt:
Every morning at 9 AM, check /trips/upcoming.md for any trip 14 days away.
For each trip 14 days out, run the full prep loop:
Create /trips/{destination}/sources/ and /trips/{destination}/artifacts/.
Use /notebooklm to create a notebook named “{destination} Trip” and run Deep Research with the standard destination prompt.
Pull fresh research from Lonely Planet, top 10 Reddit r/travel threads from the last 90 days, last 20 Time Out articles, State Department advisory, and top 5 travel blog posts. Save to /trips/{destination}/sources/.
Add every source file to the notebook.
Generate Mind Map, Briefing Doc, Study Guide. Save to /trips/{destination}/artifacts/.
Add the trip date to /trips/upcoming.md more than two weeks in advance.
That is the whole thing.
You walk into a city you have never been to with a citation-grounded brief, a visual map of where things are, and twenty phrases that work.
For more, check out my AI travel guide